15 Trendy Wood Tile Bathroom Looks with Modern Charm
- Bathroom Tile
 Alina
Alina- 0
- 44 minutes read

Look, I’m just going to say it—wood tile in bathrooms is one of the best design decisions you can make. Real wood? Yeah, that’s a recipe for disaster with all that moisture and humidity. But wood-look tile? Now we’re talking genius. You get all the warmth and natural beauty of wood without the warping, rotting, or that weird moldy smell that haunts your nightmares.
I’ve spent way too many hours scrolling through bathroom designs (don’t judge me), and I can tell you that wood tile has completely transformed how we approach bathroom aesthetics. Whether you’re working with a shoebox-sized powder room or a sprawling master bath, there’s a wood tile look that’ll make your space feel like a million bucks. Let me walk you through 15 trendy ways to use wood tile that’ll give your bathroom that modern charm everyone’s obsessing over.
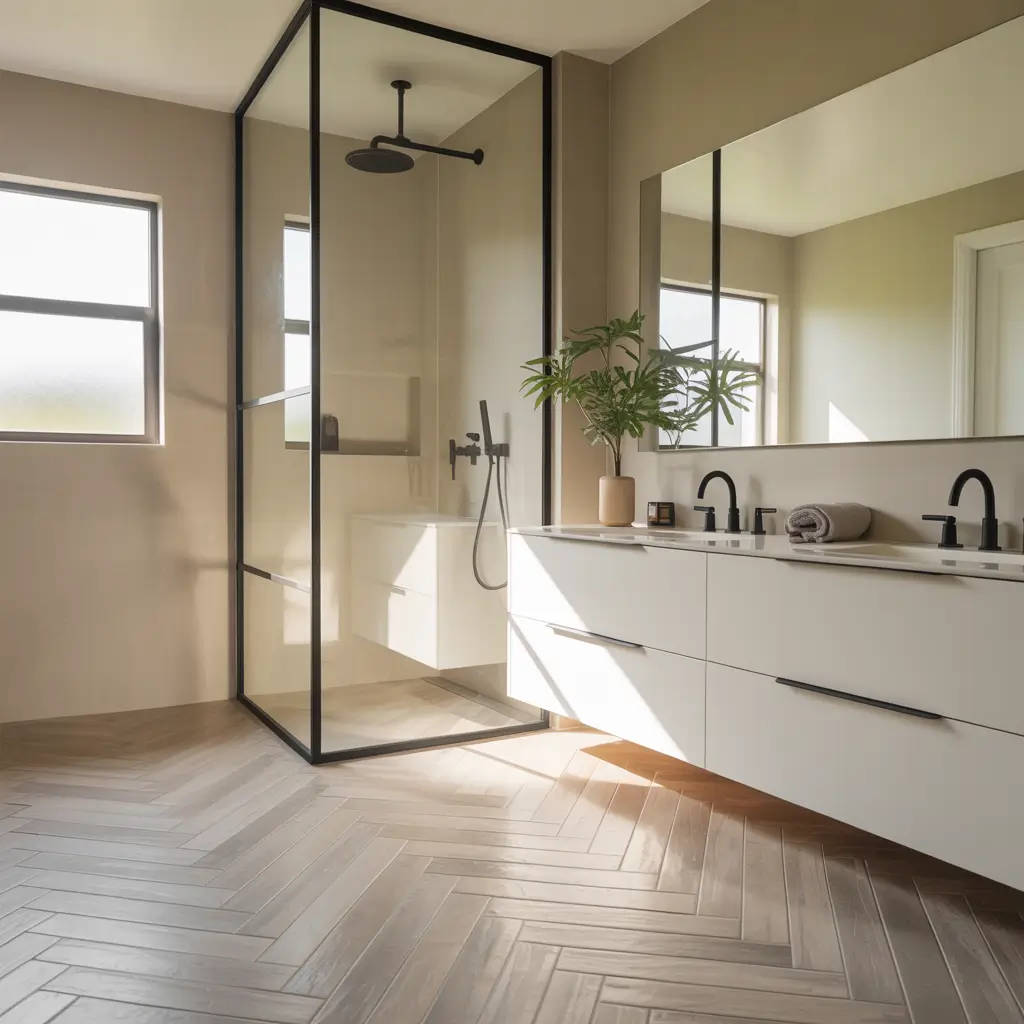
1. Wood Tile Bathroom Ideas for a Modern Spa Look
Ever walked into a high-end spa and thought, “I want to live here”? That tranquil, zen-like atmosphere isn’t some unattainable dream. You can totally recreate it in your bathroom with the right wood tile choices.
The secret sauce here is pairing warm wood tones with clean, minimalist elements. Think medium to light wood-look tiles on the floor, combined with crisp white walls and simple fixtures. I recently helped my sister redesign her bathroom using pale oak-effect porcelain tiles, and honestly, it looks like something out of a wellness magazine.
Here’s what makes the spa look work:
- Horizontal wood grain patterns that create visual flow and calm
- Soft, neutral color palettes (grays, whites, beiges)
- Underfloor heating beneath your wood tiles (because luxury)
- Natural stone accents paired with wood for that organic feel
- Floating vanities with wood-look fronts to maintain the airy vibe
The trick is keeping everything uncluttered. You want that “ahhhh” feeling when you walk in, not “where did I put my toothbrush among all this chaos?”
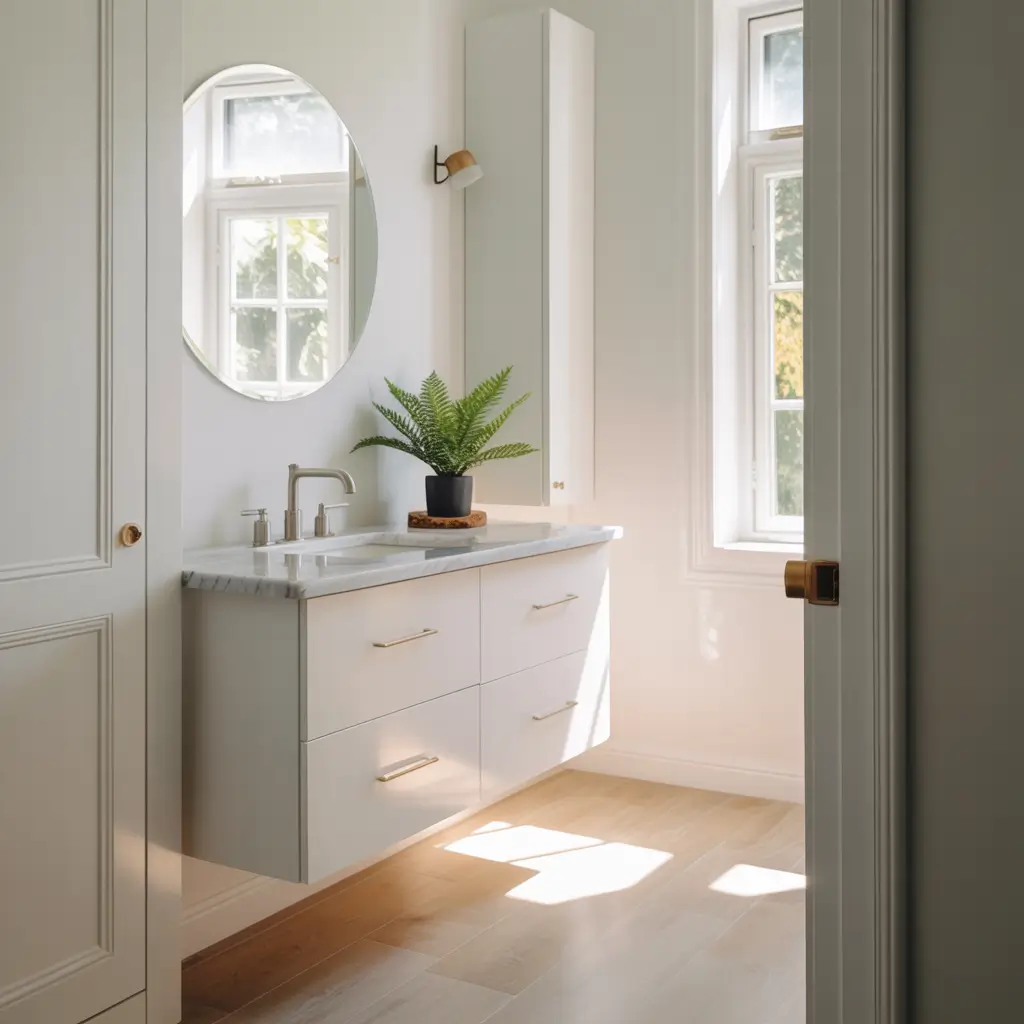
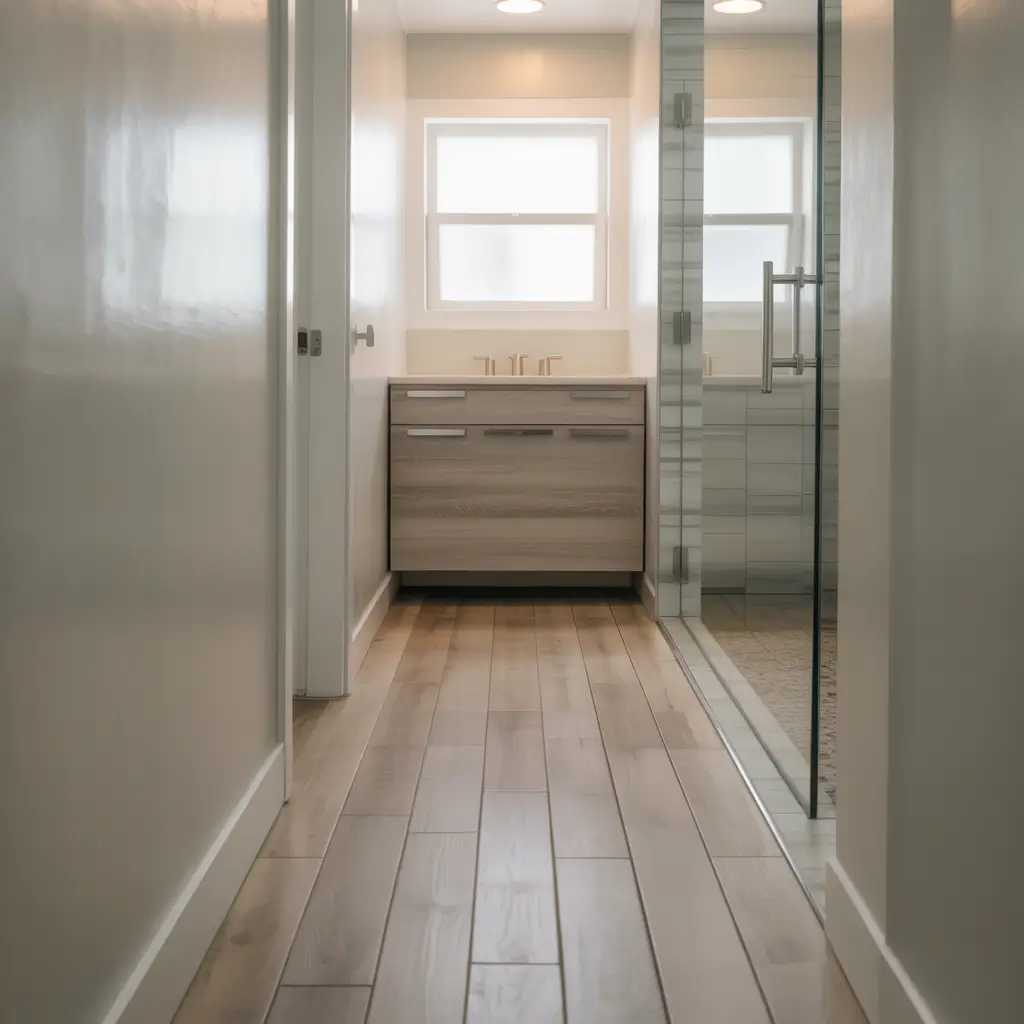
2. Small Bathroom Designs with Wood Look Tile Floors
Small bathrooms are the ultimate design challenge, am I right? But here’s the thing—wood tile can actually make your tiny bathroom feel bigger. No, I’m not selling you snake oil here.
Running wood planks lengthwise in a narrow bathroom creates the illusion of more space. Your eye follows those long lines, and suddenly your cramped bathroom doesn’t feel quite so cramped. I learned this the hard way after installing square tiles in my first apartment’s bathroom—it looked like a checkerboard coffin. :/
For small spaces, consider these game-changers:
- Light-colored wood tones (bleached oak, whitewashed pine) to reflect more light
- Large-format planks to minimize grout lines and visual breaks
- Running the same tile from floor to shower for continuity
- Vertical wood tile installations on one wall to draw the eye upward
The continuity thing is huge. When you use the same wood tile throughout, you eliminate visual boundaries that chop up the space. Your brain reads it as one cohesive area instead of a bunch of tiny sections crammed together.
3. Rustic Farmhouse Bathrooms with Wood Tile Accents
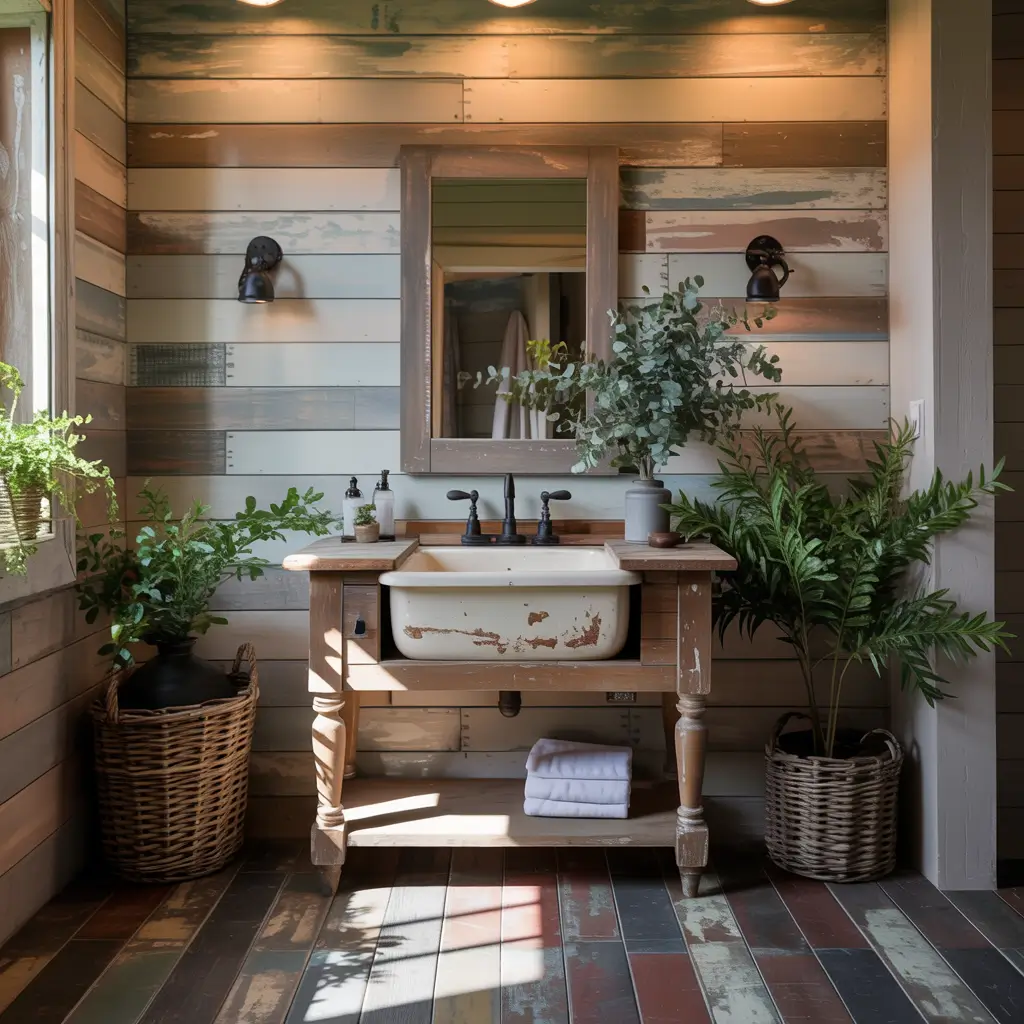
Okay, farmhouse style might be everywhere right now, but there’s a reason it’s popular—it just works. And wood tile is basically the MVP of farmhouse bathroom design.
You want that weathered, reclaimed wood look without actually dealing with reclaimed wood (which, FYI, can be stupidly expensive and high-maintenance in bathrooms). Wood-look porcelain tiles that mimic distressed barn wood give you all the character without the headache.
I’m obsessed with pairing these rustic wood tiles with:
- Shiplap walls (real or tile—yes, shiplap tile exists)
- Matte black fixtures for contrast
- Vintage-style mirrors with chunky frames
- Open shelving with wrought iron brackets
- Freestanding tubs sitting on wood-look tile floors
The beauty of this style is that it feels collected and lived-in rather than sterile. You can mix different wood tones—maybe darker wood tiles on the floor with lighter wood accents elsewhere. The slightly imperfect, rustic vibe forgives a lot.
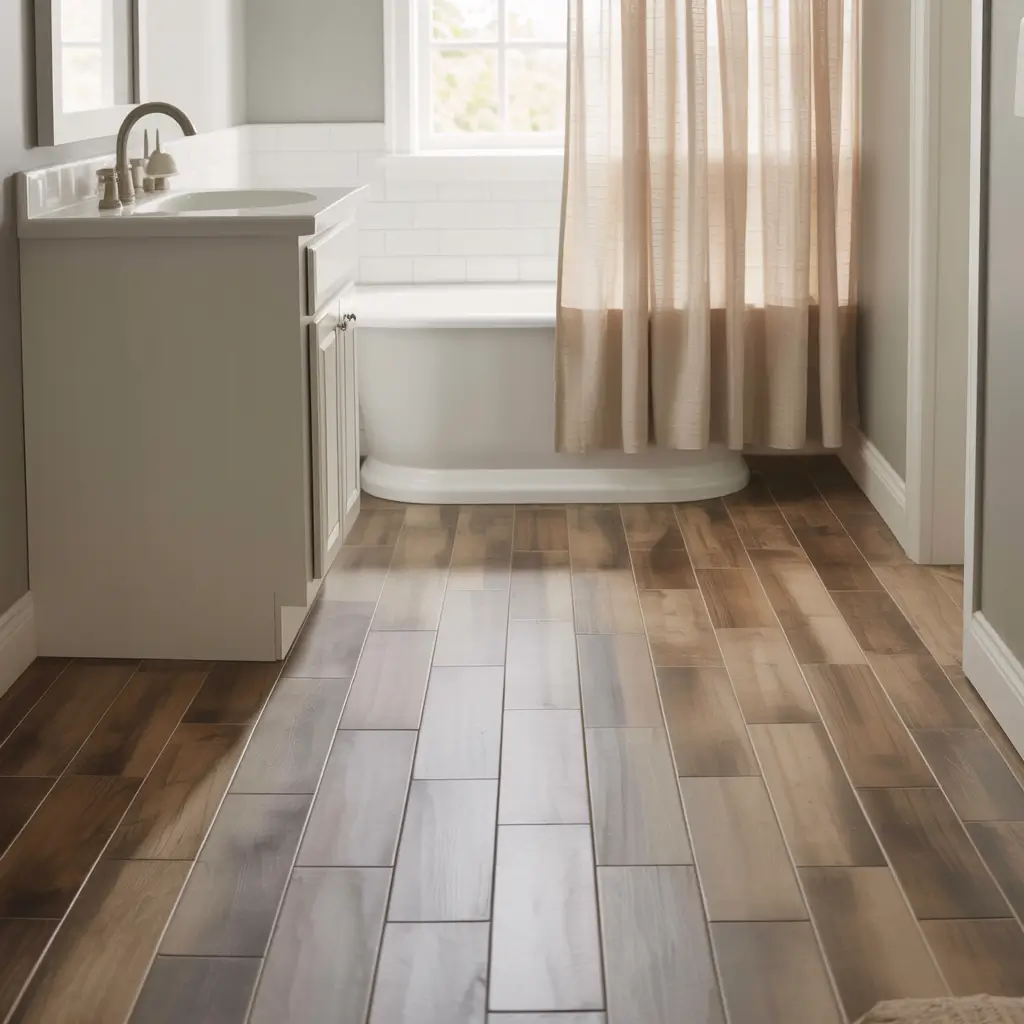
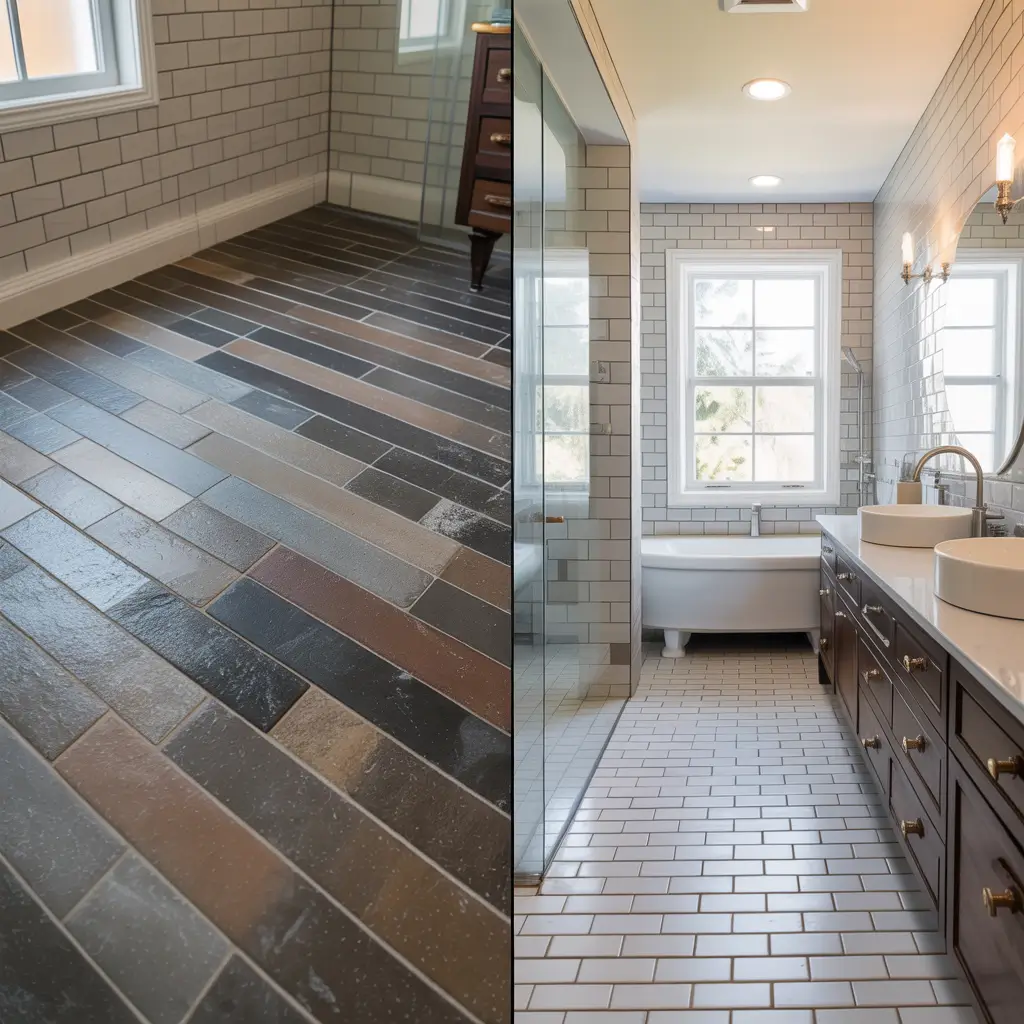
4. Best Wood Look Tile Patterns for Bathroom Floors
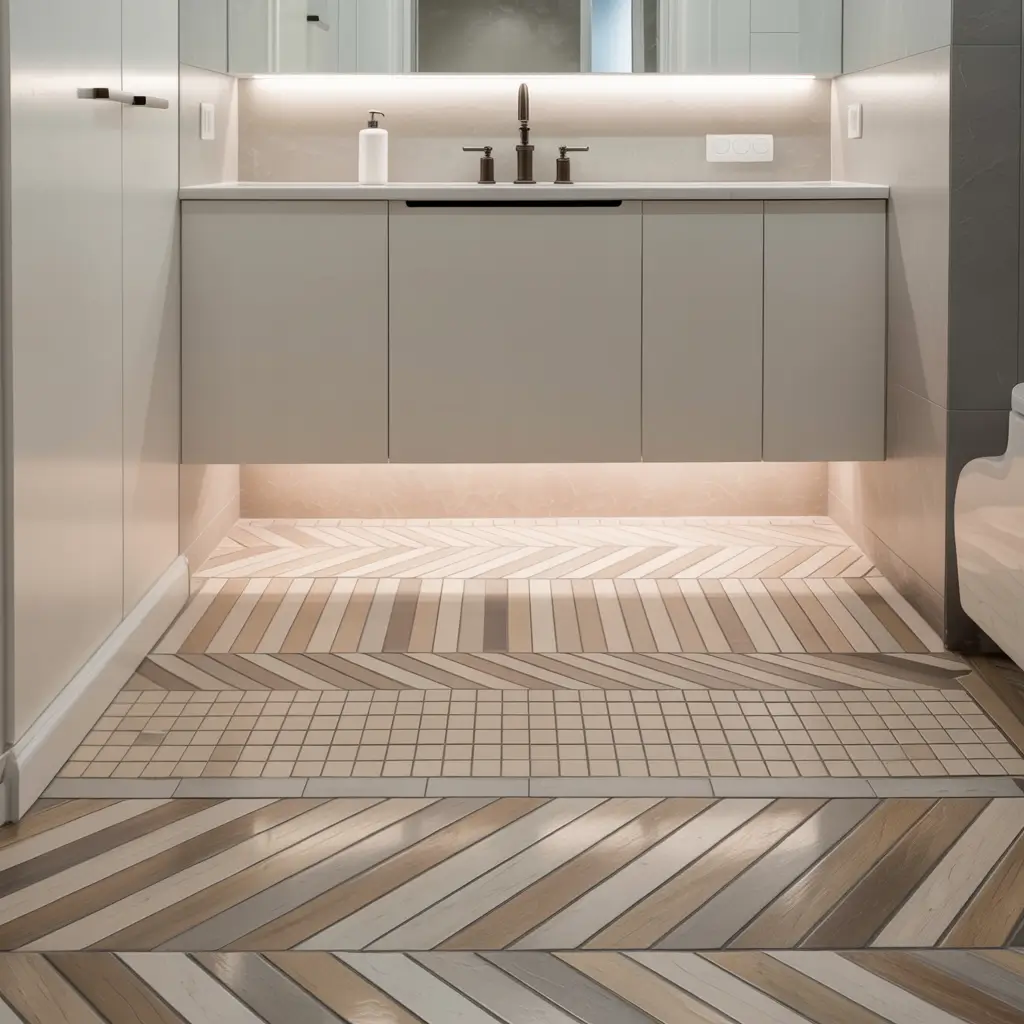
Pattern matters, people. You could have the most gorgeous wood tile in the world, but lay it wrong and it’ll look off. The pattern you choose completely changes the vibe of your bathroom.
Straight lay (running planks parallel) is your classic choice. It’s clean, it’s timeless, and it won’t look dated in five years. But if you want to get fancy, here are some patterns that’ll elevate your bathroom game:
- Staggered/offset pattern (like hardwood flooring): Natural and traditional
- Herringbone (we’ll talk more about this later): Sophisticated and eye-catching
- Chevron: Similar to herringbone but with a sharper angle—very modern
- Diagonal installation: Makes square spaces feel larger
- Mixed-width planks: Mimics real reclaimed wood for authentic character
I personally lean toward the staggered pattern for most bathrooms. It gives you that authentic hardwood feel without being too trendy. But hey, if you’re bold enough for chevron, more power to you. Just know that it’ll cost more in installation because it requires more precise cutting.
Also Read: 15 Elegant Brown Tile Bathroom Styles That Feel Luxurious
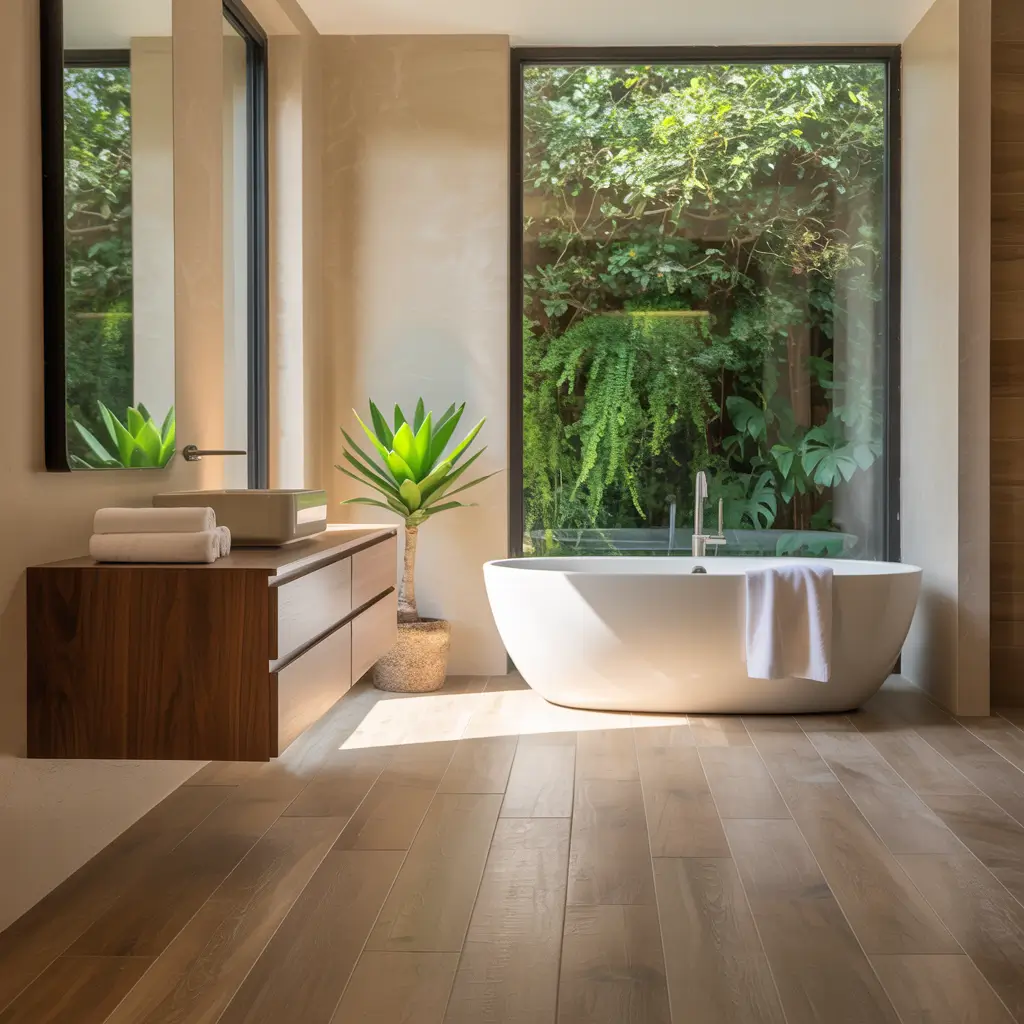
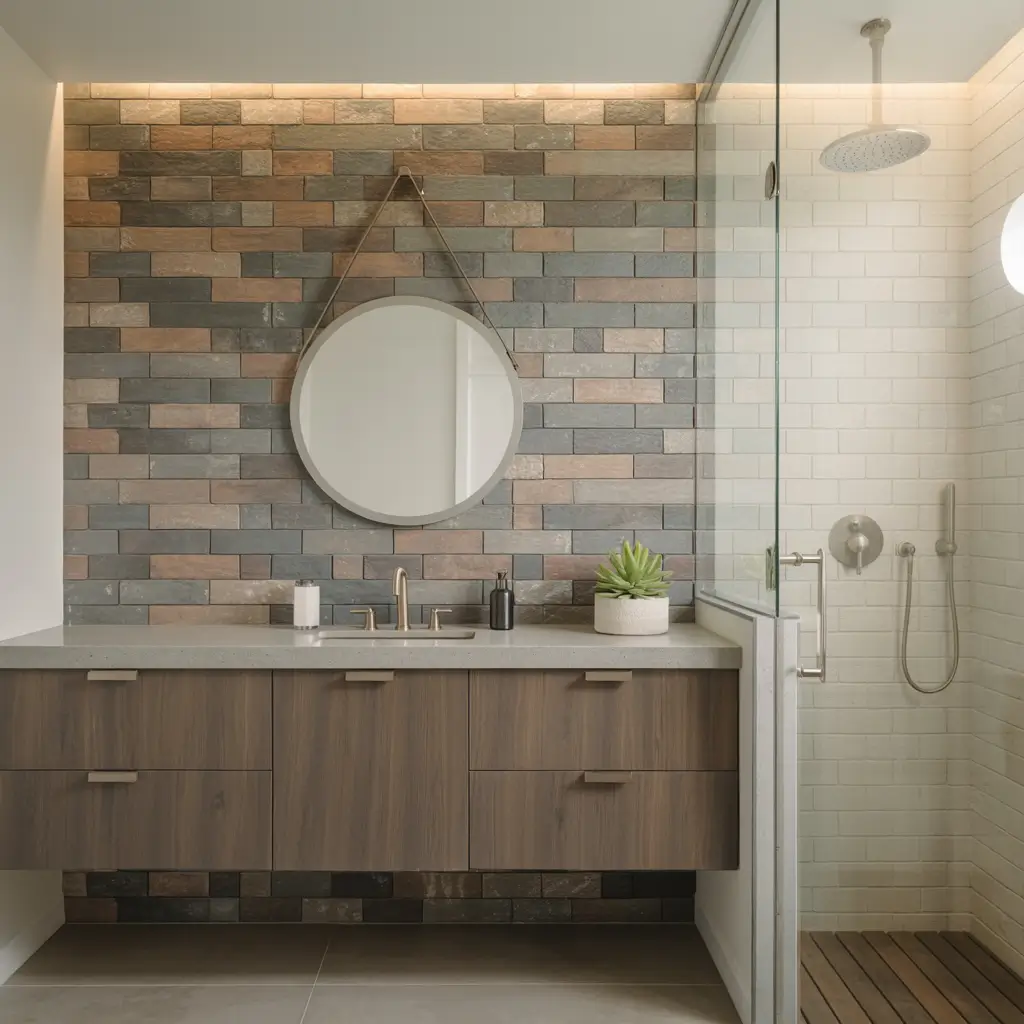
5. Wood Tile Shower Ideas That Feel Luxurious
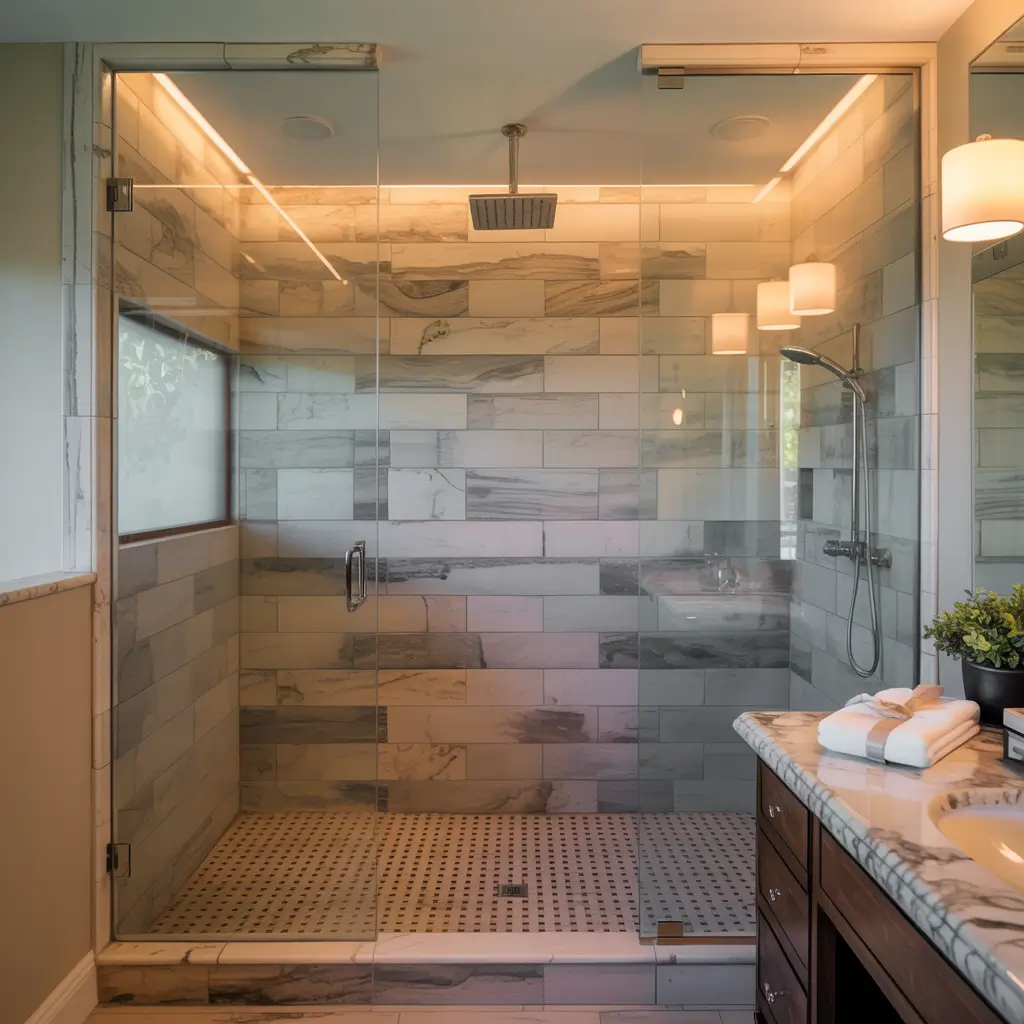
Here’s where wood tile really shows off. Using it in the shower was once considered crazy talk, but modern porcelain technology has made it totally viable. And wow, does it look amazing.
Picture this: You’re standing under a rainfall showerhead, surrounded by warm honey-toned wood planks, maybe with some sleek white subway tile as an accent. That’s luxury without the country club price tag. I installed vertical wood-look tiles in my shower last year, and I kid you not, I take longer showers now just because it feels so good in there.
Shower-specific tips that’ll save you headaches:
- Use rectified tiles (precisely cut edges) for minimal grout lines
- Go with porcelain over ceramic for better water resistance
- Install vertical planks to create height and prevent water pooling
- Mix wood tile with stone or marble for visual interest
- Seal your grout properly (seriously, don’t skip this)
The vertical installation is key. Water runs down instead of across grout lines, which means less maintenance and fewer chances for problems. Plus, it makes your shower feel taller and more spa-like.
6. Light vs Dark Wood Tile in Bathroom Design
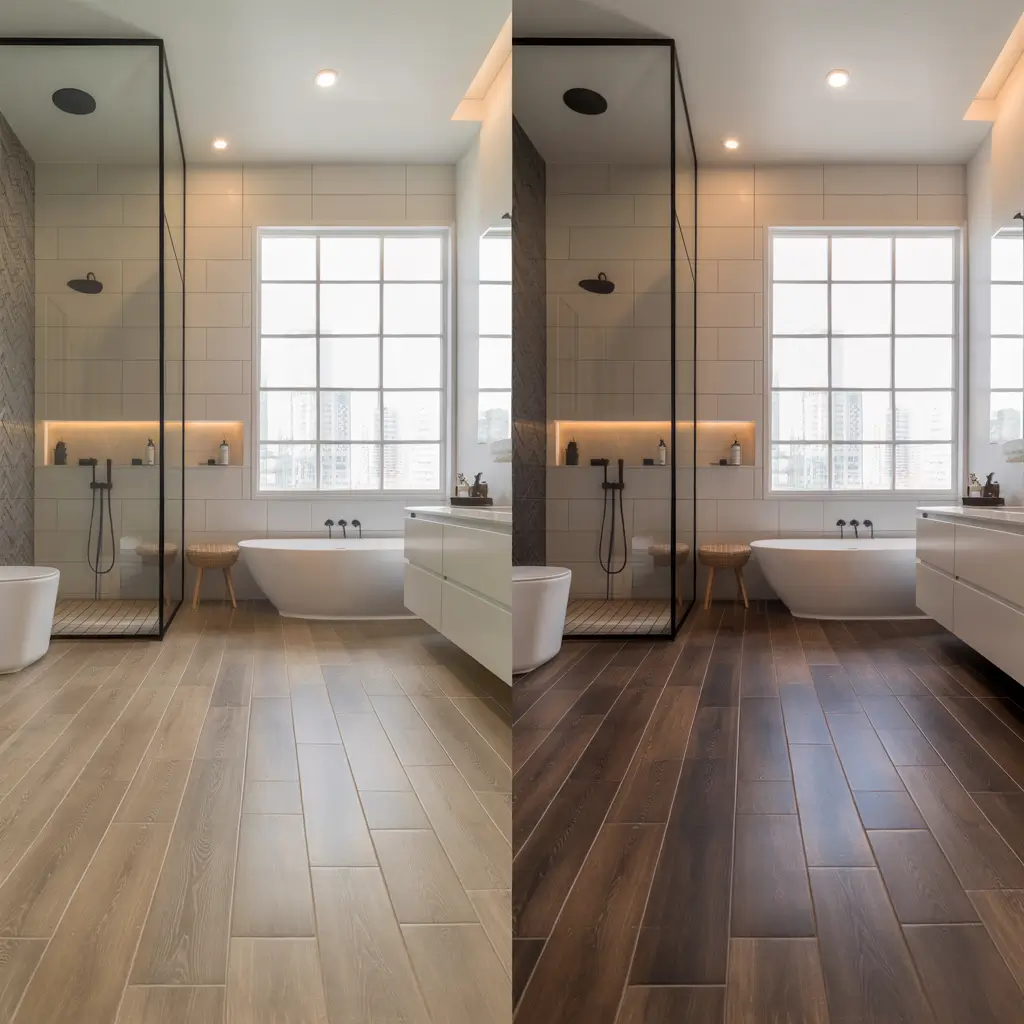
This is the eternal bathroom debate, isn’t it? Light or dark wood tile? The answer is… it depends. (I know, super helpful, right?)
Light wood tiles (think blonde oak, ash, or whitewashed finishes) work miracles in smaller bathrooms or spaces with limited natural light. They bounce light around and make everything feel fresh and airy. I’ve used light wood tiles in probably 60% of my bathroom projects because they’re so darn versatile.
Dark wood tiles (walnut, espresso, dark cherry tones) bring drama and sophistication. They anchor a space and create this cozy, intimate atmosphere. But—and this is important—they show every water spot, soap residue, and dust particle. You’ll be wiping down those floors more often than you’d like.
Here’s my honest take:
Choose light wood tiles if you:
- Have a small bathroom
- Want low-maintenance flooring
- Prefer a bright, open feel
- Have limited natural light
Choose dark wood tiles if you:
- Have a spacious bathroom
- Want a moody, dramatic look
- Don’t mind regular cleaning
- Have plenty of light to balance the darkness
IMO, you can’t really go wrong with a medium tone—it’s the Goldilocks option that works in almost any situation.
7. Coastal Bathroom Ideas with Driftwood Look Tile
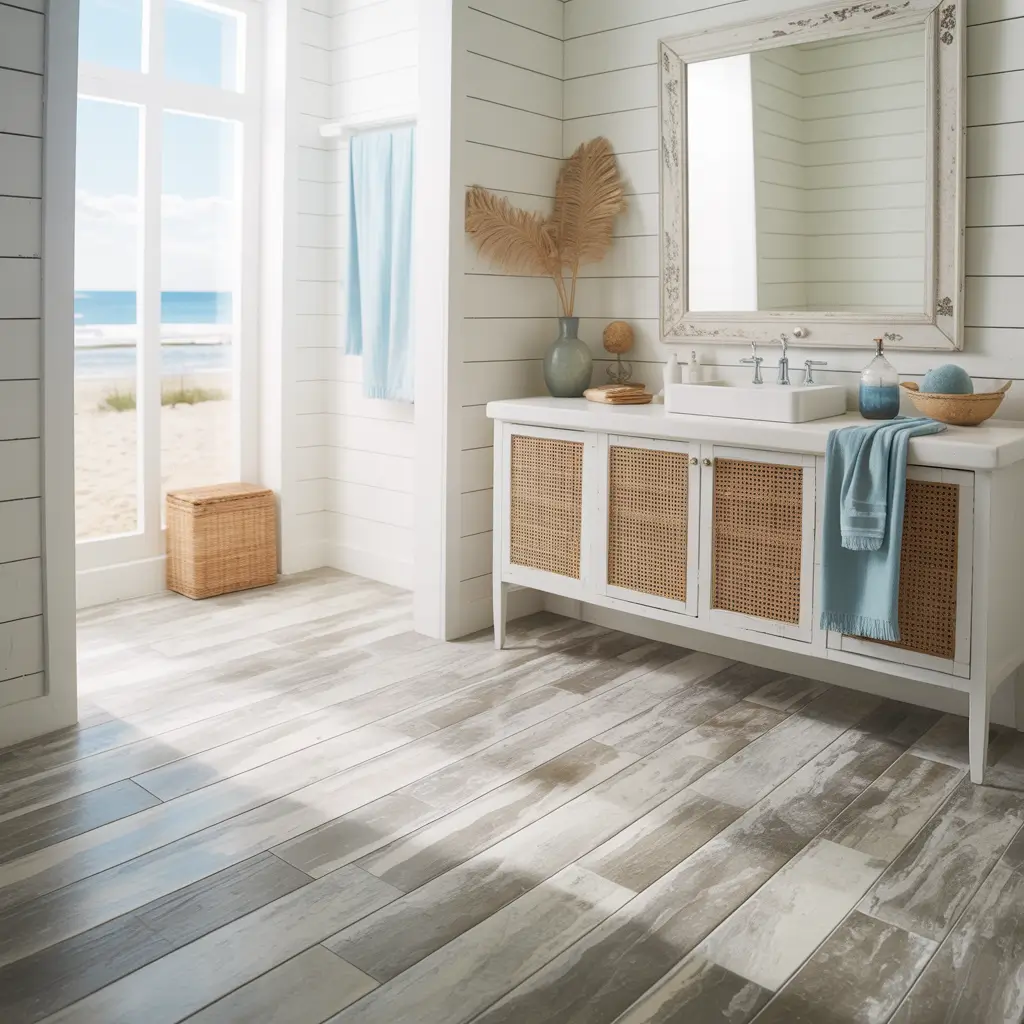
Beach vibes in your bathroom? Yes, please. Driftwood-look tiles capture that weathered, sun-bleached aesthetic that makes you feel like you’re perpetually on vacation.
The coastal bathroom trend is all about soft, muted tones and natural textures. You want wood tiles in grays, silvery tones, and pale blues—basically, colors that look like they’ve been sitting on a beach for years. I decorated my guest bathroom with gray driftwood-effect tiles, and every visitor asks if I used real reclaimed beach wood. Nope, just really good porcelain. 🙂
Nail the coastal look with these elements:
- Driftwood gray or whitewashed wood tiles on floors
- Soft blue or seafoam green accents on walls
- Natural materials like rope, seagrass, and linen
- Glass elements (shower doors, accessories) for that water connection
- Brushed nickel or oil-rubbed bronze fixtures (not shiny chrome—too modern)
The beauty of this style is its inherent casualness. It shouldn’t look too polished or perfect. You want that relaxed, “just got back from the beach” energy, not “interior designer spent three months planning this.”
8. Herringbone Wood Tile Bathroom Floor Designs
Okay, let’s talk about herringbone because this pattern deserves its own section. It’s having a serious moment right now, and for good reason—it’s absolutely stunning.
Herringbone wood tile creates movement and visual interest without being overwhelming. The zigzag pattern draws your eye across the floor, making rooms feel larger and more dynamic. I’ll admit, I was skeptical at first (thought it might be too busy), but after seeing it in person, I became a total convert.
Fair warning though: herringbone installation costs more. Those tiles need to be precisely cut at 45-degree angles, and installers charge accordingly. You’re looking at probably 20-30% more than a standard installation. Worth it? That’s your call, but I think it is for the right space.
Herringbone works best when:
- You have a medium to large floor area (too small and the pattern gets lost)
- Your bathroom has simple, clean lines elsewhere (let the floor be the star)
- You’re using consistent wood tones (multi-toned tiles can make herringbone look chaotic)
- You pair it with neutral walls and minimal patterns elsewhere
The classic herringbone uses planks of equal length, but you can also find variations like double herringbone or diagonal herringbone if you’re feeling extra adventurous.
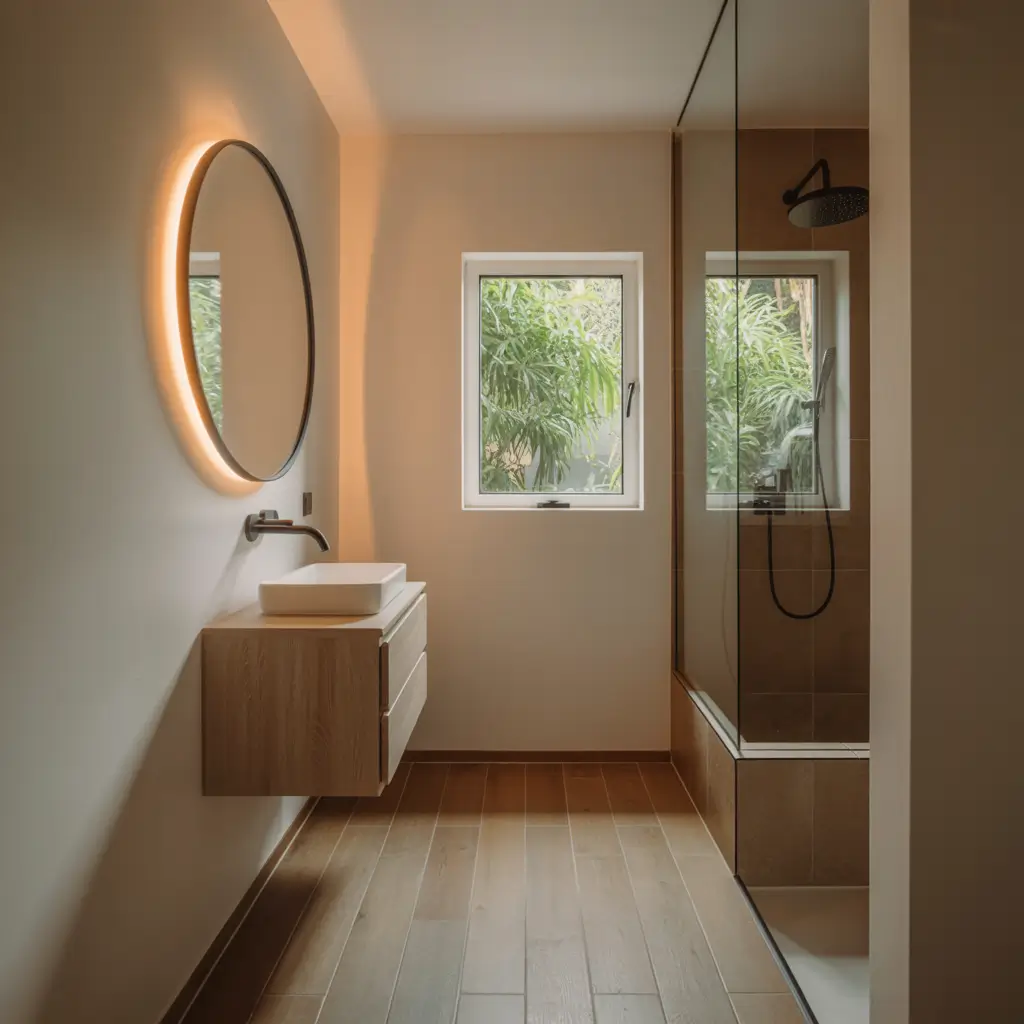
9. Minimalist Bathrooms with Warm Wood Effect Tiles
Minimalism doesn’t mean cold and sterile—not when you add warm wood effect tiles to the mix. This is about creating a calm, uncluttered space that still feels inviting and human.
The minimalist approach strips away unnecessary elements and lets quality materials shine. Your wood tiles become a focal point not through crazy patterns or busy designs, but through their inherent beauty and texture. I love this style for master bathrooms where you want that peaceful, meditative quality.
Key principles for minimalist wood tile bathrooms:
- Simple, straight-lay patterns (no fancy installations needed)
- Warm-toned wood tiles (honey oak, natural maple, light walnut)
- Monochromatic color schemes with wood as the warm accent
- Hidden storage to maintain clean lines
- Quality over quantity in fixtures and accessories
Less really is more here. Choose one or two stunning elements—maybe a beautiful wood tile floor and a statement mirror—and keep everything else understated. The wood brings enough warmth and texture to prevent that “sterile hospital” vibe that sometimes plagues minimalist spaces.
10. Wood Tile Accent Walls for Statement Bathrooms
Who says wood tile has to live on the floor? Taking it vertical creates instant drama and gives you that designer-level sophistication.
Accent walls with wood tile are basically your bathroom’s statement jewelry. They command attention without overwhelming the space. I installed a floor-to-ceiling wood tile wall behind my bathtub, and it transformed the entire room from “meh” to “magazine-worthy.”
Smart places to use wood tile accent walls:
- Behind the bathtub for a focal point
- Behind the vanity to frame your mirror
- In the shower (full wall or just one section)
- Opposite the entry door as the first thing you see
- Half-wall wainscoting style for a subtle touch
The color and direction matter here. Vertical installations make ceilings feel higher. Horizontal installations make narrow bathrooms feel wider. Dark wood creates intimacy; light wood opens things up. You’re basically playing with visual perception, which is pretty cool when you think about it.
Mix your wood tile accent wall with complementary materials—white subway tile, concrete-look porcelain, or natural stone. The contrast is what makes it pop.
Also Read: 15 Inspiring White Subway Tile Bathroom Ideas That Shine
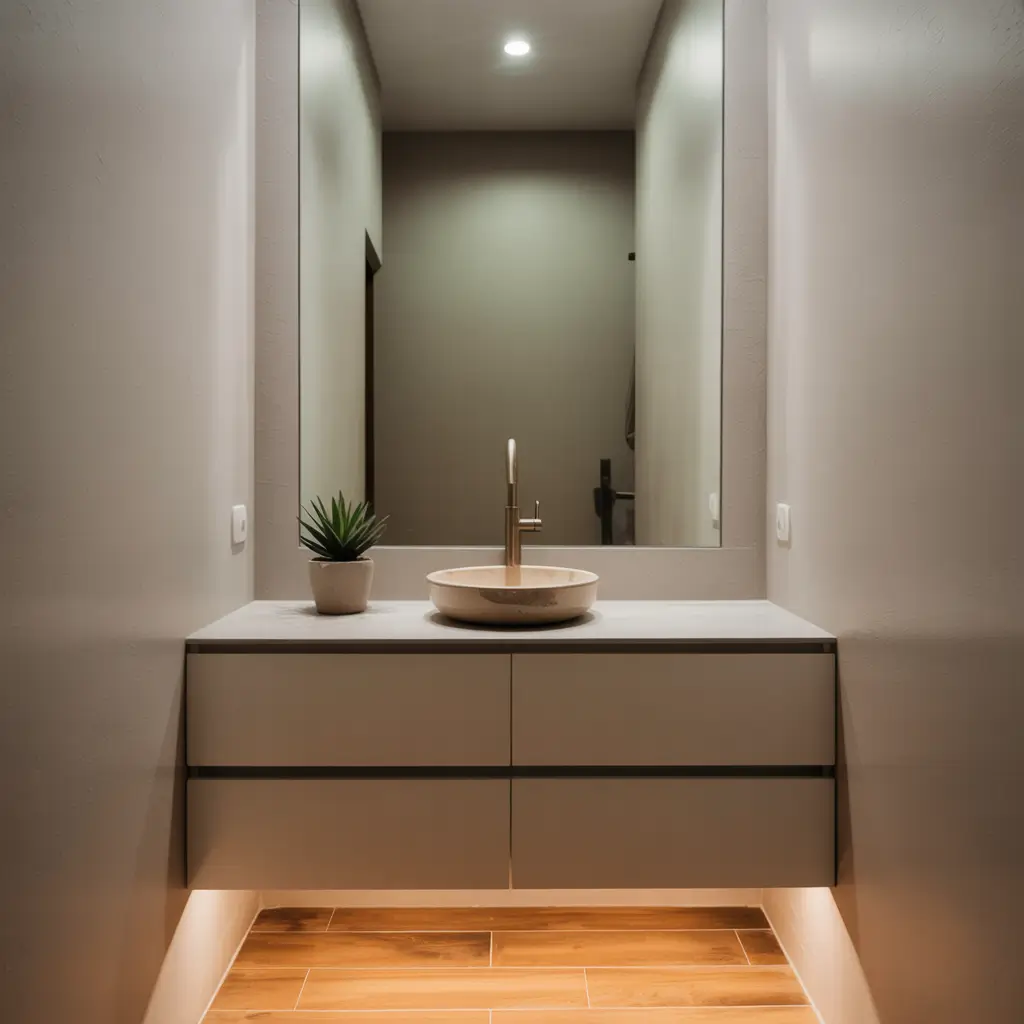
11. Budget Bathroom Remodel with Wood Look Porcelain Tile
Let’s get real about money for a second. Bathroom remodels can drain your bank account faster than you can say “contractor markup.” But wood-look porcelain tile is actually a budget-friendly option that looks expensive.
Compare it to real hardwood (which you shouldn’t use in bathrooms anyway) or even high-end ceramic, and porcelain wood-look tile comes out ahead. You get durability, water resistance, and gorgeous aesthetics without the premium price tag. I’ve done entire bathroom floors with quality wood-look porcelain for under $5 per square foot. Try finding real wood flooring at that price.
Budget-stretching strategies that actually work:
- Shop remnants and overstock at tile warehouses
- Use wood tile strategically (maybe just the floor, not walls)
- DIY the installation if you’re handy (saves 40-50% on labor)
- Choose standard sizes (6×24 or 6×36 planks are most affordable)
- Skip ultra-premium brands (mid-range quality is fine for most bathrooms)
Here’s something nobody tells you: the installation matters more than the tile itself. You can buy expensive tile and have it ruined by sloppy installation, or buy mid-range tile and make it look incredible with proper installation. Invest in a good installer even if you skimp slightly on materials.
12. Scandinavian Style Bathrooms with Wood Tile Floors
Scandinavian design is like minimalism’s warmer, cozier cousin. It embraces simplicity and functionality while celebrating natural materials—which makes wood tile the perfect foundation.
The Scandi aesthetic is all about that “hygge” feeling (you know, that Danish concept of cozy contentment). Light wood tones, clean lines, and a touch of nature combine to create bathrooms that feel fresh yet inviting. I’m kind of obsessed with this look because it never feels cold or uninviting like some modern styles can.
Essential elements of Scandinavian wood tile bathrooms:
- Light wood tones (birch, ash, light oak) in simple patterns
- White or very pale walls to maximize light
- Black accents (fixtures, frames, accessories) for contrast
- Natural textiles like cotton, linen, and wool
- Minimal decoration with purposeful, quality pieces
- Plants (because Scandinavians love bringing nature indoors)
The magic happens in the details. You’re not throwing together a bunch of trendy elements—you’re thoughtfully choosing each piece for both form and function. That wood tile floor isn’t just pretty; it’s durable, practical, and timeless.
13. Wood Tile Bathroom Ideas for Tiny Spaces
Tiny bathrooms are their own special challenge. You’re working with maybe 30-40 square feet (if you’re lucky), and every choice matters. Good news: wood tile can actually help your tiny bathroom feel less claustrophobic.
Strategic wood tile placement creates visual flow that makes small spaces feel larger. I worked on a powder room that was literally 20 square feet, and using light wood tiles made it feel almost double that size. Almost. Let’s not get crazy here.
Tiny bathroom wood tile tactics:
- Run planks toward the longest wall to elongate the space
- Use large-format planks (fewer grout lines = less visual clutter)
- Match wall and floor tones for seamless flow
- Install wall-to-wall (avoid rugs that break up the space)
- Choose reflective finishes over matte for light bounce
One trick I love: use the same wood tile on the floor and extend it partway up the wall. This vertical continuation draws the eye up and makes the ceiling feel higher. It’s a simple optical illusion that really works.
Also, for the love of all that’s holy, keep your color palette tight. This isn’t the place to experiment with five different wood tones and a rainbow of accent colors. Stick to 2-3 colors total, with your wood tile as the anchor.
14. Modern Black and Wood Tile Bathroom Combinations
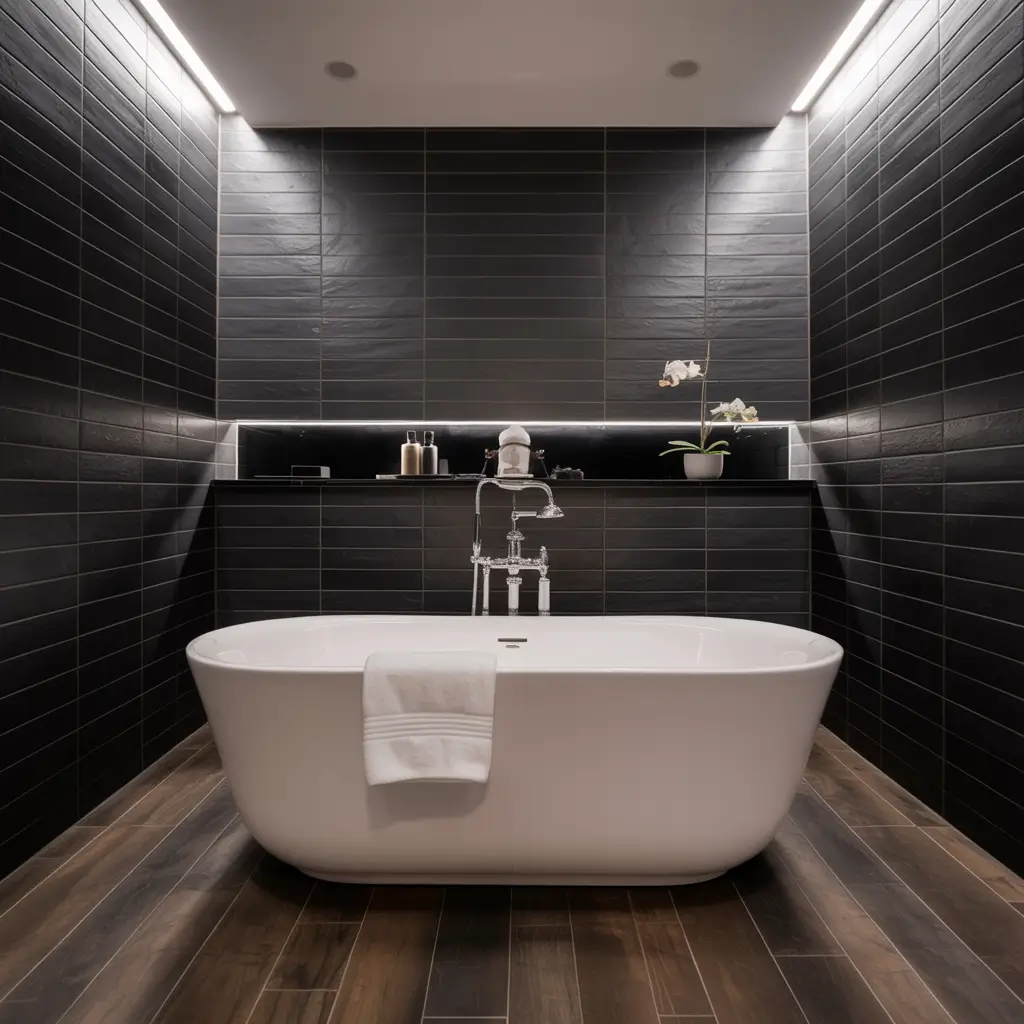
Want to know the combination that makes me weak in the knees? Black and wood. It’s bold, it’s sophisticated, and it’s surprisingly versatile.
This look walks the line between masculine and neutral, working equally well in a bachelor pad or a family bathroom. The contrast between dark black tile and warm wood creates visual drama without being overwhelming. I used this combo in my own master bath—wood-look floor tiles with matte black hexagon wall tiles—and I still love it three years later.
Ways to rock the black and wood combination:
- Wood tile floors with black accent walls (in shower or behind vanity)
- Black floors with wood tile wainscoting (flips the script)
- Checkerboard pattern alternating black and wood tiles (bold but cool)
- Wood vanity with black countertop and wood floor (layered look)
- Black fixtures and hardware against all wood tile (subtle contrast)
The key is balance. Too much black feels oppressive; too much wood can feel boring. You want enough contrast to create interest but not so much that your eyes don’t know where to look.
Pro tip: use matte black rather than glossy. The matte finish feels modern and sophisticated, while glossy can look dated or cheap. Same goes for your wood tile—satin or matte finishes work better with black than high-gloss.
15. Mistakes to Avoid When Installing Wood Tile in Bathrooms
Alright, let’s wrap this up with some real talk about what NOT to do. I’ve seen (and unfortunately made) enough wood tile mistakes to save you some headaches.
The biggest mistake? Treating wood-look tile like real wood. They’re different materials with different installation requirements. I watched a friend’s contractor install gorgeous wood tiles without proper waterproofing underneath because “it’s tile, not wood.” Guess who had to redo their entire bathroom floor six months later? Yeah.
Common mistakes that’ll haunt you:
- Skimping on waterproofing (especially in showers—don’t be cheap here)
- Using incorrect grout (use epoxy or urethane grout in wet areas)
- Not sealing grout lines properly (water finds a way, trust me)
- Poor substrate preparation (uneven subfloors show through)
- Mixing tile batches without checking color variation
- Ignoring expansion gaps at walls (tile expands and contracts)
- Choosing the wrong tile finish (too slippery for floors = lawsuit waiting to happen)
Here’s something that surprised me: tile direction matters for water drainage. In showers especially, you want to consider how water will flow across the tile. Horizontal installations can trap water in grout lines, while vertical often drains better.
Also, don’t cheap out on the installer unless you really know what you’re doing. Wood-look tile installation requires precision—those grout lines need to be consistent, or the whole illusion falls apart. You’ll notice a 1/8-inch variation in spacing on wood planks way more than you would on square tiles.
And please, PLEASE, buy 10-15% extra tile. You’ll have cuts, waste, and possibly breakage. Plus, if you need to replace a tile down the road, having extras from the same batch is clutch. Tile manufacturing can vary between batches, and you don’t want one plank that’s slightly different from the rest.
Bringing It All Together
Look, I could keep going about wood tile bathrooms for days (my friends have literally asked me to stop talking about tile at parties), but you get the idea. Wood-look tile brings warmth, character, and versatility to bathroom design in ways that few other materials can match.
Whether you’re creating a spa-like retreat, maximizing a tiny space, or going bold with dramatic black accents, wood tile gives you a foundation that works. It’s durable enough to handle bathroom humidity, beautiful enough to be a focal point, and varied enough to work with virtually any style.
The best part? You don’t need a massive budget or a designer to make these looks happen. Start with good-quality porcelain wood-look tile, think through your pattern and color choices, and don’t skip the important stuff like proper waterproofing and installation. Your bathroom will thank you, and you’ll actually enjoy being in there.


