15 Gorgeous DIY Laundry Room Ideas for Tiny Rooms
- Laundry Room Ideas
 Alina
Alina- 0
- 40 minutes read


Listen, I get it. Your laundry room is probably the size of a shoebox, and every time you walk in there, you feel like you’re playing Tetris with detergent bottles and dirty clothes. I’ve been there, staring at my cramped laundry closet, wondering how on earth people create those Instagram-worthy laundry spaces when I can barely close the door.
Here’s the good news: you don’t need a massive budget or a contractor on speed dial to transform your tiny laundry space into something functional AND gorgeous. I’ve spent way too many weekends experimenting with DIY laundry projects (some successful, some… well, we don’t talk about the shelf that fell at 2 AM). What I’ve learned is that small spaces actually give you the perfect excuse to get creative.
So grab your drill, channel your inner Bob Vila, and let’s talk about 15 DIY laundry room ideas that’ll make you actually want to do laundry. Okay, maybe that’s overselling it, but at least you won’t cringe every time you open the door.
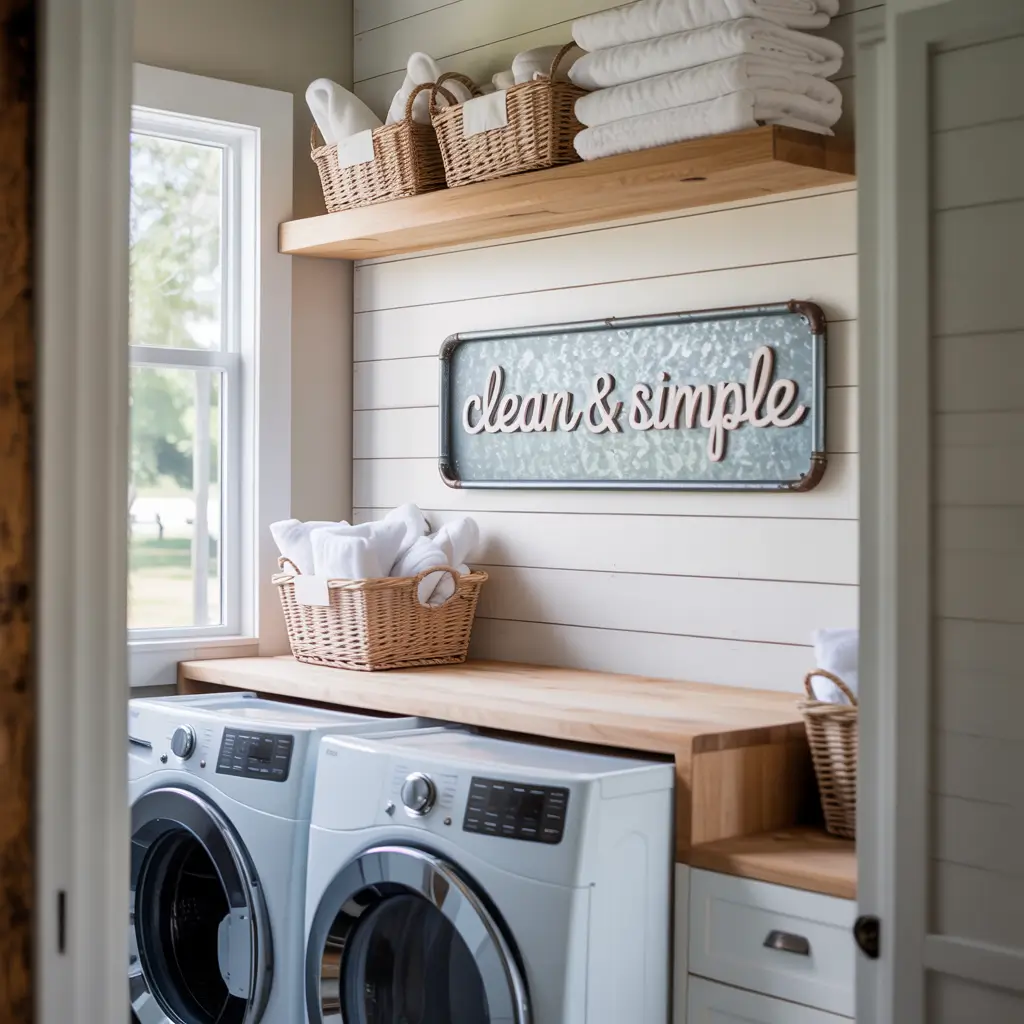
1. Floating Wood Shelves Over Washer and Dryer
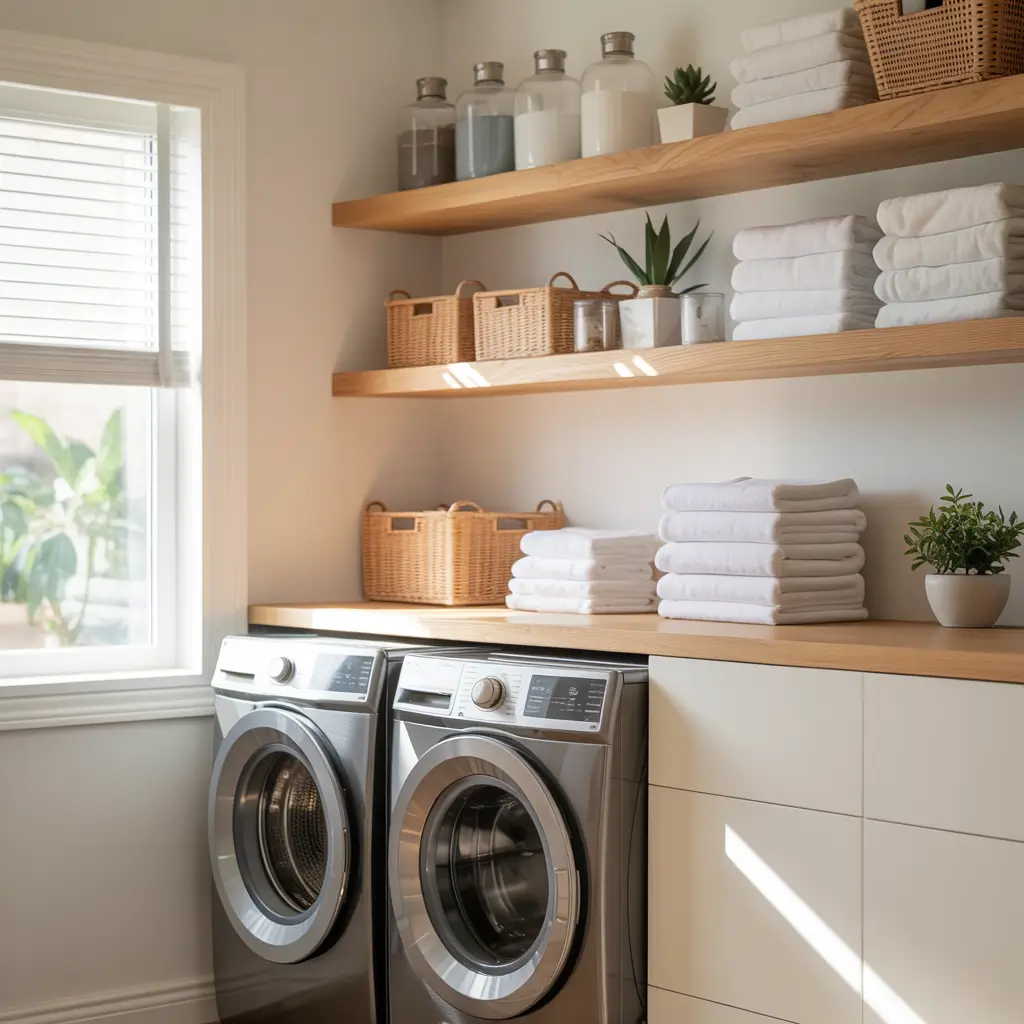
Ever look at that awkward space above your washer and dryer and think, “What a waste”? Yeah, me too. Floating wood shelves are literally the easiest way to reclaim that dead space without making your tiny room feel even more cramped.
I installed mine on a Sunday afternoon with nothing more than a drill, some brackets, and a couple of pine boards from the hardware store. The beauty of floating shelves is they don’t have those chunky brackets sticking out, so they maintain a clean, streamlined look. You can stain them to match your aesthetic or paint them white for that crisp, modern vibe.
Here’s what you’ll need:
- Wood boards (1×8 or 1×10 work great)
- Floating shelf brackets
- Level (seriously, don’t skip this unless you want crooked shelves haunting you forever)
- Drill and screws
- Sandpaper and finish of your choice
Pro tip: I use mine to store all those bulky detergent containers and fabric softener bottles. It keeps them off the floor and makes the whole space feel less cluttered. Plus, when guests peek in, they think you’re way more organized than you actually are. 🙂
2. DIY Countertop Over Front Load Machines
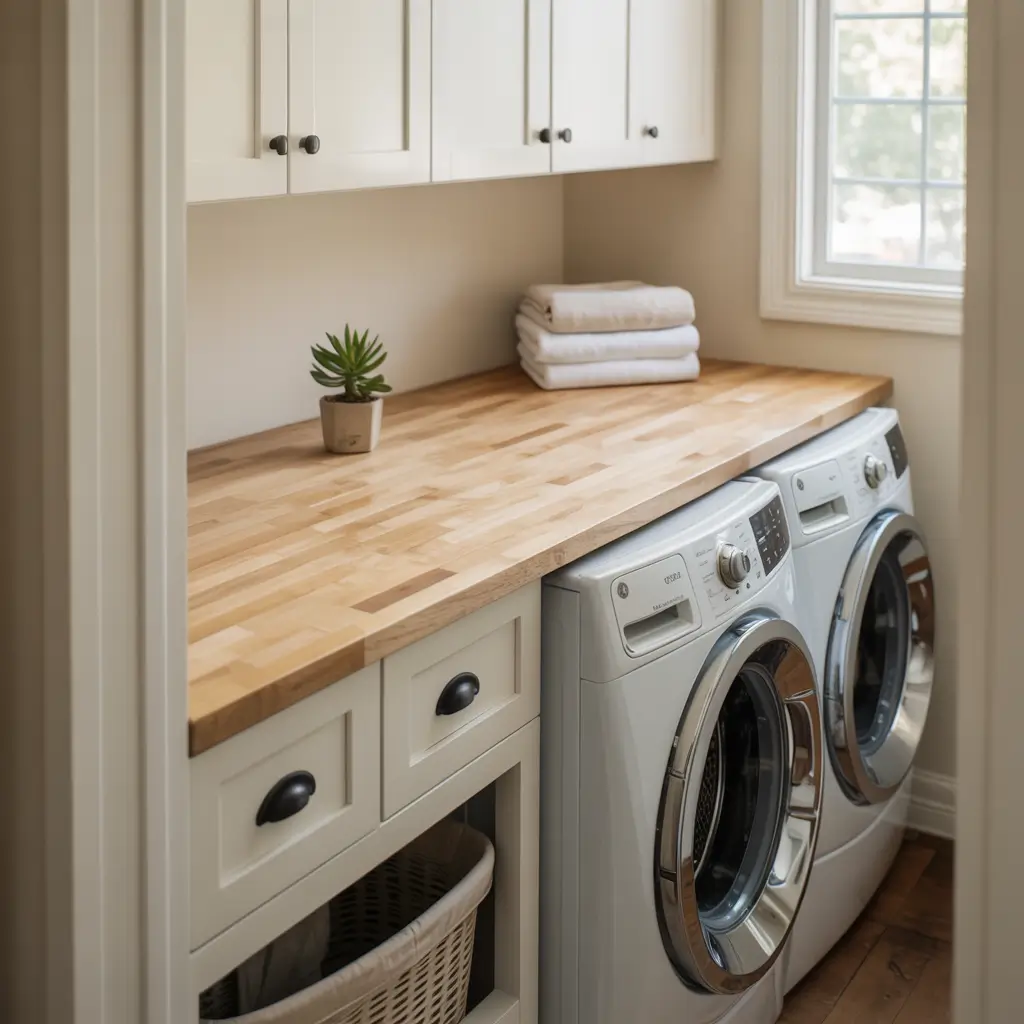
If you’ve got front-loading machines, you’re already winning at the space-saving game. But you know what makes them even better? A custom countertop that bridges the gap between them.
I built mine using a single sheet of plywood covered with peel-and-stick laminate (because I’m not about to spend hundreds on butcher block). The result? An instant folding station that doesn’t take up extra floor space. You can fold clothes, sort socks, or just stack clean laundry there instead of on your bed like a normal person.
The measurements matter here—you want the countertop to sit flush with the back wall and overhang slightly in the front for easy access. I cut mine to exact size at the hardware store (they usually do this for free, FYI), then just laid it across both machines.
Things to consider:
- Make sure your countertop doesn’t block access to detergent dispensers
- Add some rubber furniture pads underneath to prevent sliding during spin cycles
- Keep it removable in case you need to pull machines out for maintenance
Honestly, this project took me maybe an hour, and it’s probably the most-used surface in my entire laundry setup.
3. Budget Laundry Room Shiplap Accent Wall
Okay, shiplap might be everywhere right now, but there’s a reason it’s popular—it looks amazing and costs almost nothing to install. I tackled my laundry room accent wall with basic pine boards from the big box store, and the whole thing cost me under $50.
Shiplap adds texture and visual interest to what’s usually a boring, forgotten space. In a tiny room, I recommend doing just one accent wall rather than all four. It creates a focal point without overwhelming the space.
Here’s my simple approach:
- Buy thin pine boards (I used 1×6)
- Cut to length
- Paint or stain BEFORE installing (trust me on this)
- Use a nickel as a spacer between boards for consistent gaps
- Nail gun makes this SO much faster, but a hammer works too
The best part? Shiplap is incredibly forgiving. Your cuts don’t need to be perfect, and minor gaps or imperfections just add to that rustic charm. I finished mine in a weekend, and every time I walk in there now, it feels less like a utility closet and more like an actual room.
4. Built-In Laundry Basket Pull-Out Station
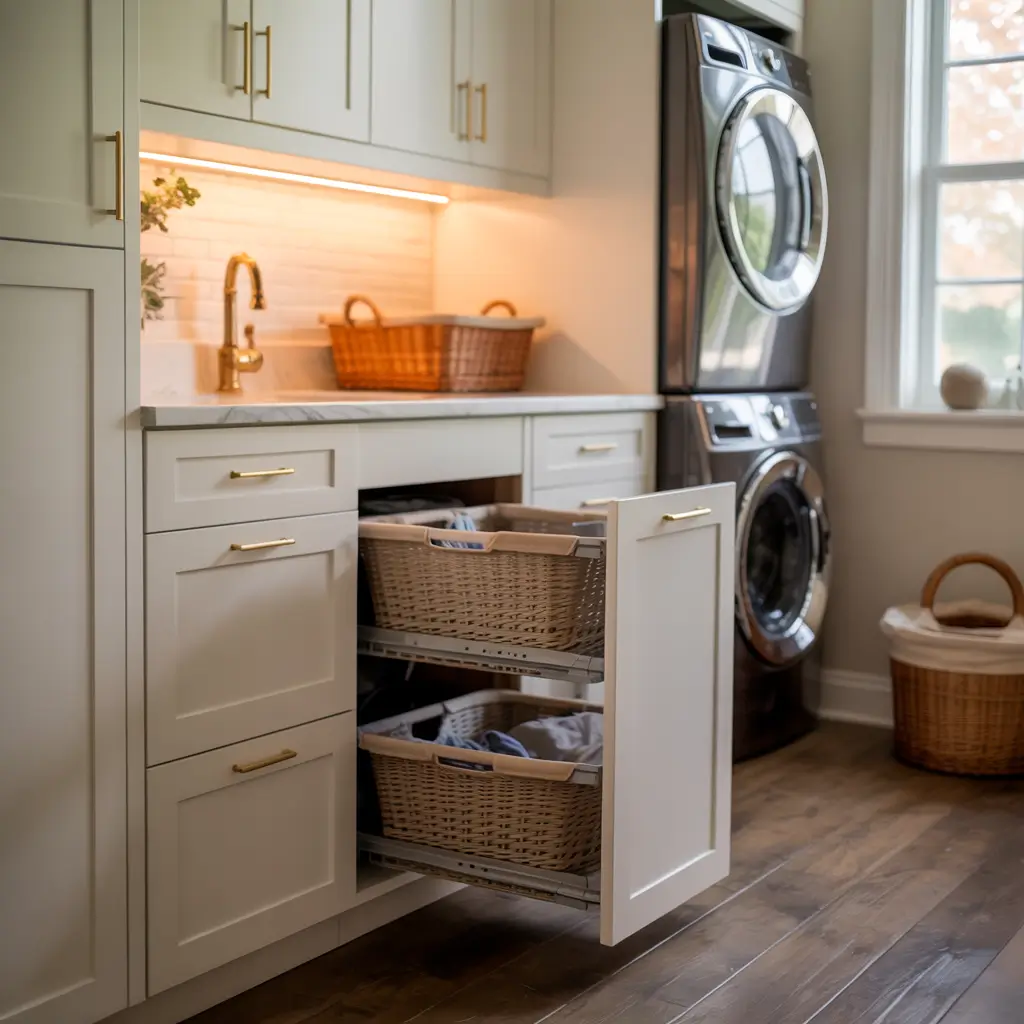
This one’s a game-changer for sorting laundry. Instead of having three ugly plastic baskets taking up floor space, I built a pull-out station with built-in hampers. It’s basically a shallow cabinet with slots for removable laundry bags or baskets.
I mounted mine in the narrow space beside my dryer—you know, that weird 10-inch gap that’s too small for anything useful? I built a simple wooden frame with drawer slides and added canvas sorting bags labeled “whites,” “darks,” and “delicates” (okay, that last one rarely gets used, but I’m pretending to be a responsible adult here).
Materials you’ll need:
- Plywood or 1×12 boards for the frame
- Heavy-duty drawer slides
- Canvas laundry bags or wire baskets
- Wood screws and brackets
The pull-out feature is key because it lets you access the baskets easily without bending down or moving stuff around. I’ve actually started sorting my laundry as I go, which is… weirdly satisfying? Who am I becoming?
5. DIY Wall-Mounted Drying Rack
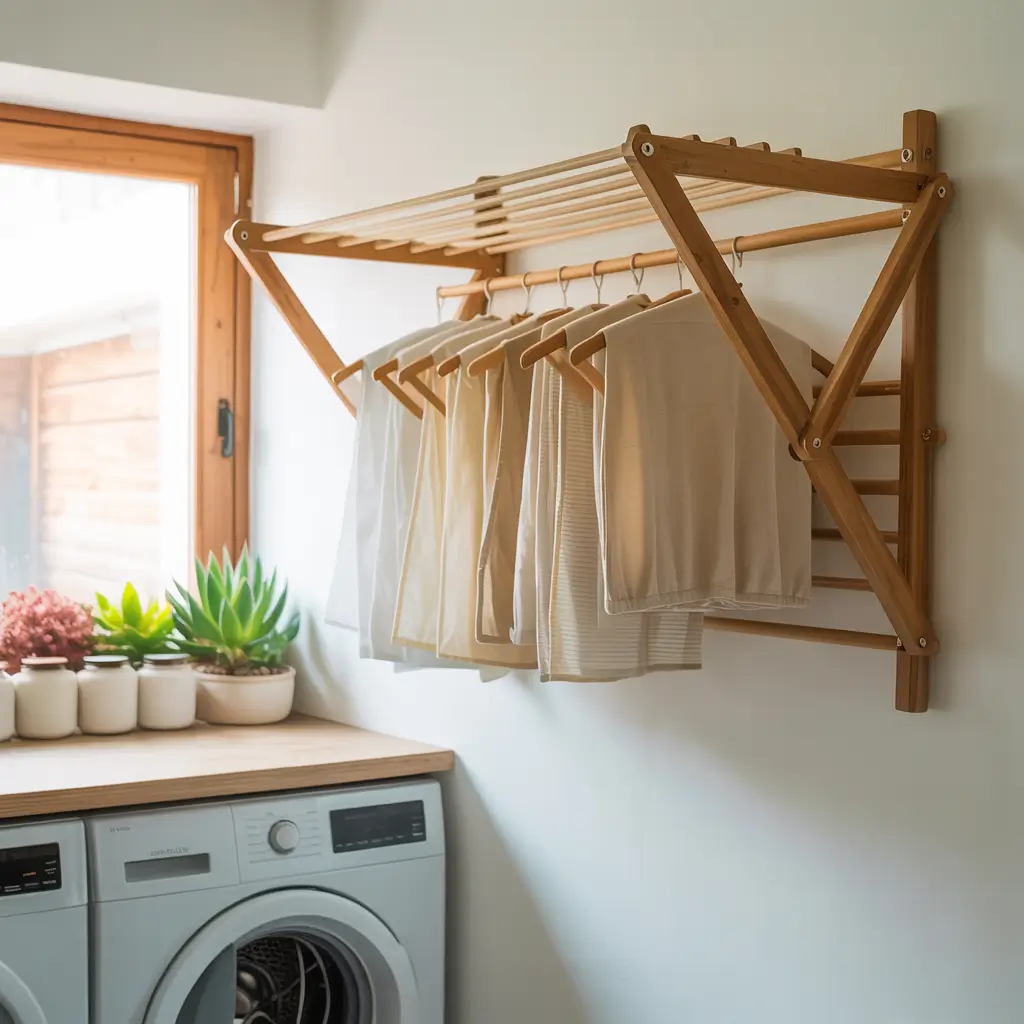
Not everything can go in the dryer, right? But those bulky drying racks eat up precious floor space. A wall-mounted drying rack that folds away when not in use is the perfect solution for tiny laundry rooms.
I installed one of those accordion-style racks on the wall beside my machines. When I need it, I pull it out and hang my delicates, sweaters, and anything else that shouldn’t face the dryer’s wrath. When I’m done, it folds flat against the wall and practically disappears.
You can build your own version using:
- Wooden dowels
- Hinges
- A mounting board
- A hook-and-eye latch to keep it closed
Or, IMO, you can buy one ready-made for like $30 and save yourself the engineering headache. Sometimes being a DIY enthusiast means knowing when to just buy the thing. The “DIY” part comes in when you install it properly—use wall anchors if you’re not hitting studs, because the last thing you need is wet clothes and a drying rack crashing down at midnight.
Also Read: 15 Stylish Blue Laundry Room Ideas for a Cozy Vibe
6. Farmhouse Style Open Shelf Storage
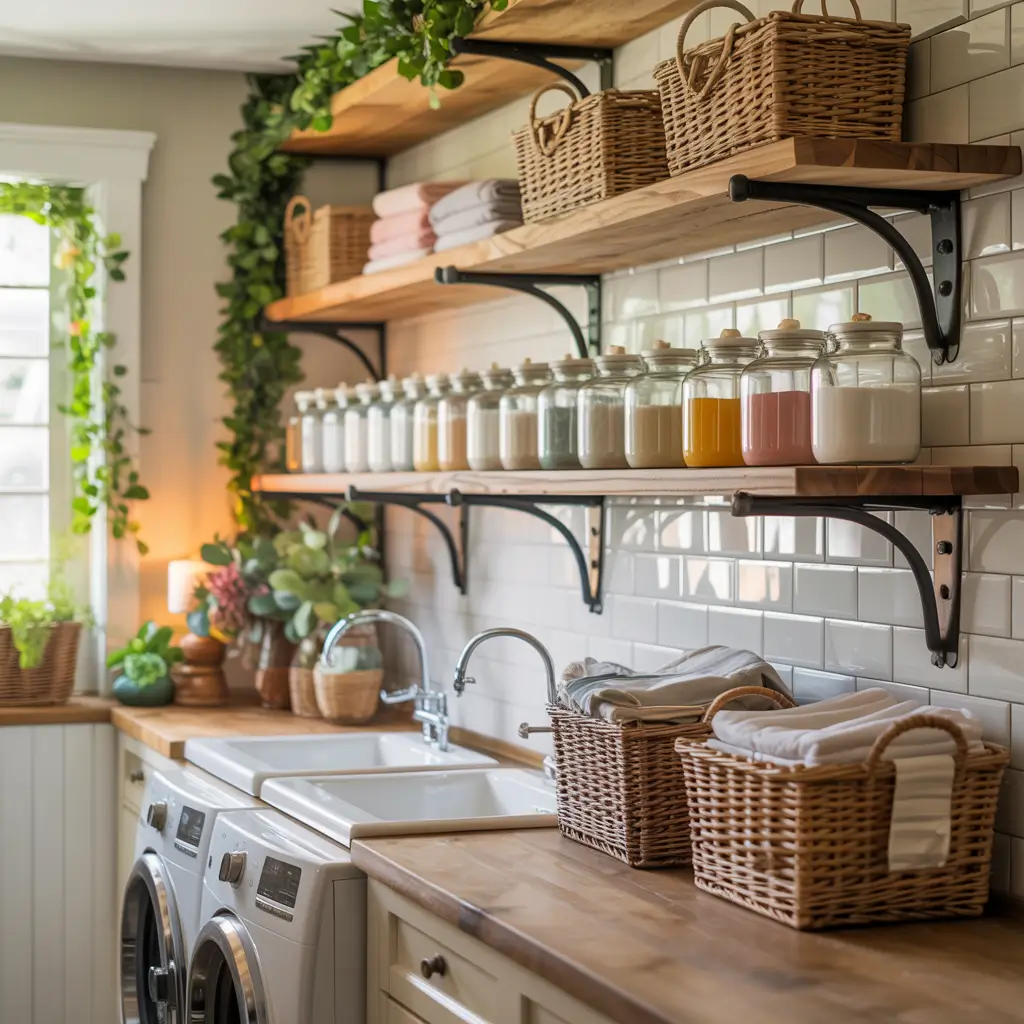
I’m slightly obsessed with the farmhouse aesthetic, so when I redid my laundry room, open shelving with those classic wooden brackets was non-negotiable. Open shelves make a small space feel bigger because they don’t have that visual weight of closed cabinets.
I built mine using reclaimed wood (okay, fine, it was just old fence boards I cleaned up) and black metal brackets. The contrast between rustic wood and matte black hardware? Chef’s kiss. I arranged my shelves at different heights to accommodate tall detergent bottles on the bottom and smaller items like dryer sheets and stain removers up top.
Styling tips that actually work:
- Use matching baskets or bins for smaller items (I found mine at the dollar store)
- Arrange things by color for a cohesive look
- Add a small plant because apparently, we’re putting plants everywhere now
- Keep frequently-used items at eye level
The key is making it look intentional rather than cluttered. I won’t lie—this requires some restraint. You can’t just shove everything up there and call it a day. But when you take five minutes to arrange things nicely, it genuinely elevates the whole space.
7. Peel and Stick Wallpaper Laundry Makeover
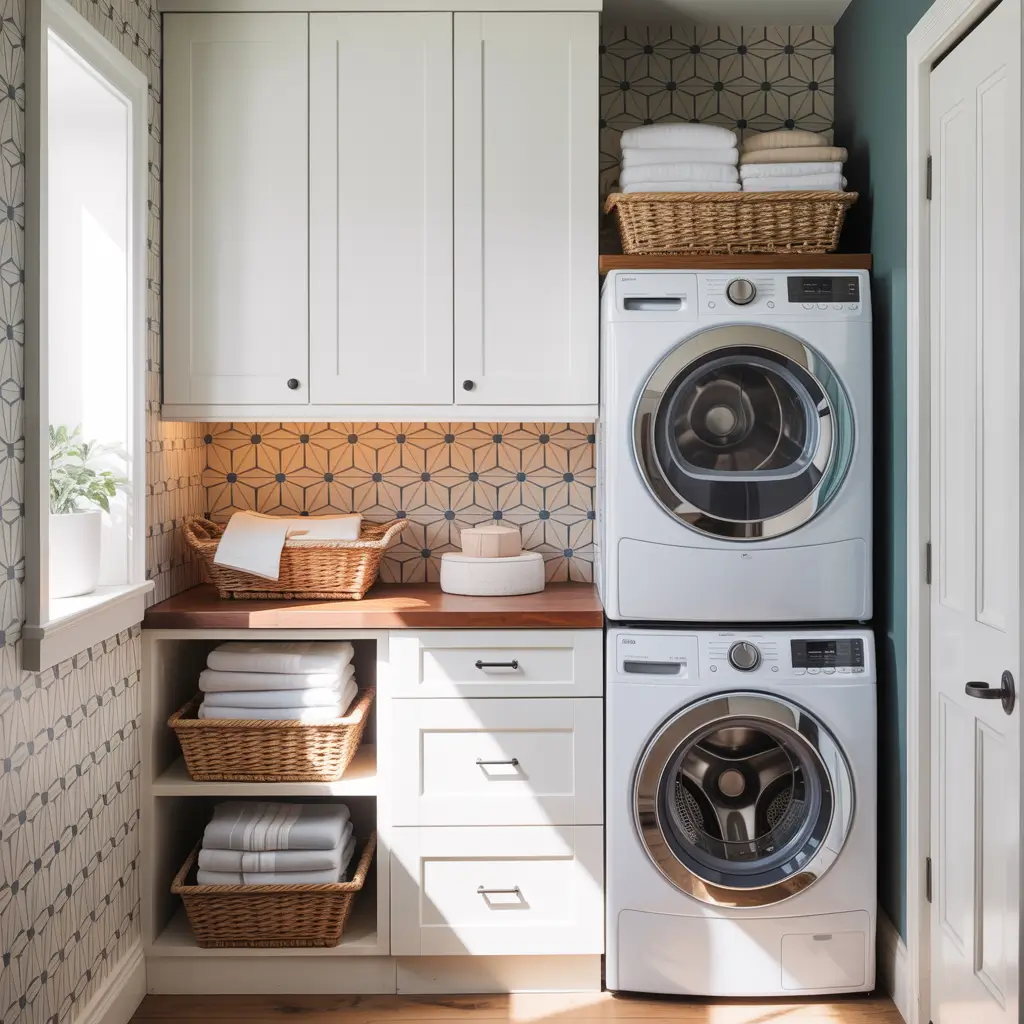
Can we talk about how amazing peel-and-stick wallpaper has become? Gone are the days of commitment-phobic renters having zero decorating options. I transformed my boring laundry closet with a fun geometric pattern, and the whole project took maybe two hours.
The beauty of this approach is it’s completely reversible. Renting? No problem. Commitment issues? I feel you. Just peel it off when you’re over it. I went with a bold pattern because, honestly, who says laundry rooms have to be boring?
Application tips I learned the hard way:
- Start from the top and work down
- Use a smoothing tool (or credit card) to avoid bubbles
- Overlap slightly at seams for a seamless look
- Don’t panic if it’s not perfect—you can literally peel it up and reposition
My only warning: make sure your walls are relatively smooth. I tried this in a space with textured walls once, and it looked… not great. But on smooth walls? It’s basically magic. Plus, whenever you do laundry, you get to stare at something pretty instead of dingy drywall. Small victories, people.
8. DIY Mudroom and Laundry Combo Setup
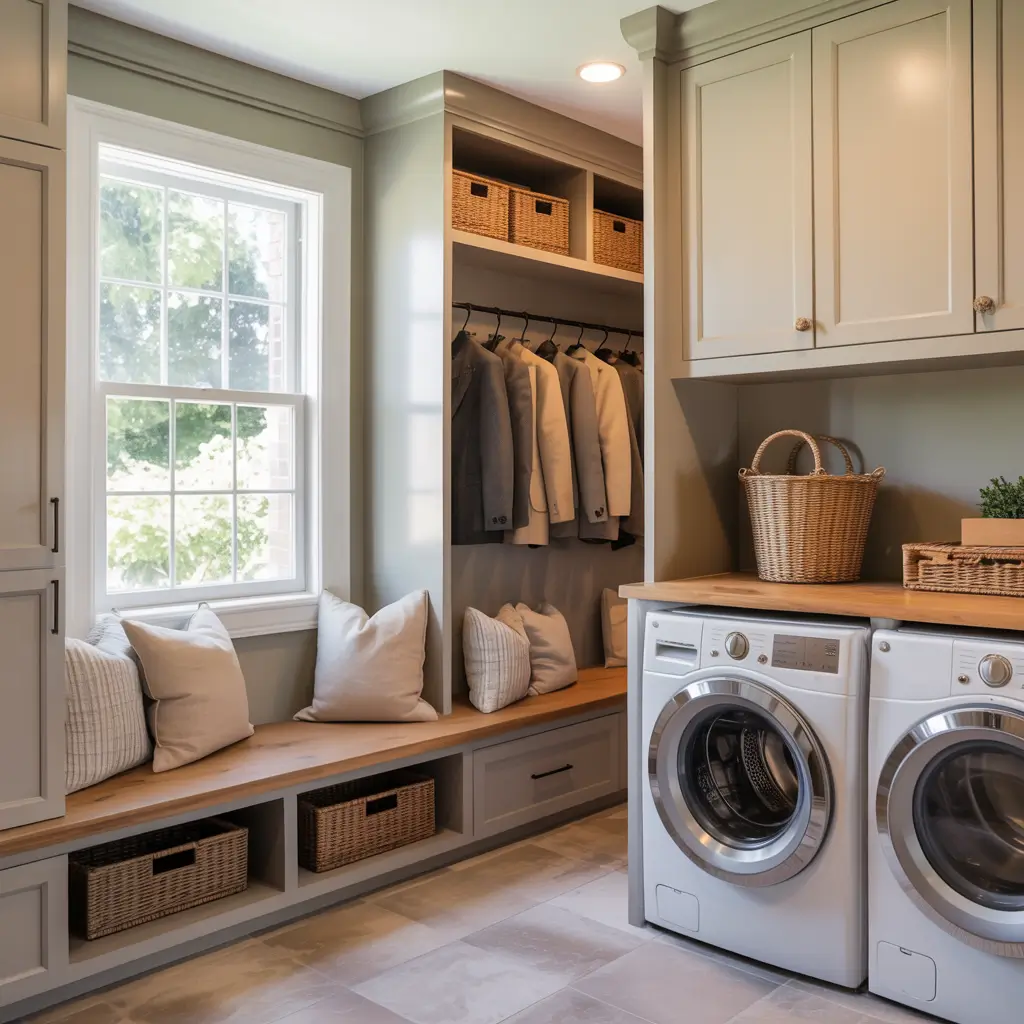
If your laundry room is near your entrance (or if you’re making it pull double duty), combining mudroom functionality with laundry features is brilliant. I added hooks for coats, a bench for shoes, and small cubbies for each family member.
This works especially well in tiny spaces because you’re maximizing every square inch. I built a simple bench with storage underneath using a basic frame, some plywood, and cushions I snagged on clearance. Above it, I mounted a row of sturdy hooks for jackets and bags.
Here’s what makes this combo work:
- Keep the bench low (around 18 inches) so it doesn’t overwhelm the space
- Use the wall above the bench for hooks or a pegboard
- Add a small basket under the bench for shoes
- Install a shelf above the hooks for hats and accessories
The trick is creating distinct zones. Your laundry stuff stays on one side, mudroom elements on the other. It feels way more organized than trying to cram everything together randomly. Plus, when you come in from a rainy day, you can immediately toss wet clothes in the washer instead of dripping through the house. Practical? Yes. Genius? Also yes.
9. Custom Laundry Room Folding Table
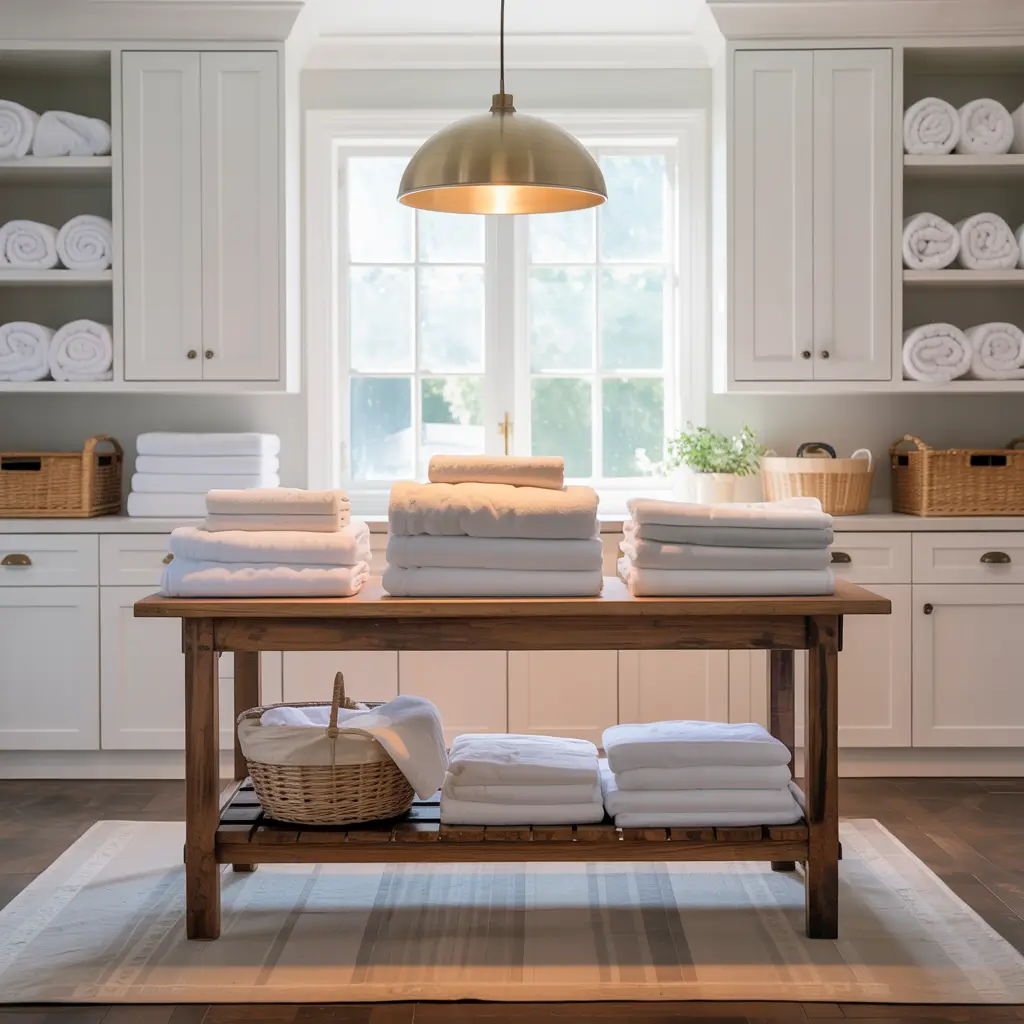
Remember how I mentioned that DIY countertop over the machines? Well, if you don’t have front-loaders or you need MORE folding space (I see you, families with actual children), a wall-mounted folding table is your new best friend.
I built mine to fold down from the wall when needed and collapse flat when I’m done. It’s basically a large board attached to the wall with heavy-duty hinges and a support leg that folds out. When I’m folding a mountain of laundry, I drop it down. When I’m done, it tucks away and doesn’t crowd the already-tiny room.
Build specs:
- Use a piece of plywood or solid wood board (mine is 24×36 inches)
- Attach piano hinges to one long edge
- Add a folding leg bracket for support
- Mount securely to wall studs (this is weight-bearing, so no shortcuts here)
I even added a small lip on the back edge to prevent things from sliding off when it’s in use. Now I can actually fold fitted sheets properly instead of balling them up in frustration. Well, theoretically I could fold them properly—I still ball them up, but at least now I have the space to do it right. :/
10. Vertical Cabinet Storage for Small Spaces
When you’re short on floor space, the only way to go is up. I installed tall, narrow cabinets that go all the way to the ceiling, and suddenly I had storage for all those random cleaning supplies, extra paper towels, and the vacuum attachments I never use but can’t throw away.
You can build these yourself with basic cabinet-building skills, or do what I did and hack some ready-to-assemble cabinets from IKEA. I bought the tallest, slimmest cabinets I could find, assembled them, and mounted them to the wall. The key is securing them properly—these babies need to be anchored to studs, especially if you’re stacking stuff inside.
Vertical storage advantages:
- Maximizes unused ceiling height
- Keeps cleaning supplies out of reach (important if you have kids or nosy pets)
- Creates a streamlined, built-in look
- Hides clutter behind closed doors
I added stick-on LED lights inside because the top shelves were basically a black hole. Now I can actually see what I’m grabbing instead of blindly reaching for what I hope is fabric softener.
11. Hidden Ironing Board Cabinet DIY
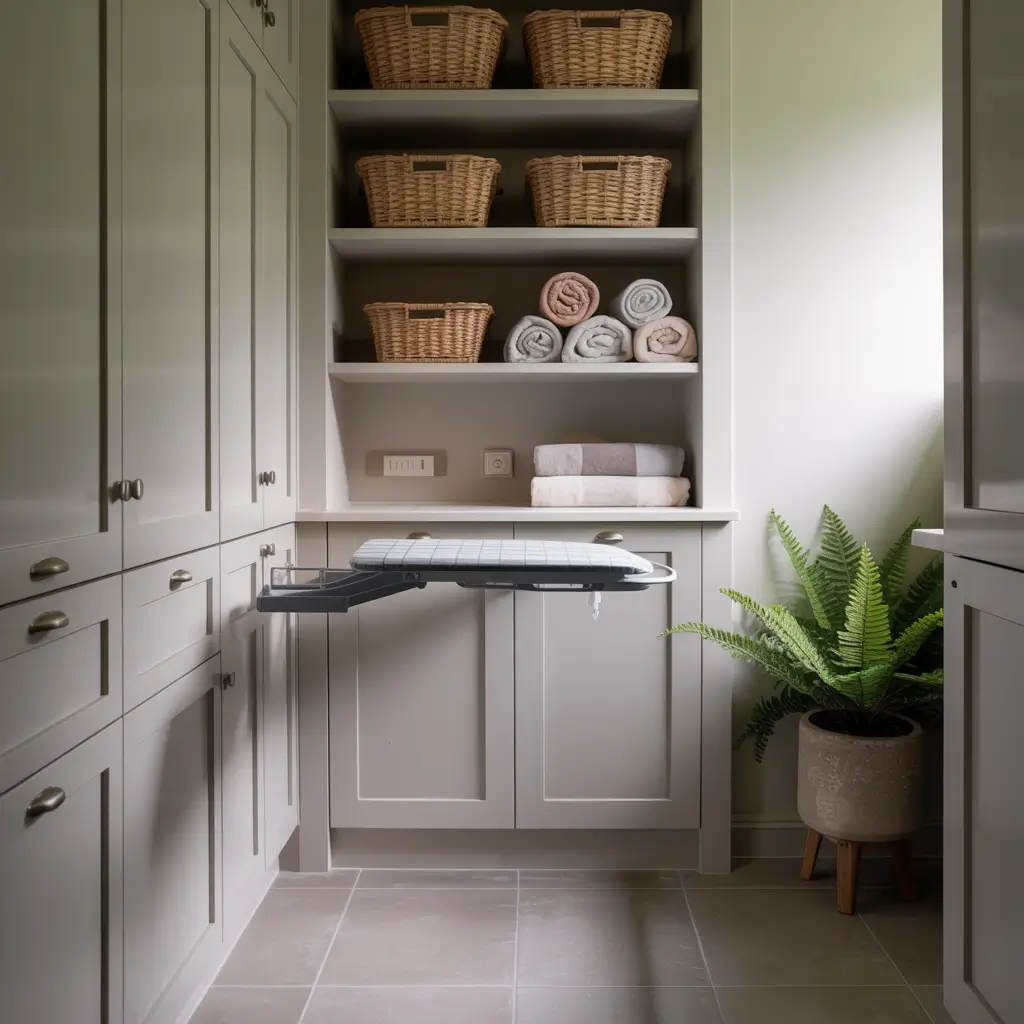
Ironing boards are awkward. They don’t fit anywhere nice, they fall over, and let’s be honest—most of us just throw clothes in the dryer for “wrinkle release” anyway. But when you DO need one, a hidden ironing board cabinet is ridiculously clever.
I built mine into the back of my laundry room door using a slim cabinet that holds a fold-down ironing board. When I need to iron something (rare), I open the cabinet, pull down the board, and voila. When I’m done, everything tucks away and you’d never know it was there.
Components you’ll need:
- A narrow wall-mounted cabinet (6-8 inches deep)
- Fold-down hardware (you can buy kits for this)
- An ironing board that fits the cabinet dimensions
- Door hinges and a magnetic catch
This project requires some precision cutting and hardware installation, but the end result is SO satisfying. Every time someone asks where I keep my ironing board, I dramatically open the secret cabinet like I’m revealing a hidden speakeasy. It never gets old.
12. Sliding Barn Door Laundry Closet Upgrade
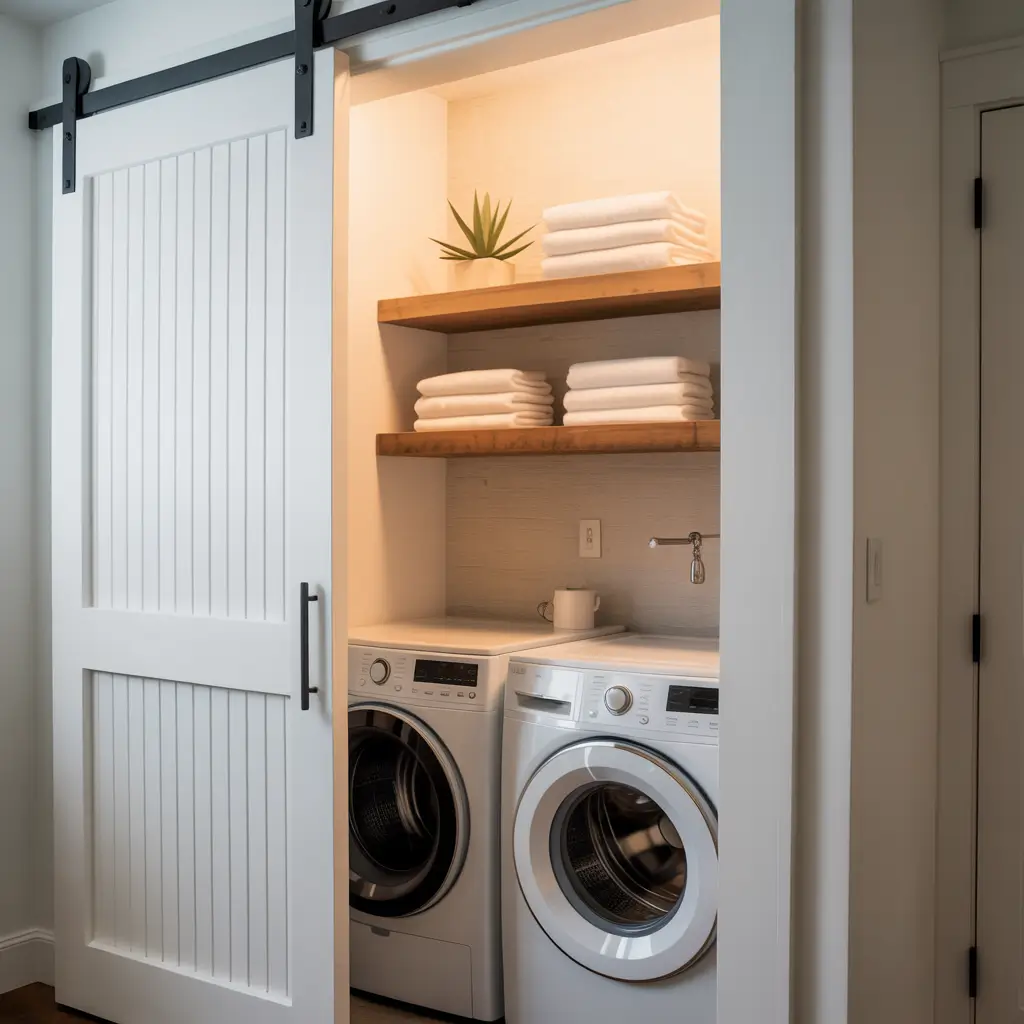
Standard doors swing out and take up valuable space. Sliding barn doors, though? They’re functional AND they look amazing. I replaced my old hinged laundry closet door with a sliding barn door, and it immediately made the space feel more intentional and less “forgotten utility closet.”
You can buy barn door hardware kits that include the track, rollers, and mounting brackets. Then you just need the door itself—I made mine from pine boards arranged vertically and held together with horizontal bracing on the back. Stained it dark walnut, and suddenly my laundry closet became a design feature.
Installation tips:
- Make sure your track is mounted to studs or use heavy-duty anchors
- The door should overlap the opening by a few inches on each side
- Add a floor guide to prevent swinging
- Consider a soft-close mechanism if you hate door-slamming sounds
The best part? When you’re doing laundry, you can slide the door open and it just sits flat against the wall instead of sticking out into the hallway. It’s one of those upgrades that’s equal parts pretty and practical.
Also Read: 15 Modern Pantry Laundry Room Combo Organization Ideas
13. DIY Utility Sink Cabinet Makeover
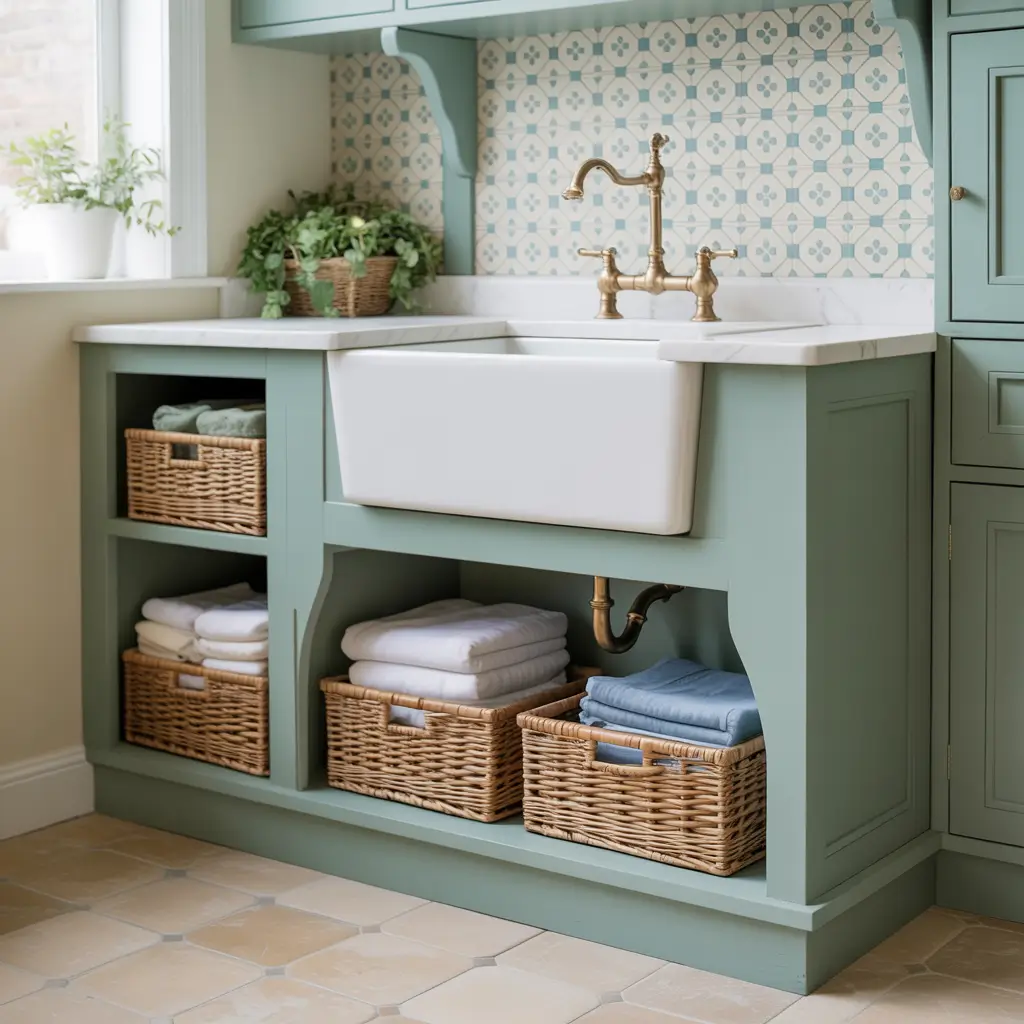
If you’re lucky enough to have a utility sink in your laundry room, you probably also have a bunch of wasted space underneath it. I built a custom cabinet around mine that hides all the plumbing while creating storage for cleaning supplies.
This project is a bit more involved because you’re working around existing plumbing, but it’s totally doable. I used basic cabinet-grade plywood, cut access panels for the pipes, and added a door on the front. Inside, I installed a pull-out drawer organizer for all those spray bottles, scrub brushes, and mysterious cleaning products I bought once and never used again.
Key considerations:
- Leave adequate clearance for plumbing access
- Use moisture-resistant materials (laundry rooms get humid)
- Add ventilation holes to prevent musty smells
- Install soft-close hinges because we’re fancy like that
I painted mine the same color as my walls so it blends in rather than looking like a big bulky cabinet. The sink area went from “industrial nightmare” to “functional and kind of cute,” which is honestly the best outcome I could hope for in a laundry room.
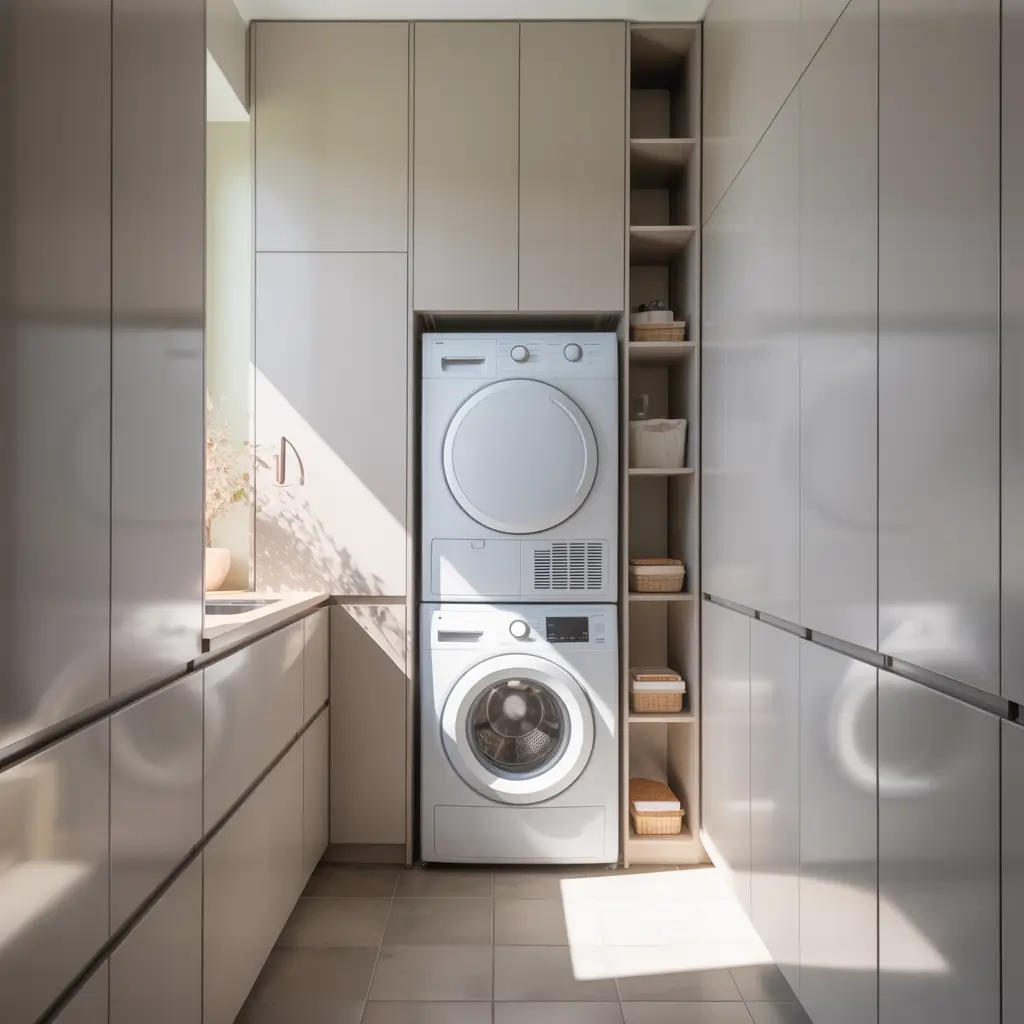
14. Stackable Washer Dryer Storage Tower
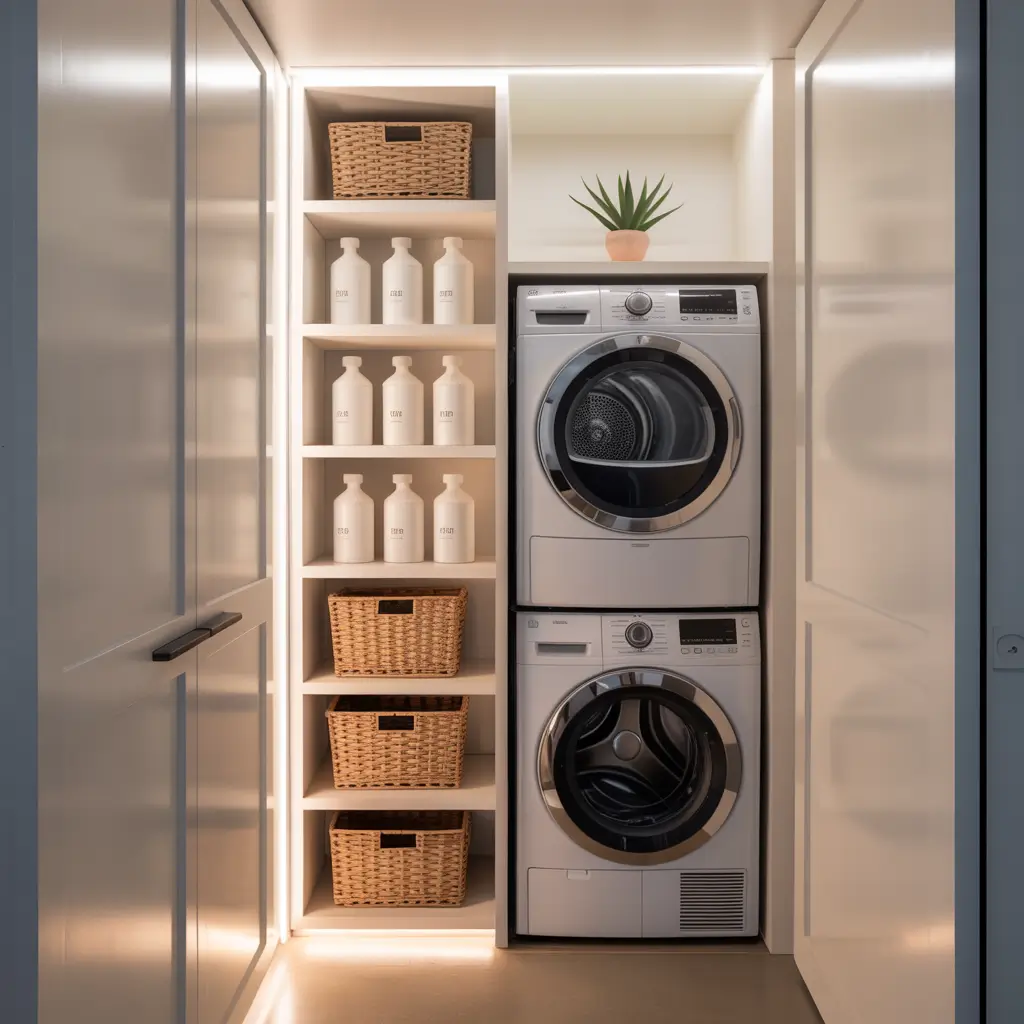
Got a stackable washer-dryer setup? That narrow space beside it is prime real estate. I built a tall, rolling storage tower that fits in the gap and holds all my laundry essentials at arm’s reach.
This is basically a tall, narrow shelving unit on casters. I used 1×12 boards for the sides and shelves, added some decorative trim to make it look less “builder-grade,” and painted it to match my room. The wheels on the bottom are crucial because I can roll it out for easy access and roll it back into place when I’m done.
What I store in mine:
- Detergent and fabric softener (top shelf)
- Dryer sheets and wool balls
- Stain removers and spot treatments
- Extra towels for clean-up
- That random collection of lost socks waiting to be reunited
The beauty of this tower is how customizable it is. You can adjust shelf heights to fit your specific products, add hooks on the sides for small tools, or even incorporate small baskets for extra organization. Plus, when you build it yourself, you can make it the exact dimensions to fit your space perfectly.
15. Over-the-Door Laundry Organization System
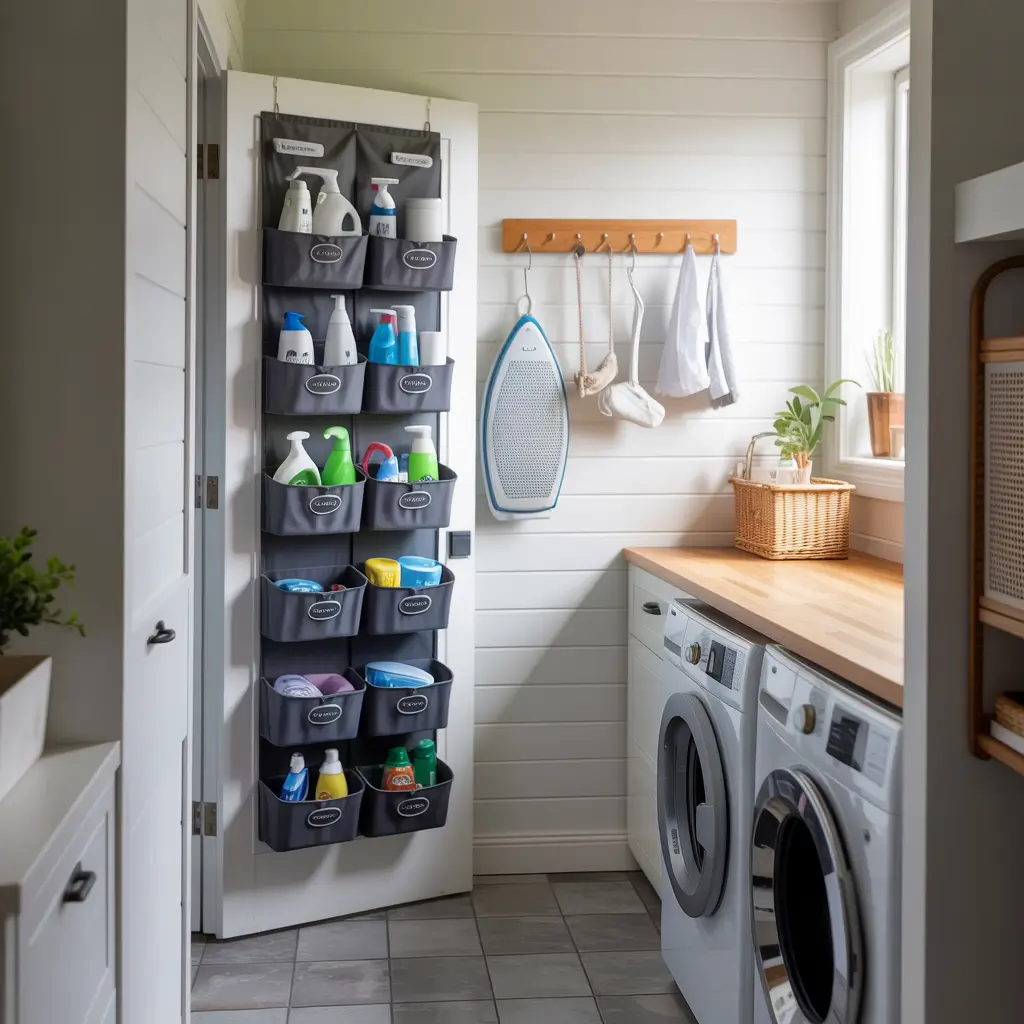
Last but definitely not least, the back of your laundry room door is valuable real estate you’re probably ignoring. I installed an over-the-door organizer with pockets and hooks, and it’s become my catch-all for all the small stuff that used to just float around creating chaos.
You can buy ready-made over-the-door organizers, but I made mine custom using a piece of pegboard and various hooks and baskets. I secured it to the door with sturdy hangers that fit over the top, and boom—instant organization for pennies.
What I hang there:
- Lint rollers and fabric shavers
- Sewing kit for quick repairs
- Stain treatment chart (yes, I printed one and laminated it)
- Mesh bags for delicates
- Dryer vent cleaning brush
- Extra clothespins and hangers
The key is not overloading the door so it won’t close properly. I learned this the hard way when I got a bit overzealous with my organizing. Start with the essentials and add from there. You want helpful organization, not a door that won’t latch because there’s too much stuff hanging on it.
Bringing It All Together
Look, transforming a tiny laundry room doesn’t require a massive renovation budget or professional contractor skills. What it DOES require is some creativity, a willingness to work with what you’ve got, and maybe a few YouTube tutorials when you’re not quite sure how that drying rack hardware is supposed to work.
I’ve tried all these ideas in various laundry spaces over the years, and they genuinely work for small rooms. The secret is vertical thinking—when you can’t go out, go up. Use every wall, every door, every awkward gap between appliances. Layer your storage solutions instead of trying to find one perfect fix.
And here’s the thing nobody tells you: a functional, organized laundry room actually makes doing laundry less terrible. I know, shocking. But when everything has a place, when you have space to fold properly, when the room doesn’t feel like a cramped disaster zone—you might actually procrastinate less on laundry day. Maybe.
Start with one or two projects that solve your biggest pain points. Maybe you desperately need folding space, so you tackle the countertop project first. Or maybe you’re drowning in cleaning supplies and that vertical cabinet storage is calling your name. You don’t have to do everything at once.
The most important thing? Make the space work for YOUR life. If you never iron, skip the ironing board cabinet and use that space for something else. If you’ve got kids tracking mud through your house daily, prioritize that mudroom combo setup. These ideas are meant to inspire you, not stress you out with an overwhelming to-do list.
So grab your drill, measure twice (seriously, always measure twice), and start transforming that tiny laundry space into something you don’t actively hate. Your future self—the one who’s not tripping over laundry baskets or losing detergent bottles in the abyss—will thank you.