Sewing Studio Layout Ideas That Actually Make Sewing Easier
- Home Organization Ideas
 Alina
Alina- 0
- 14 minutes read


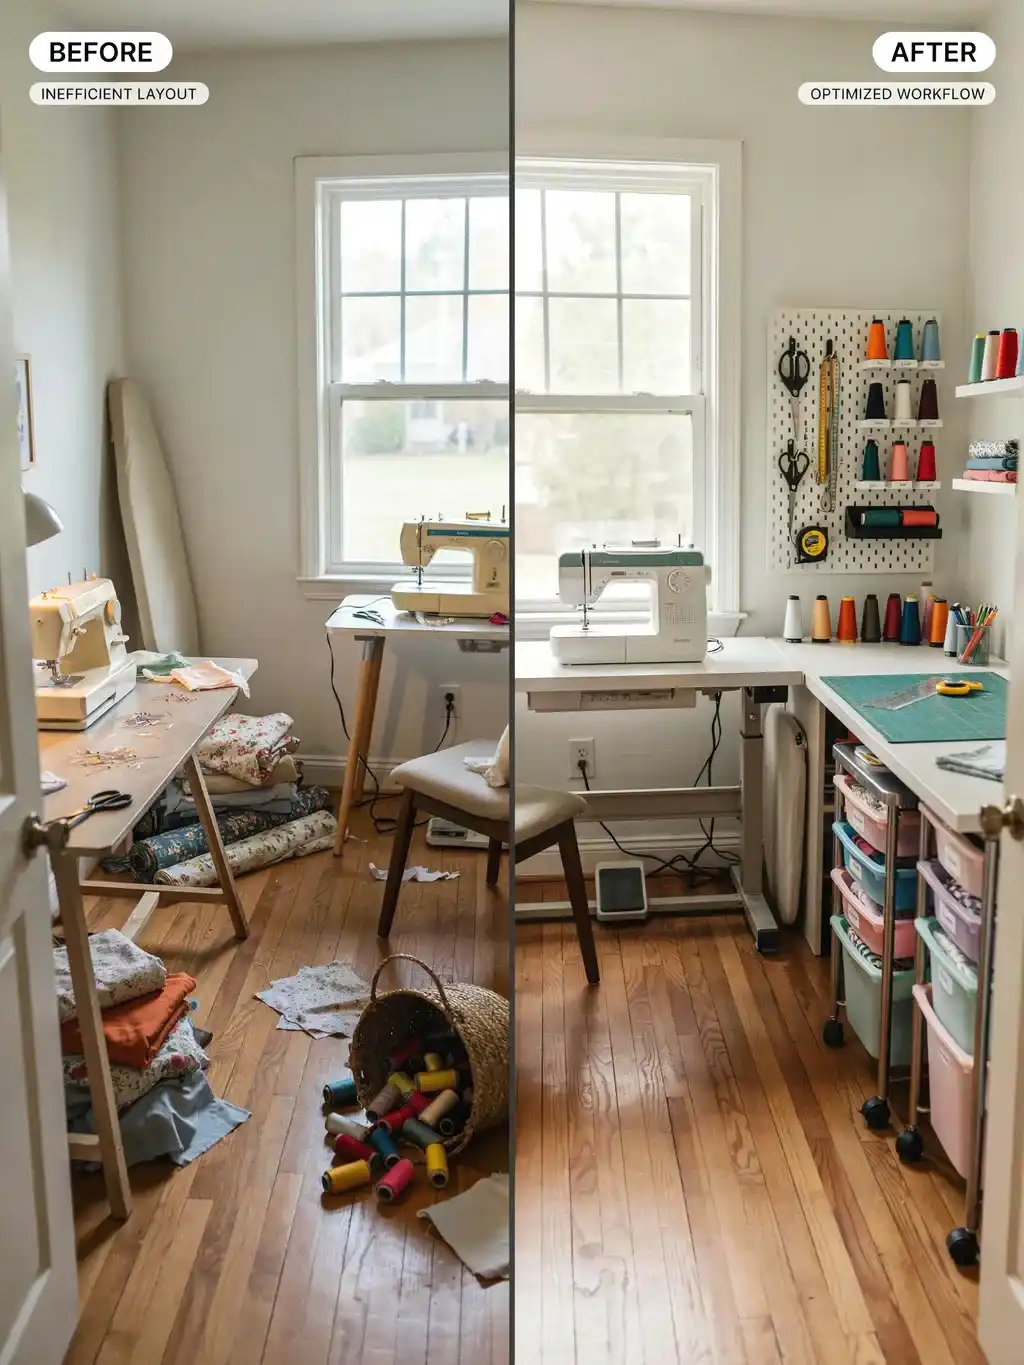
I laid out my first sewing studio entirely by where things looked nice. The machine went under the prettiest window, the cutting table sat against the wall with the good light, and the ironing board lived in the corner because that’s where corners are for. It looked great. It also meant that to finish a single seam I walked a little triangle of about fifteen steps, machine to iron to cutting table and back, hundreds of times a project. My layout was actively making me slower.
That’s the thing nobody tells you about a sewing studio: the layout matters more than anything you put in it. A cheap machine in a smart layout beats a dream setup arranged badly. So here’s what I’ve learned about laying out a sewing space that works with you instead of against you, plus the mistakes worth avoiding.
Plan around the sewing triangle
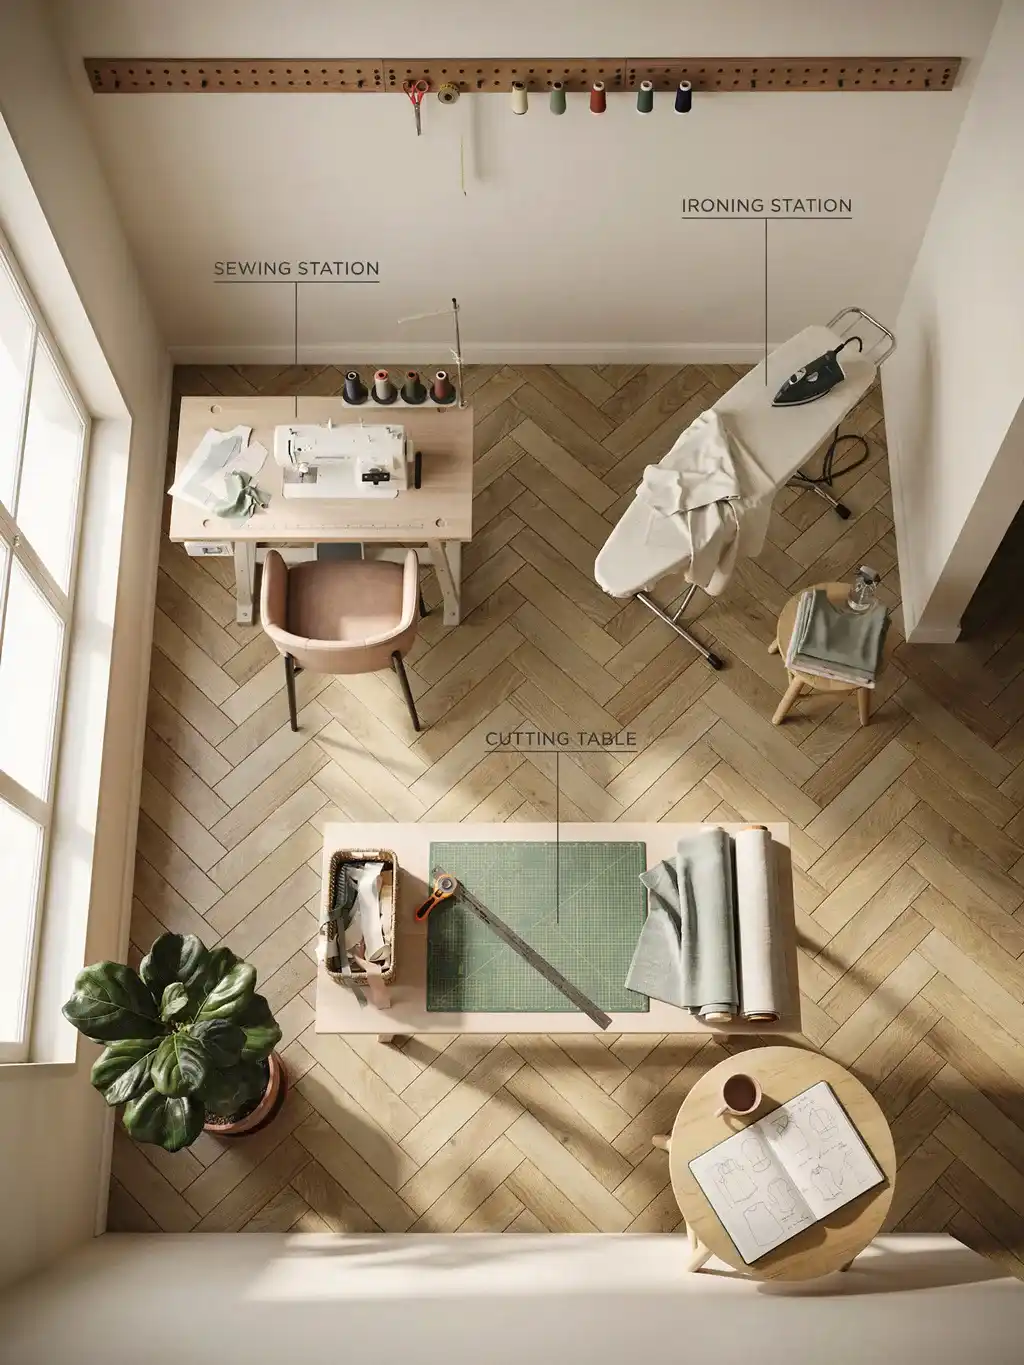
Borrow the idea from kitchen design. In a kitchen it’s the work triangle between hob, sink, and fridge. In a sewing studio it’s the triangle between your machine, your cutting surface, and your ironing station, because those are the three stations you bounce between constantly.
Keep those three close enough that you can move between them in a step or two, ideally without sitting down and standing up repeatedly. When I rearranged so my iron was within arm’s reach of my machine, my whole workflow sped up and my back stopped aching from the constant up-and-down. Map your triangle first, then fit everything else around it. Get this one thing right and the rest forgives a lot.
Put the cutting table in the middle if you can
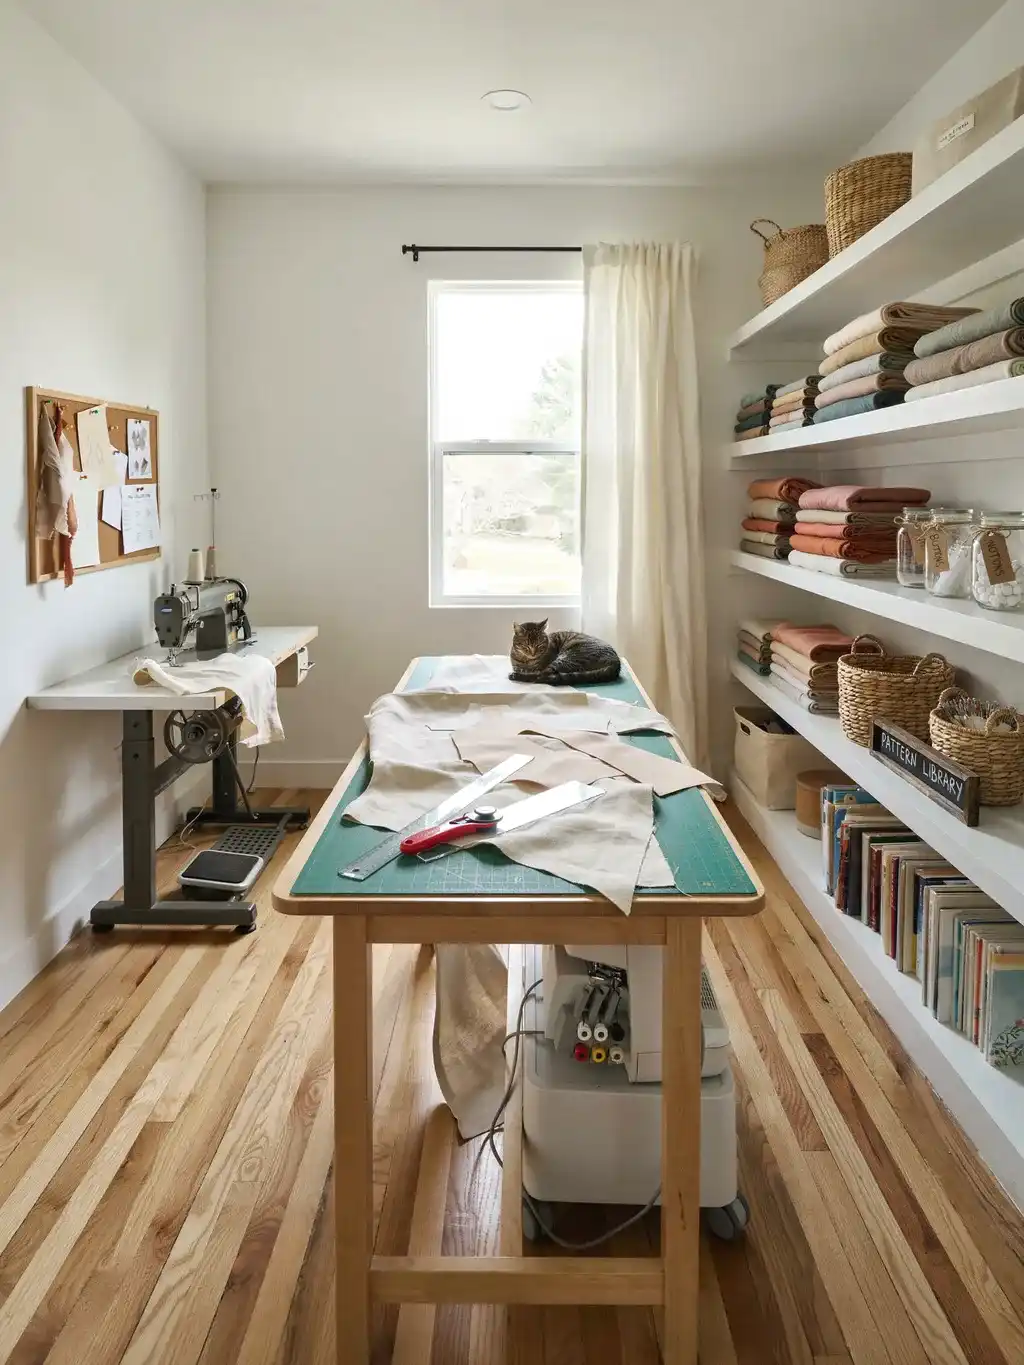
The instinct is to push every surface against a wall, but the cutting table is the one piece that earns a spot in the centre of the room. You need to walk all the way around it to cut large pieces and lay out patterns, and pinned against a wall you lose access to two sides.
A central island, even a cheap one, changes how a studio works. I built mine from two flat-pack cabinets with a board on top, counter height so I’m not bending over, and being able to circle it completely made cutting twice as fast. The cabinets underneath swallow storage too. If your room is big enough for one freestanding piece, make it the cutting table.
Raise your cutting surface to the right height
While we’re on cutting tables: standard tables are too low and they wreck your back. A dining-height surface forces you to hunch over every cut. Counter or bar height, around 90cm, lets you cut standing with a straight spine.
The cheap fix if you already have a low table is bed risers or a set of sturdy blocks under the legs. I lifted mine and the difference to my back was immediate. You spend more time bent over a cutting table than you think, so the height of it is not a small detail. Stand at your current table and notice whether you’re stooping, because if you are, every cutting session is quietly costing you.
Get the machine into good light without chasing the window
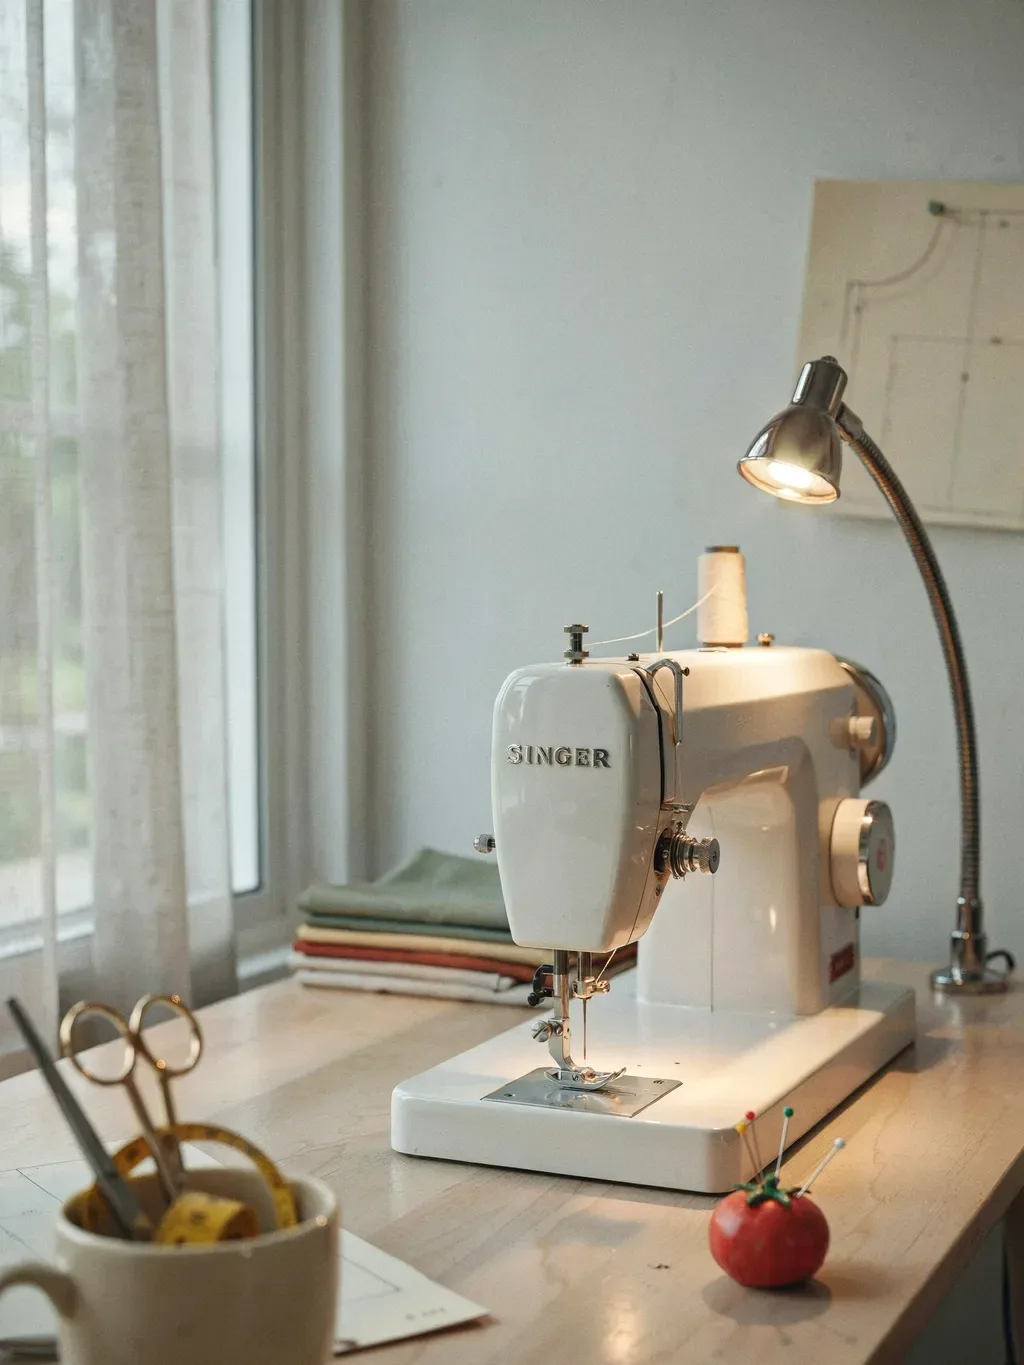
Putting the machine under the window sounds lovely until you realise the light comes from behind you and your own shadow falls right over the needle. Side light is what you actually want, daylight coming across the work rather than from behind it.
Position the machine so a window is to the side, and back it up with a dedicated task lamp regardless, because you’ll often sew when the daylight’s gone. I keep a daylight-balanced lamp to the front-left of my machine so nothing shadows the needle. The view out the window is nice, but it’s the side light and the lamp that actually let you see your stitches. Function wins this one over the pretty view.
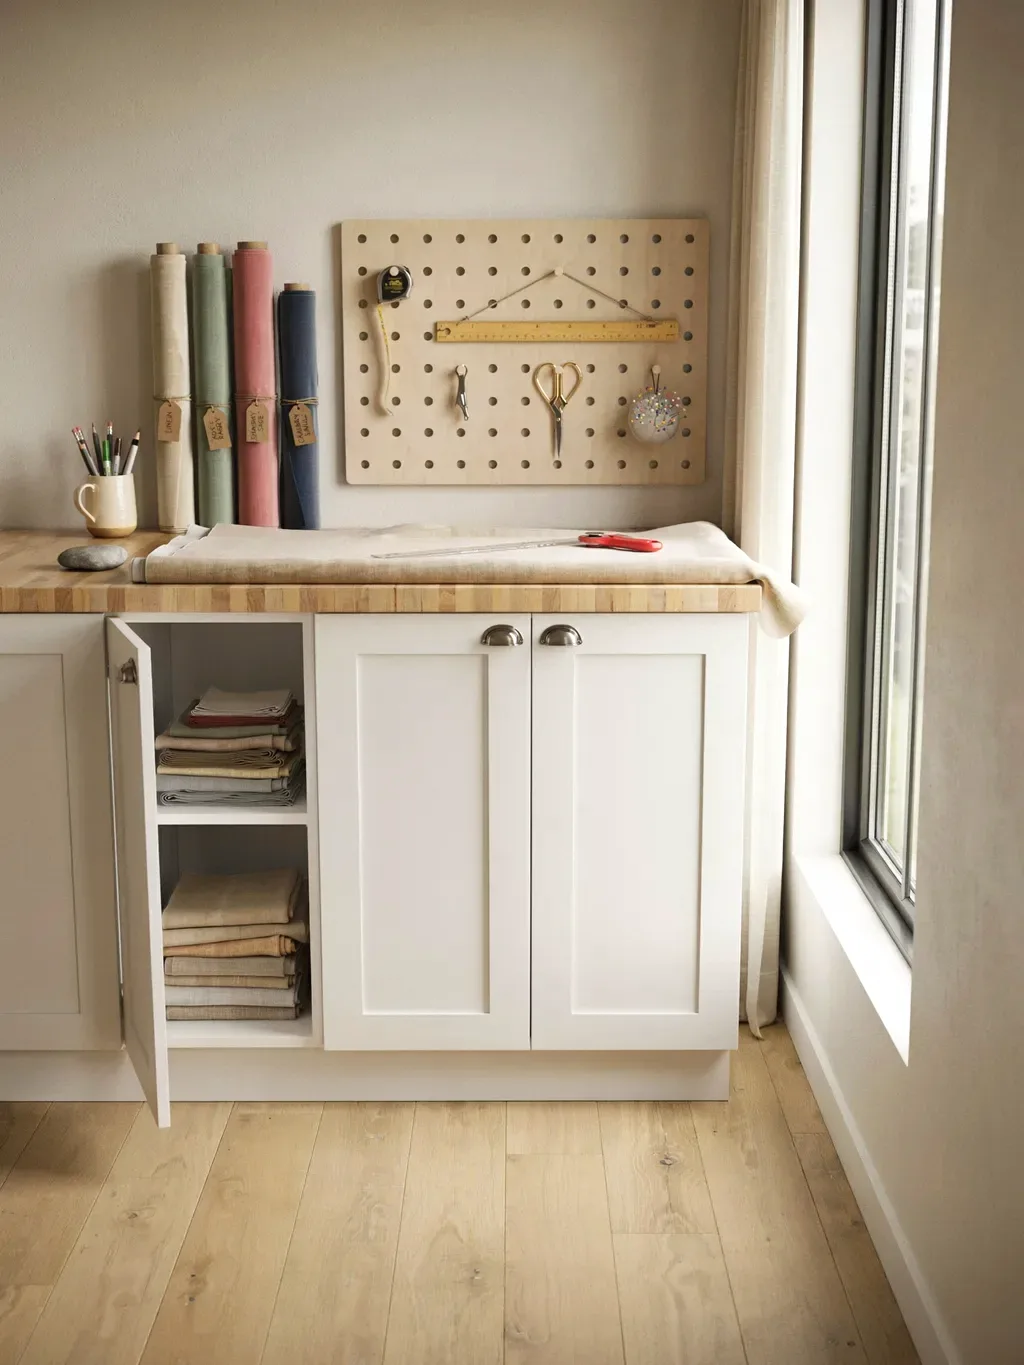
Build storage up the walls, keep the floor clear
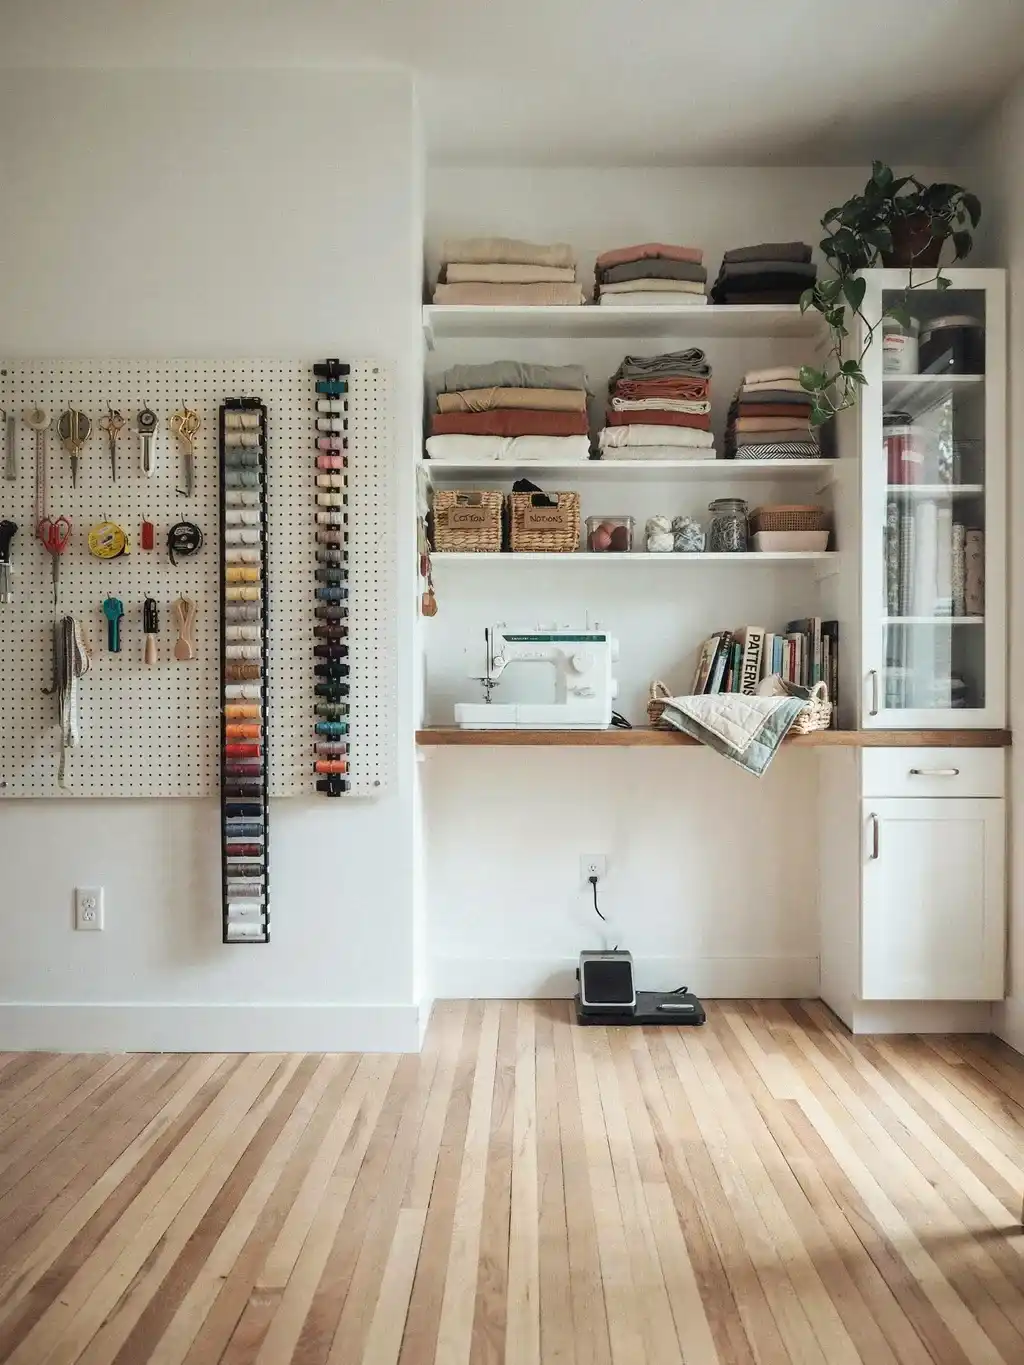
Floor space in a studio is for working, not for stacking boxes. The more you can push storage up onto the walls, the more room you have to actually move, cut, and lay things out. Shelves, pegboards, wall-mounted thread racks, and tall narrow cabinets all buy you floor by using height.
I cleared a whole stack of plastic tubs off the floor by putting up wall shelving and a pegboard, and the room instantly felt twice the size. Clear floor is what lets you wheel a chair around, walk around the cutting table, and lay fabric out without tripping. Treat the walls as your main storage and the floor as workspace, never the other way round.
Keep your most-used kit within arm’s reach of the machine
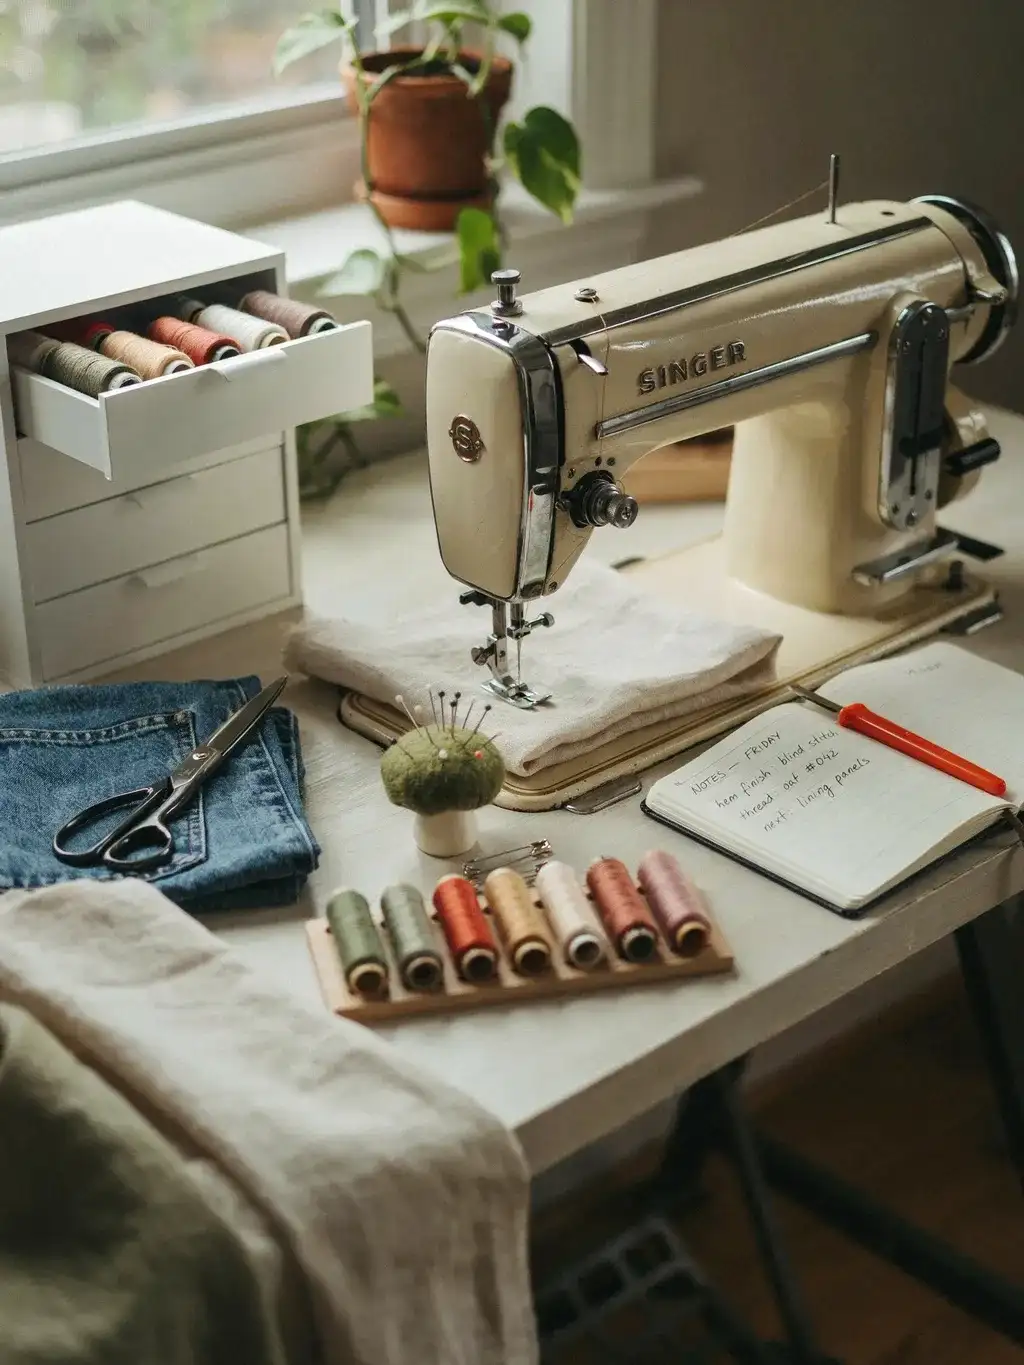
Think about what you reach for every few minutes while sewing: seam ripper, scissors, pins, the threads in current use. Those want to live right at the machine, in a drawer or on a small rack you can touch without standing. Everything you use rarely can go further away or up high.
This is the single biggest time-saver after the triangle. I added a small drawer unit on castors right beside my chair for the constant-use bits, and stopped getting up every two minutes. Arrange your storage by frequency of use, not by category. The stuff you touch hourly gets the prime spot; the stuff you touch monthly can be across the room.
Leave room to actually move
It’s tempting to fill every inch, but a studio crammed wall to wall is miserable to work in. You need clearance to push your chair back from the machine, to walk around the cutting table, to swing a length of fabric without knocking something over. Leave genuine gaps.
Aim for at least a metre of clear space around the cutting table and behind your sewing chair. When I first set up I packed in too much furniture and spent every session squeezing past things; pulling a unit out entirely made the room far nicer to be in. An emptier studio you can move freely in beats a fuller one you have to shuffle around sideways.
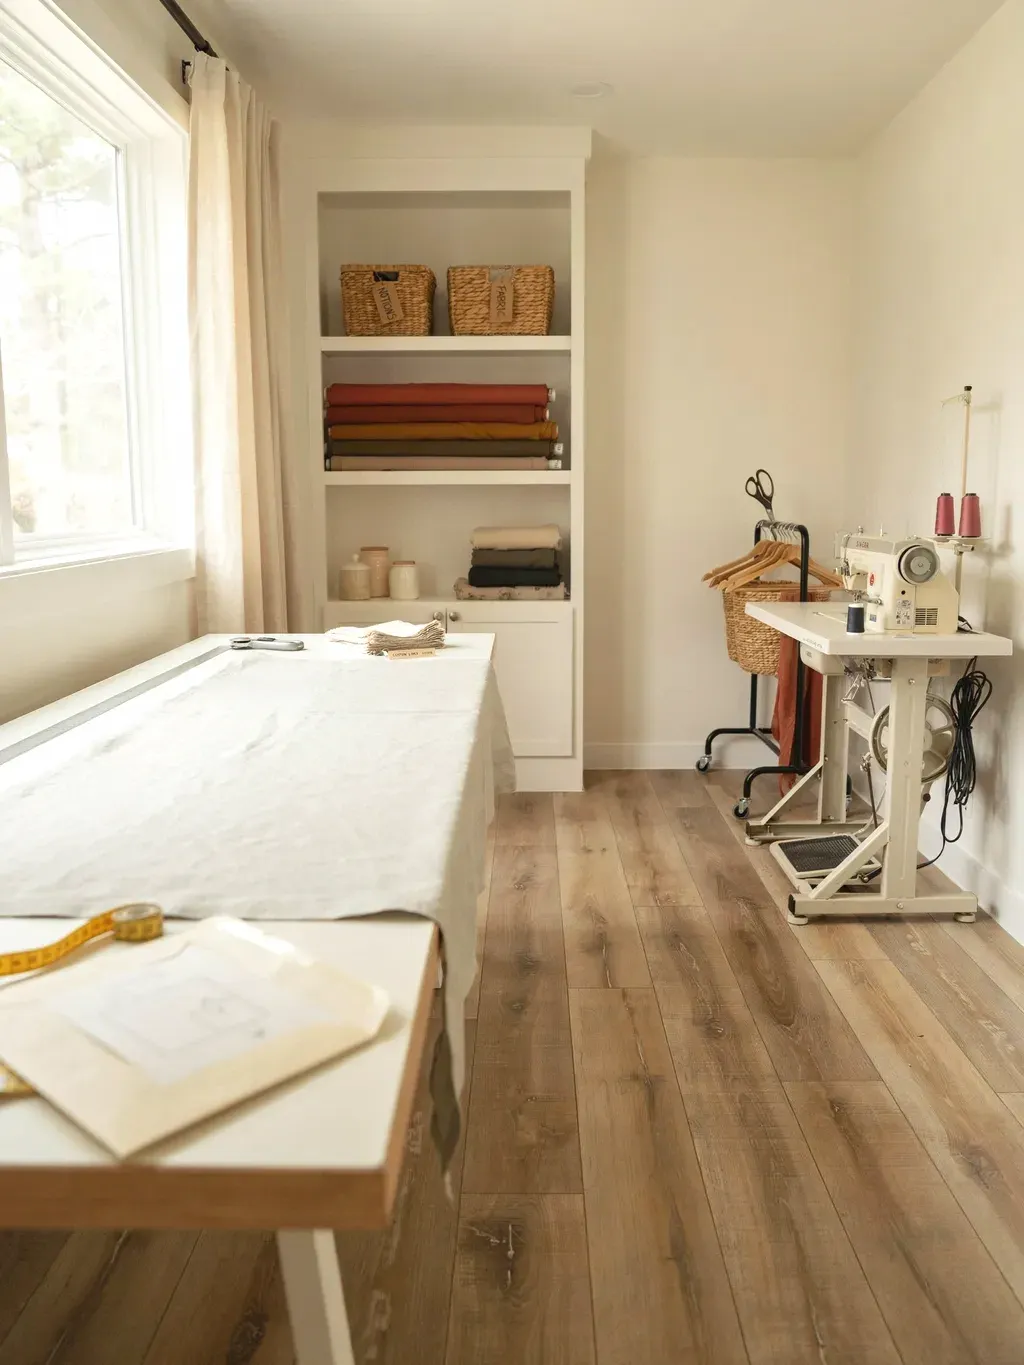
Match the layout to the room you actually have
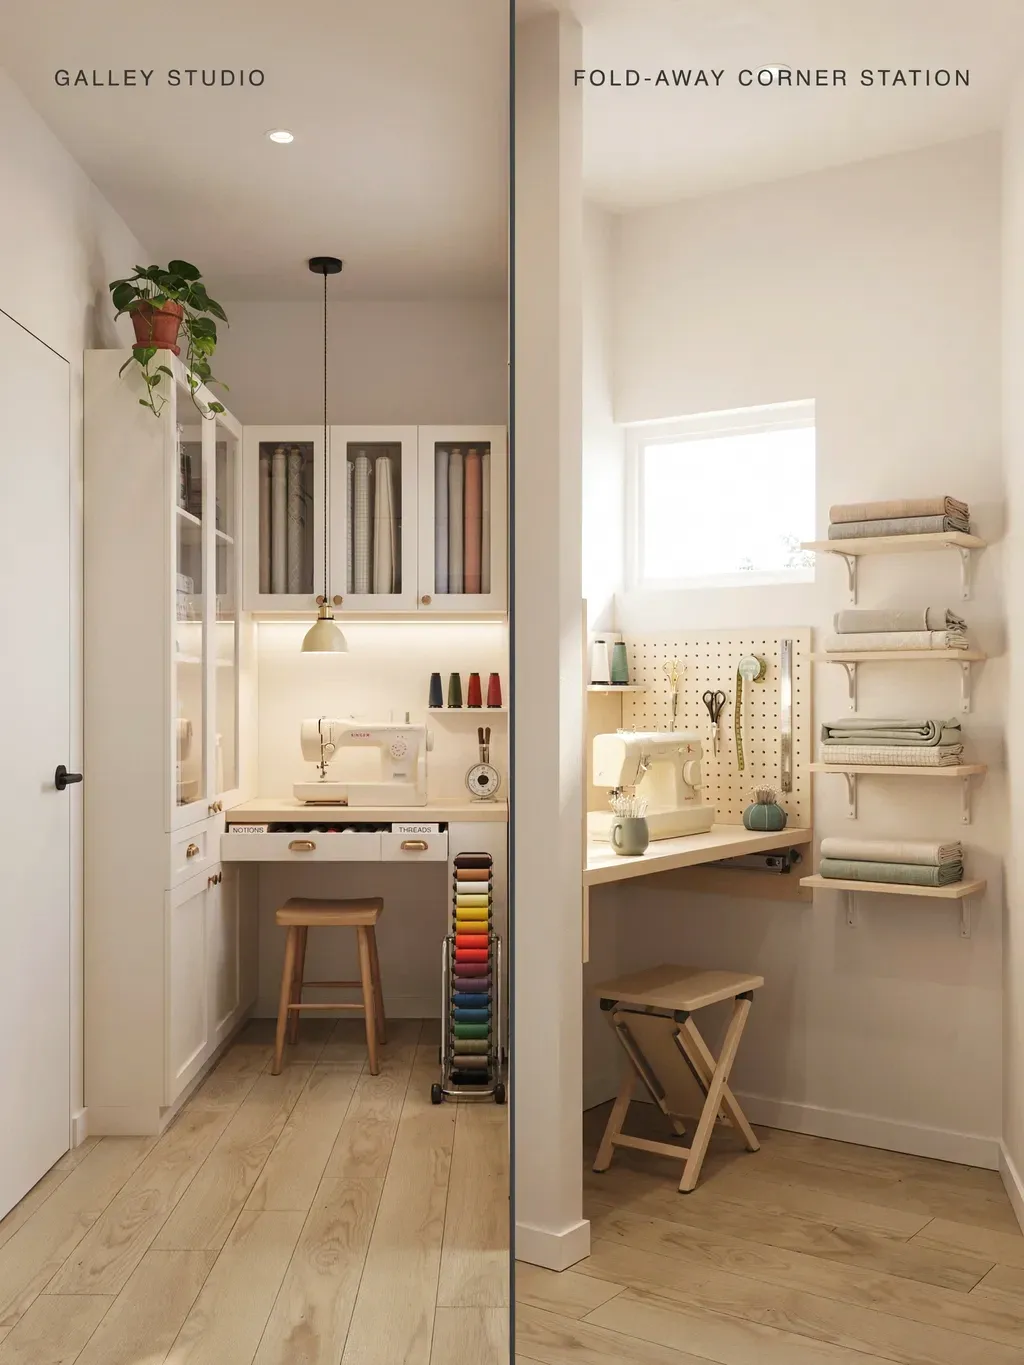
Not everyone has a dedicated room, and the best layout depends on your space. A long narrow room suits a galley layout, stations along one wall with the cutting table off the other end. A square room suits the central-island approach. A shared or temporary space suits a fold-away setup where the machine and surfaces pack down.
Be honest about which you’ve got. I spent ages trying to force an island layout into a narrow box room before accepting a galley run worked far better there. If you’re squeezing the studio into a spare bedroom or a corner of another room, plan vertically and consider a drop-leaf or fold-down surface so it disappears when you’re done. The right layout is the one that fits your actual room, not the one from the photo.
A couple of things to skip
Skip backing the ironing board into a far corner. It feels like the natural home for it, but the iron is part of your core triangle and stranding it across the room means endless walking. Keep a small pressing surface right next to the machine, even just a wool pressing mat on the desk, and save the full board for big jobs.
Skip filling the room with matching furniture sets too. A studio works best assembled from pieces chosen for function, the right-height cutting table, the storage that fits your kit, the chair that supports your back, even if none of it matches. Coordinated furniture that’s the wrong height or shape for the job looks tidy and works badly.
And the one I learned the hard way: don’t lay out the studio by looks first. Walk through an imaginary project before you fix anything in place, machine to cut to press and back, and put the stations where that walk is shortest. I arranged my first studio for the photo and spent two years walking laps of it. The second time I laid it out for the workflow, and now the prettiness is just a bonus on top of a room that actually makes sewing easier.


