IKEA Kallax Hacks That Add Storage Without Looking Basic


The Kallax is the cube shelf in roughly every flat, dorm, and playroom on earth. It’s cheap, it’s sturdy, it holds a heroic amount of stuff, and out of the box it looks exactly like what it is: a plain grid of boxes. That ubiquity is the problem, everyone recognises a bare white Kallax on sight, and it reads as “I needed storage fast,” not “I designed this.”
The good news is the Kallax (which quietly replaced the beloved Expedit back in 2014) is one of the most hackable pieces IKEA makes, precisely because it’s a sturdy, simple blank canvas. With a bit of paint, some trim, the right legs, or a cushion on top, the same basic cube becomes something that looks custom and costs a fraction of built-in. Here are the hacks worth doing, and the details that take them from flat-pack to high-end.
The flagship hack: turn it into a storage bench or banquette
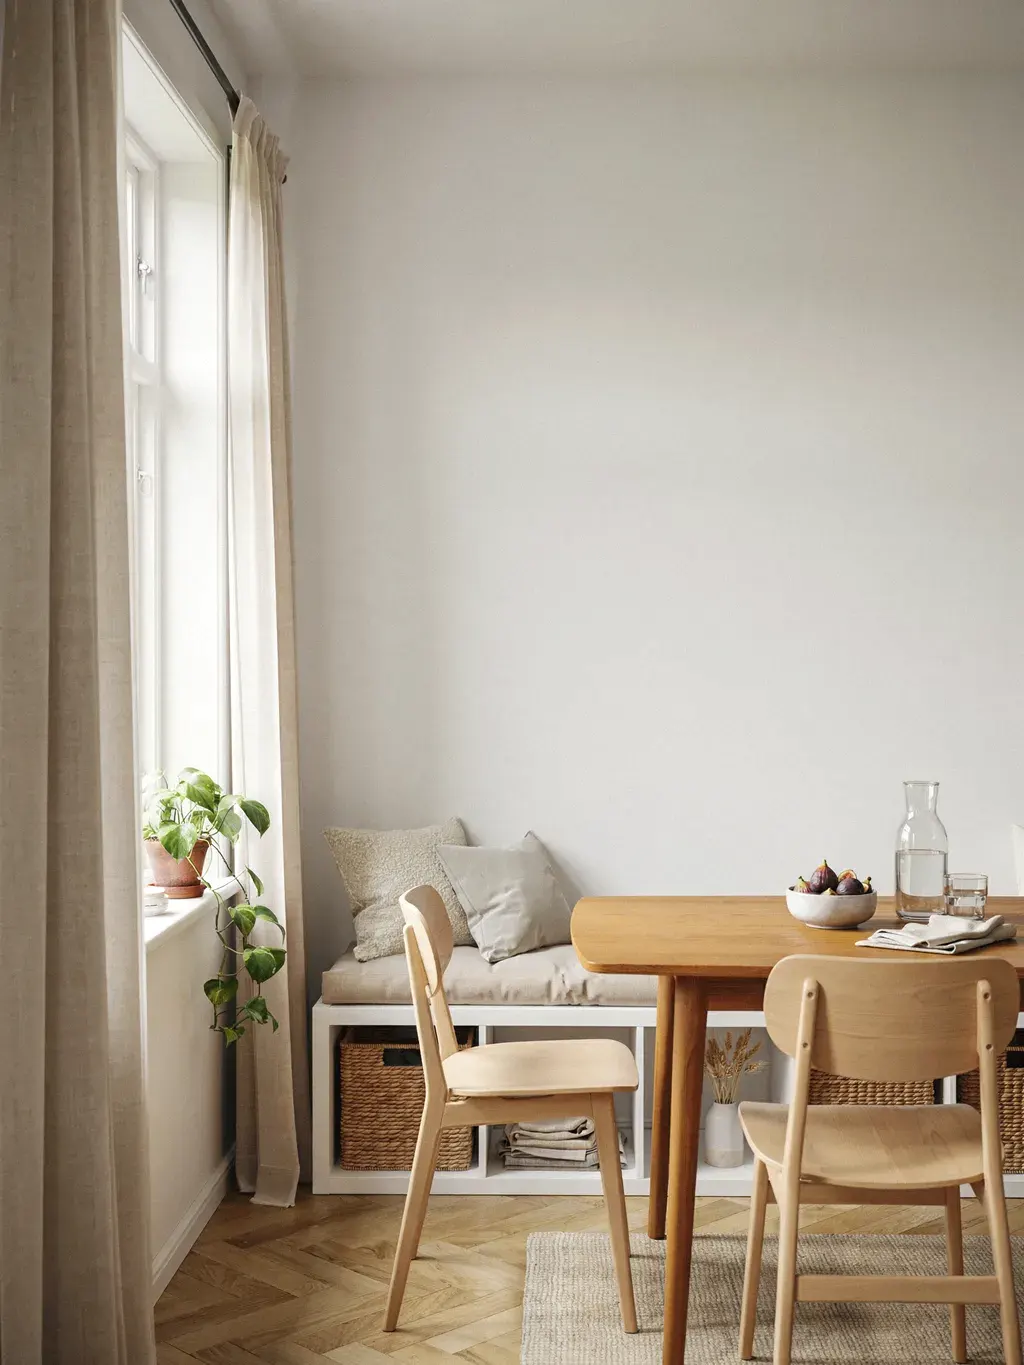
If you do one Kallax hack, make it this one. Laid on its back with the cubbies facing up and a cushioned lid on top, a Kallax becomes a storage bench, and a run of them becomes a built-in-look banquette for a dining nook, the kind of seating people pay a fortune to have custom-built. It’s the most popular Kallax hack for good reason: seating and hidden storage in one footprint.
The crucial number is height. A Kallax laid on its back stands roughly 15 to 16 inches; add a 3-inch foam cushion and you land around 18 inches, which is the sweet spot for pairing with a standard 28-to-30-inch dining table. Measure your actual table before you buy anything, because a two-inch mismatch is uncomfortable and not fixable without cutting the unit down. You can either hinge a plywood lid on top for hidden storage inside, or lay the unit on its side so the cubbies face out for basket storage, the hidden-storage version looks more built-in.
Make the bench look built-in, not like a cube with a cushion
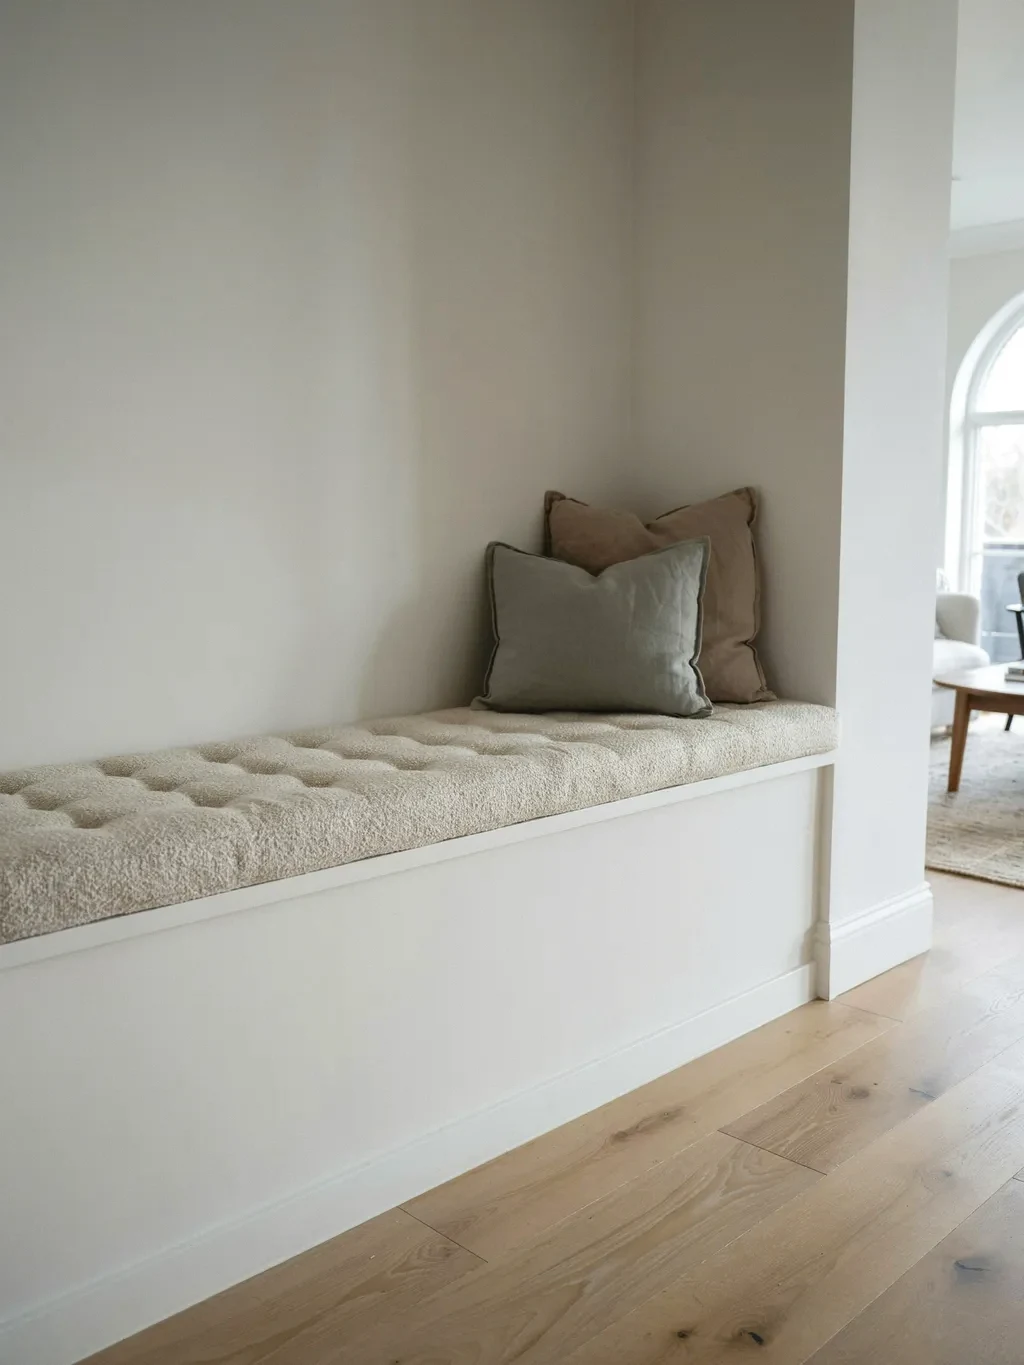
Here’s what separates a banquette that looks like carpentry from one that looks like a shelf with a pad dropped on it: the finishing. The trick is to hide the raw Kallax edges and ground the piece so it reads as part of the room.
Add trim and baseboard around the base so it looks like it grows out of the wall, caulk the gaps, and paint the trim to match the room’s existing trim. Cap the ends with MDF panels to hide the open sides. Builders who nail this say the finished piece reads as built-in millwork, not IKEA, and that’s almost entirely down to trim, caulk, and paint. One safety non-negotiable: anchor the unit to the wall with the anti-tip brackets, especially as a bench people sit on.
Add curved or arched panels for a high-end look
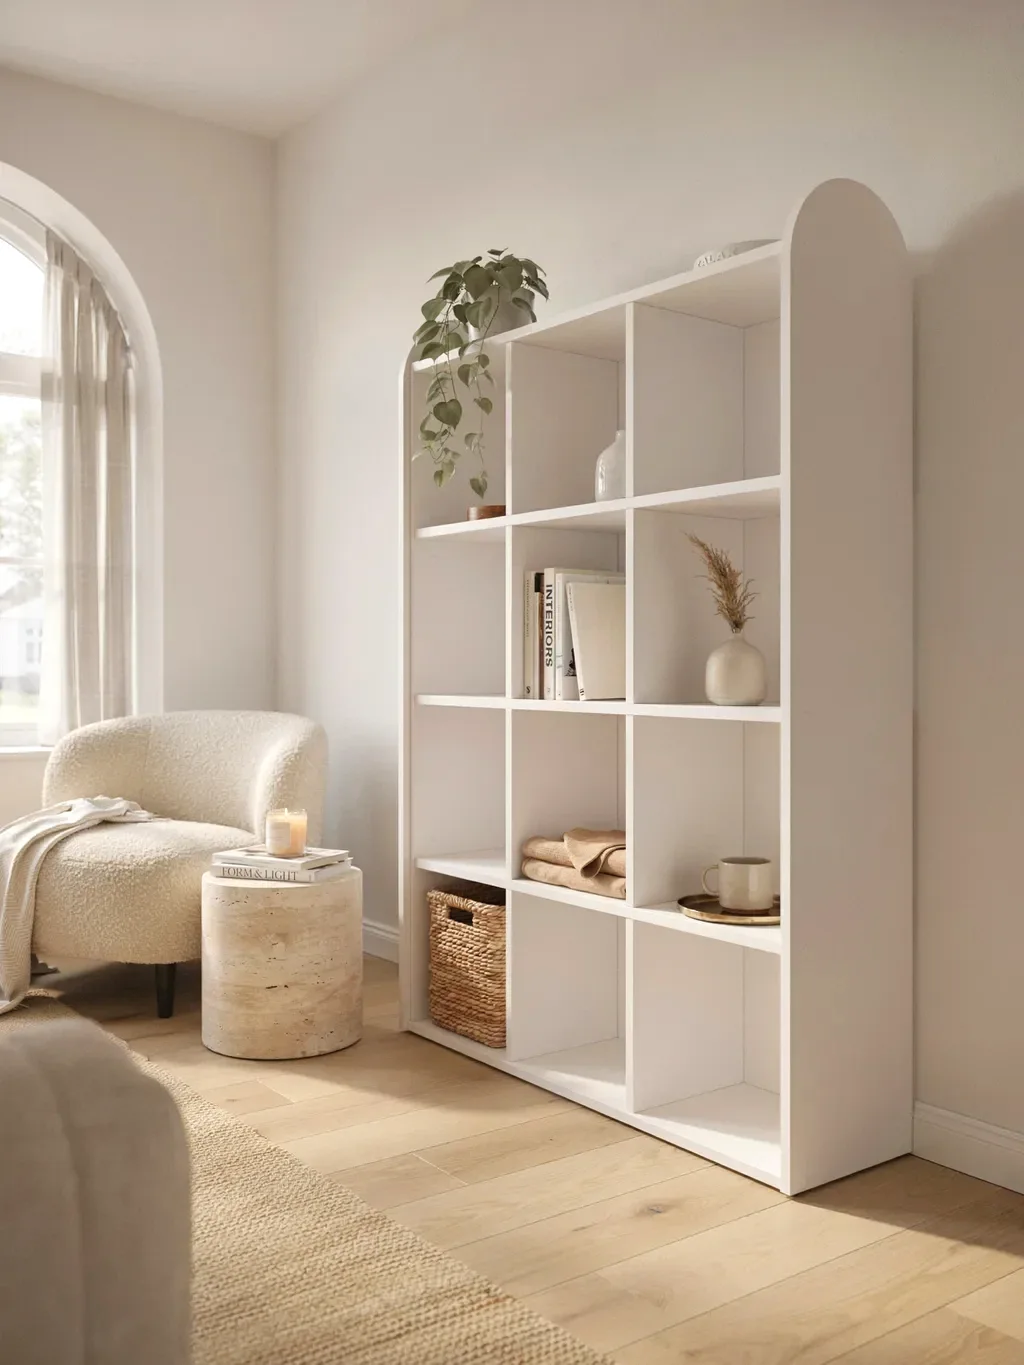
Want the version that makes people do a double-take? Add curves. Cutting arched or curved MDF panels for the open end of a bench, or across the front of an upright unit, instantly elevates a boxy Kallax into something sculptural and on-trend.
It’s a more advanced cut (a template and a jigsaw help), and you can skip it if you’re a beginner, but it’s the single detail that most distinguishes a designer-looking Kallax hack from a basic one. Whitewash or paint the panels to blend them with the unit, and the hard cube edges soften into something that looks deliberately designed.
Swap the legs to lift it off the floor
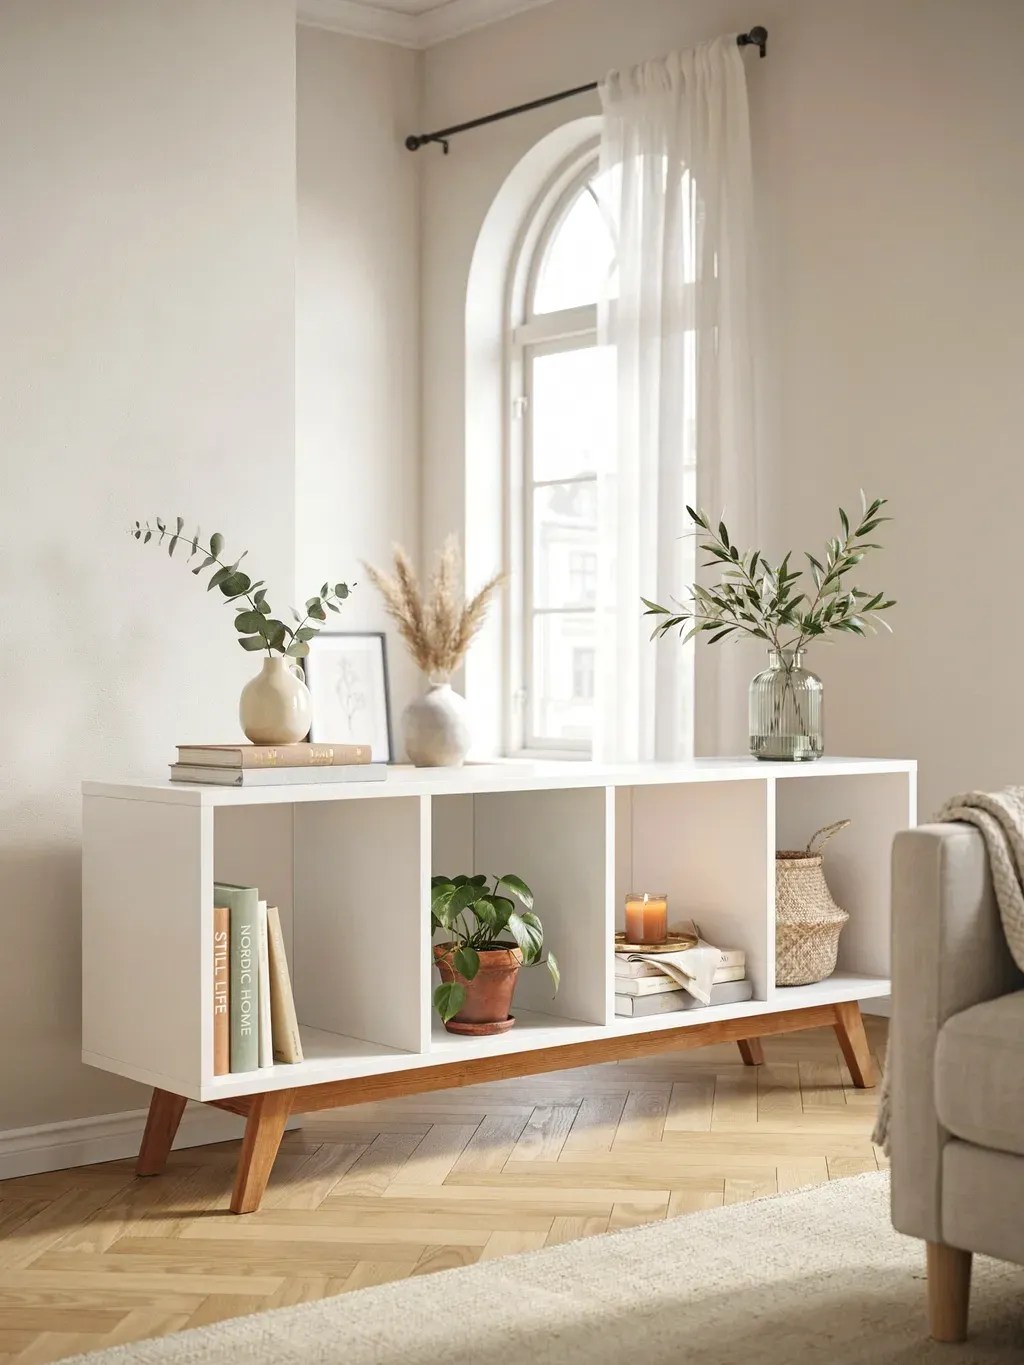
The fastest, lowest-effort upgrade of all: get it off the ground. A Kallax sitting flat on the floor looks like a storage cube; the same unit raised on legs instantly reads as a proper piece of furniture, a sideboard, a console, a bench.
Swap in mid-century-style tapered wooden legs, hairpin legs, or IKEA’s own Capita legs for an instant lift. Raised legs add warmth, let light travel underneath (which makes the piece feel lighter in the room), and are the difference between “dorm shelf” and “considered sideboard.” It’s often a ten-minute change that transforms the whole look.
Dress the fronts with rattan, fluting, or new knobs
The flat cubby openings and basic doors are where a Kallax looks cheapest, so that’s where small upgrades pay off most. Cut pre-woven rattan or cane sheets to fit the doors or cubby fronts for an instant boho, expensive-looking texture. Pole wrap or slim half-round trim glued on creates a fluted, reeded front that’s very on-trend.
And if your unit has doors or drawer inserts, swap the basic knobs for brass, ceramic, or leather pulls, a tiny change that lifts the whole piece. Even lining the backs of the cubbies with wallpaper or a painted plywood backing adds colour and depth that a plain Kallax lacks. These are low-effort tweaks with high-impact returns.
Paint it, but prime it properly
A coat of paint in a rich colour transforms a Kallax from anonymous white box to designer piece, but the Kallax (like most IKEA furniture) has a slick laminate surface that ordinary paint peels off. The fix is the same as any IKEA paint job: scuff it lightly, then prime with a shellac-based primer before your colour coat, especially important if you’ve added raw MDF panels, which soak up moisture and warp without a sealing primer.
For a bench or any high-traffic piece, finish with a durable semi-gloss or scuff-resistant paint so it holds up to daily use. Get the prep right and a £40 secondhand Kallax can look like a bespoke painted cabinet.
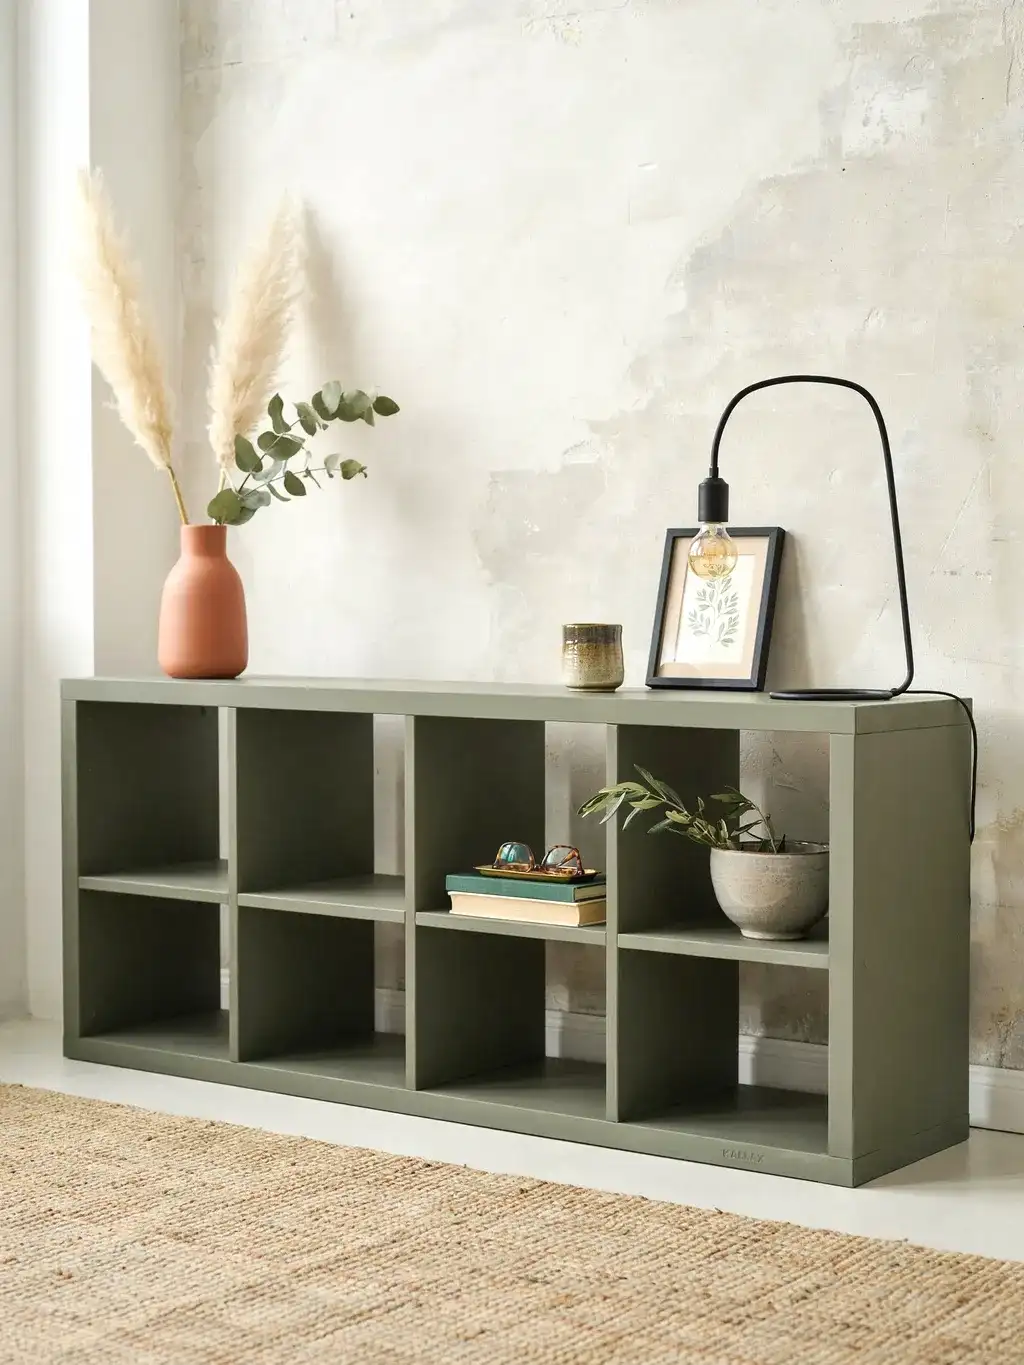
Fill the cubbies like you mean it
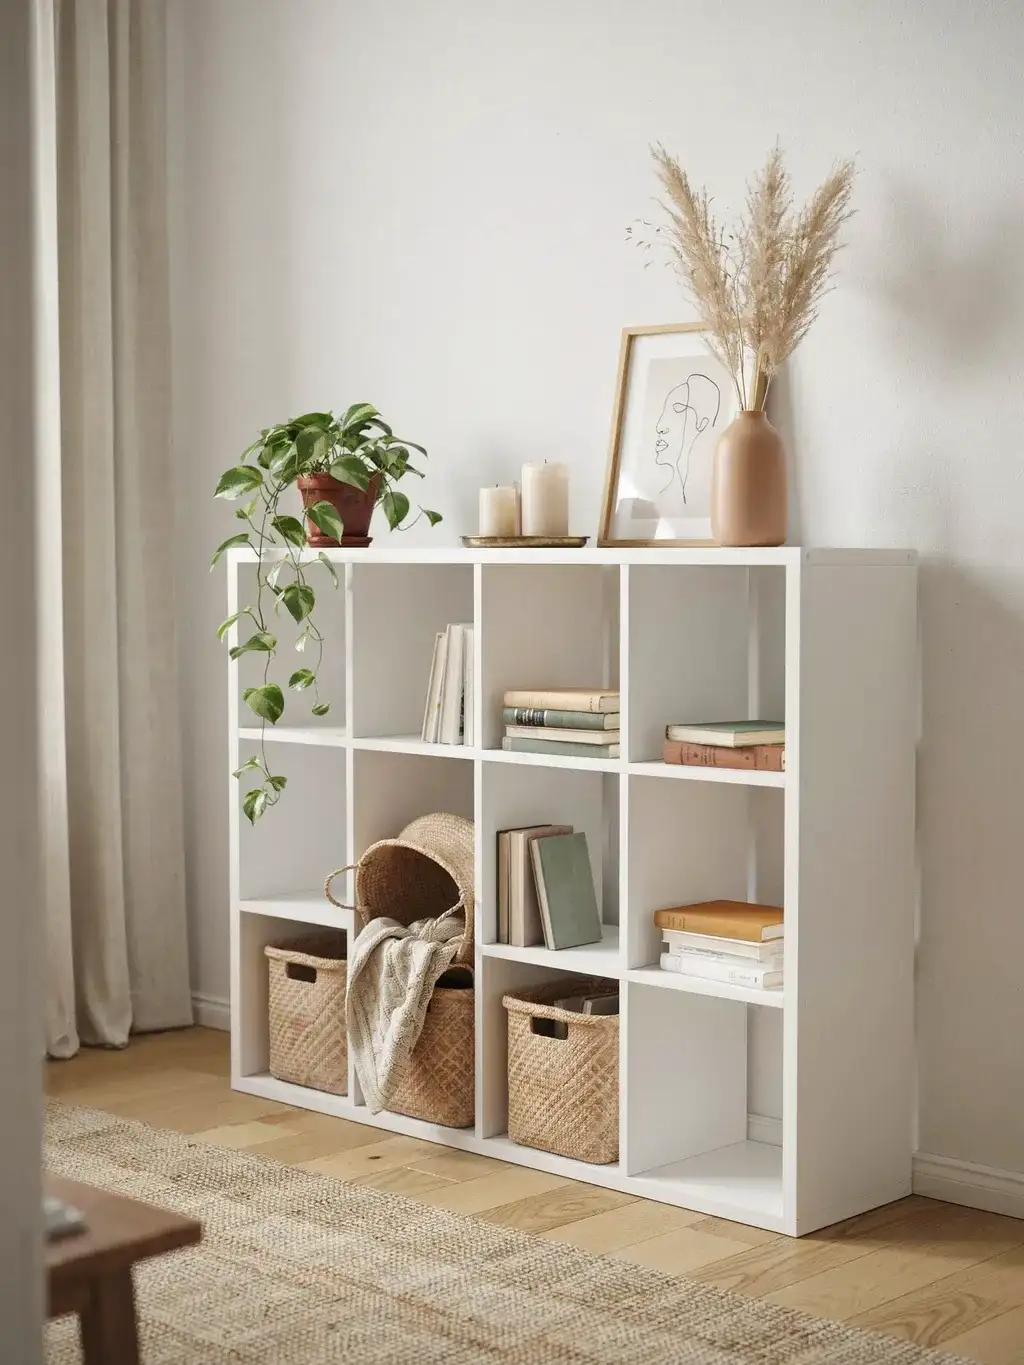
Even without building anything, how you fill a Kallax decides whether it looks basic or styled. A grid of mismatched loose clutter looks like storage; a considered mix looks like decor. Use matching woven baskets or fabric bins to hide the messy stuff, then leave some cubbies open to display books, plants, or a few nice objects.
Natural rattan or seagrass baskets in particular add warmth and texture that makes a plain white unit look far more expensive than it is. The rule is the same as any shelf styling: contain the clutter, display the pretty, and leave a little breathing room so it reads as intentional.
Reinvent it entirely: console, bar, divider, and more
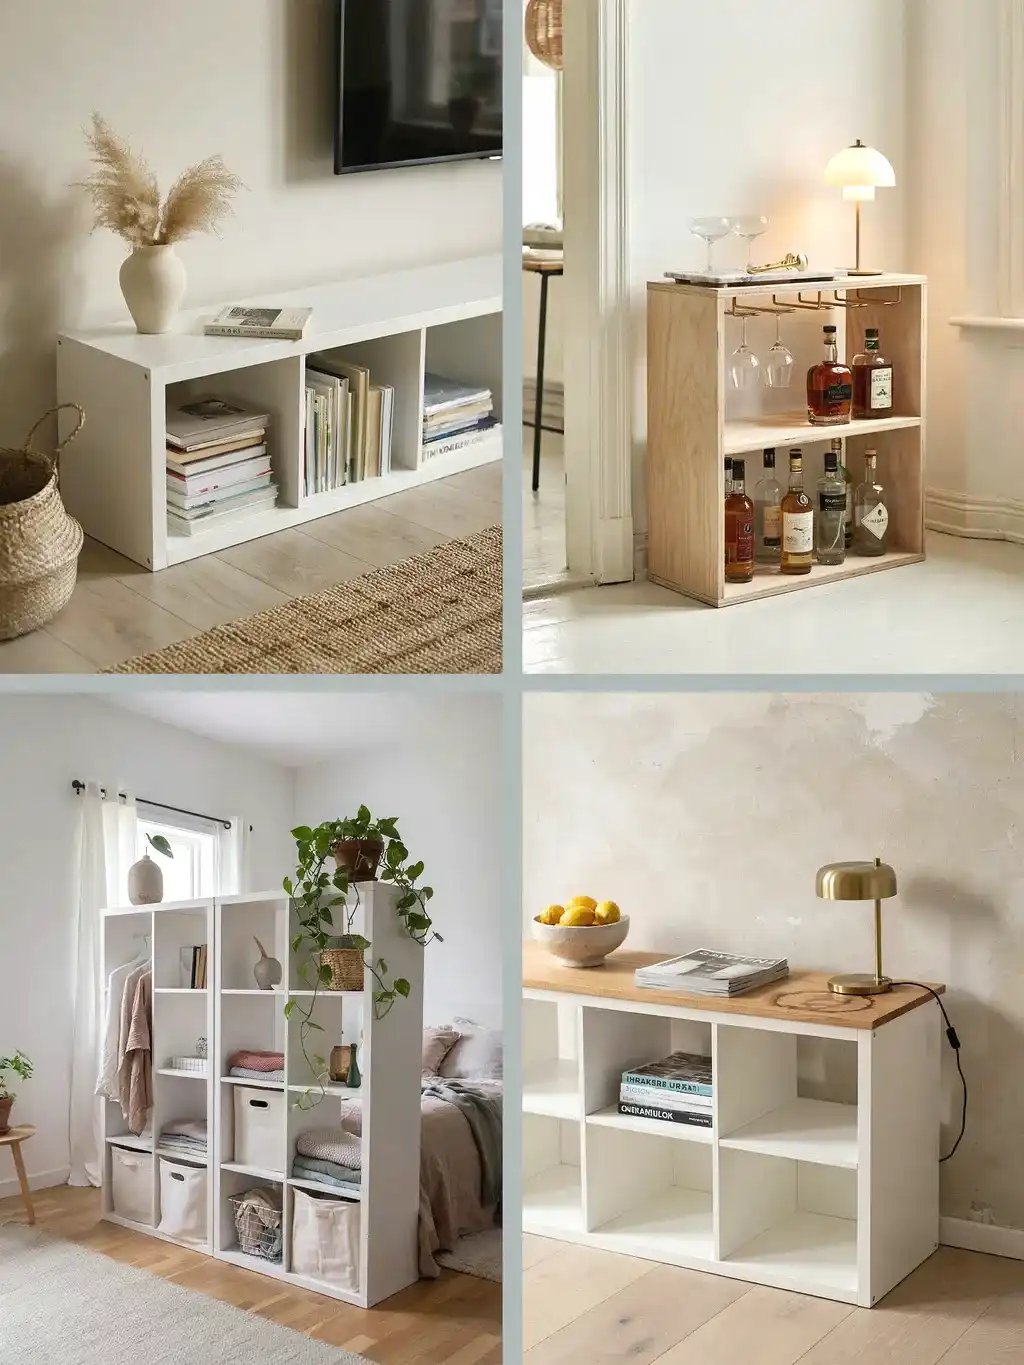
Beyond the bench, the Kallax’s simple sturdy box shape makes it a brilliant carcass for all sorts of builds. Flipped on its side it becomes a low TV console with storage. Topped with a wood surface and backlit, a unit or two becomes a home bar or cocktail station. Stood tall as a room divider, it splits an open-plan space while storing things from both sides (anchor it well). People have also turned Kallax units into mid-century sideboards with plywood and hairpin legs, mobile craft carts on casters, changing tables, and window benches.
The throughline: use the Kallax as the sturdy bones, then add the top, the legs, the finish, and the trim that suit your room. That’s where the “custom” look comes from.
The bottom line
A basic Kallax looks basic because it’s left basic, bare, on the floor, full of random stuff. Every hack here is really the same move: take the cheap, sturdy cube and add the finishing the factory left off. Lay it down and cushion it into a bench, lift it on legs, dress the fronts in rattan or trim, paint it a proper colour over shellac primer, and fill it with intention. Do even a couple of those and nobody will guess your high-end-looking bench, console, or sideboard started as the most recognisable shelf in IKEA. The cube is just the starting point, the finishing is the hack.


