15 Gorgeous Peel and Stick Floor Tile Bathroom Designs
- Bathroom Tile
 Alina
Alina- 0
- 41 minutes read

Introduction
Look, I’ll be honest with you—I used to think peel and stick floor tiles were basically the participation trophies of home improvement. You know, the thing you use when you can’t afford “real” renovations. Boy, was I wrong! After redoing my own bathroom with these bad boys (and saving myself from a minor financial crisis), I became a total convert.
Here’s the thing: peel and stick floor tiles have come a LONG way from those sad, plasticky things your grandma had in her basement. We’re talking about gorgeous designs that’ll make your guests do a double-take and ask for your contractor’s number. And you get to smugly tell them you did it yourself on a Saturday afternoon.
Whether you’re a renter who can’t make permanent changes, a homeowner on a budget, or just someone who likes instant gratification (hi, that’s me), peel and stick bathroom floor tiles are about to become your new best friend. Ready to see some seriously stunning designs that’ll make you want to renovate your bathroom ASAP?
1. Budget Peel and Stick Bathroom Floor Makeover
Let’s start with the elephant in the room—money. I don’t know about you, but I’m not exactly swimming in cash like Scrooge McDuck over here.
Traditional tile installation can easily set you back $1,500 to $3,000 for a standard bathroom. Meanwhile, you can snag quality peel and stick tiles for anywhere from $1 to $5 per square foot. Do the math, and you’re looking at potentially saving thousands of dollars. Yeah, you read that right—thousands.
The budget-friendly approach doesn’t mean you have to sacrifice style either. I’ve seen basic white subway-style peel and stick tiles transform dingy bathrooms into fresh, clean spaces that look like they belong in a design magazine. The secret? Keep it simple and classic. White or light gray tiles with thin grout lines give you that timeless look without emptying your wallet.
Pro tip: Buy an extra box or two. Trust me on this one. I learned the hard way when I messed up a corner and had to wait three days for more tiles to arrive. Not fun when you’re halfway through a project 🙂
2. Renter Friendly Bathroom Floor Tile Upgrade
Renting is the worst sometimes, right? You’re stuck staring at someone else’s questionable design choices, and your landlord definitely isn’t about to spring for renovations.
Here’s where peel and stick tiles become an absolute game-changer. Most quality brands are completely removable without damaging the subfloor. You stick ’em down, enjoy your gorgeous new bathroom, and peel them right back up when you move out. Boom—security deposit saved.
I actually helped my sister do this in her rental apartment, and the transformation was insane. She went from gross beige linoleum to a chic geometric pattern in about four hours. When she moved out two years later, those tiles came up cleanly, and her landlord never knew the difference.
Installation Tips for Renters:
- Clean the existing floor thoroughly before applying tiles
- Test a tile in an inconspicuous spot first (like inside a closet)
- Take photos of the original floor before you start
- Store the tiles you remove in a dry place for reinstallation later
The beauty here is that you get to actually enjoy where you live without losing money when you leave. Win-win!
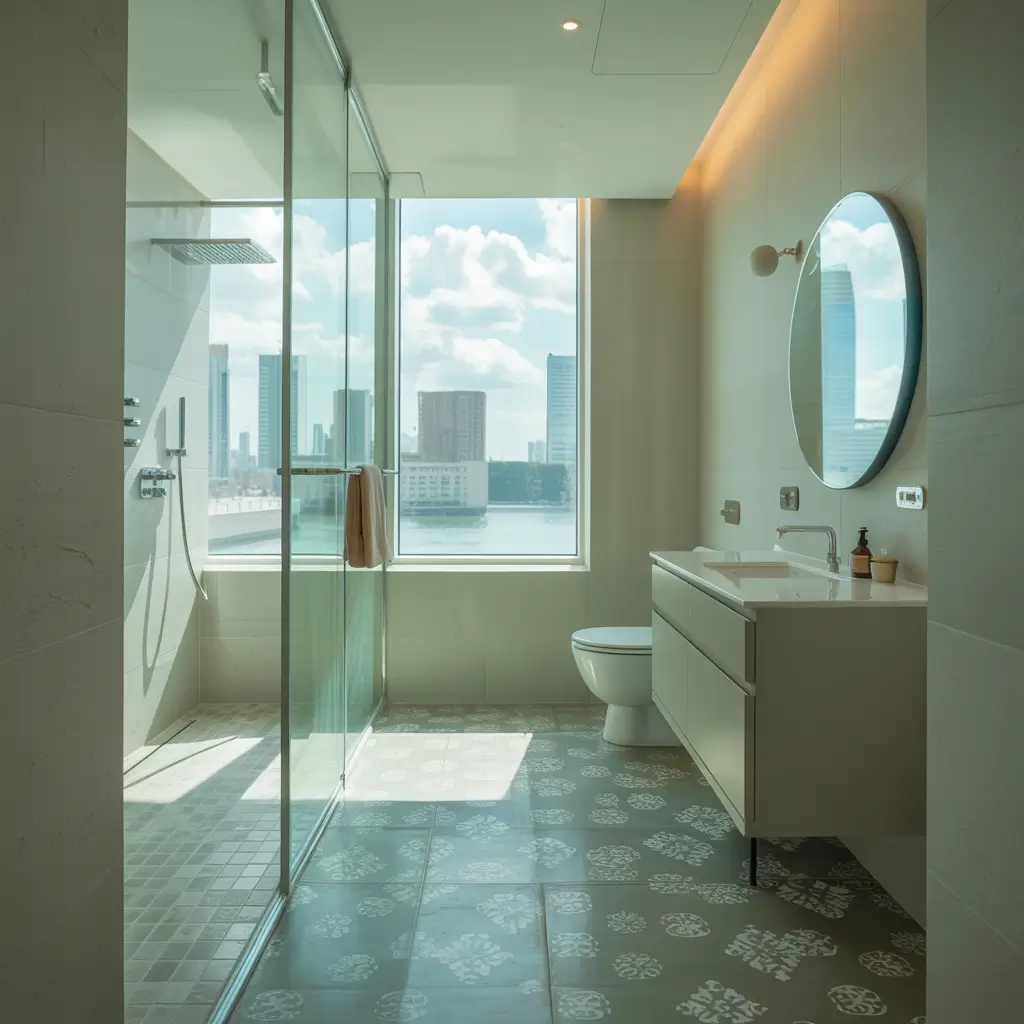
3. Waterproof Peel and Stick Tile for Small Bathrooms
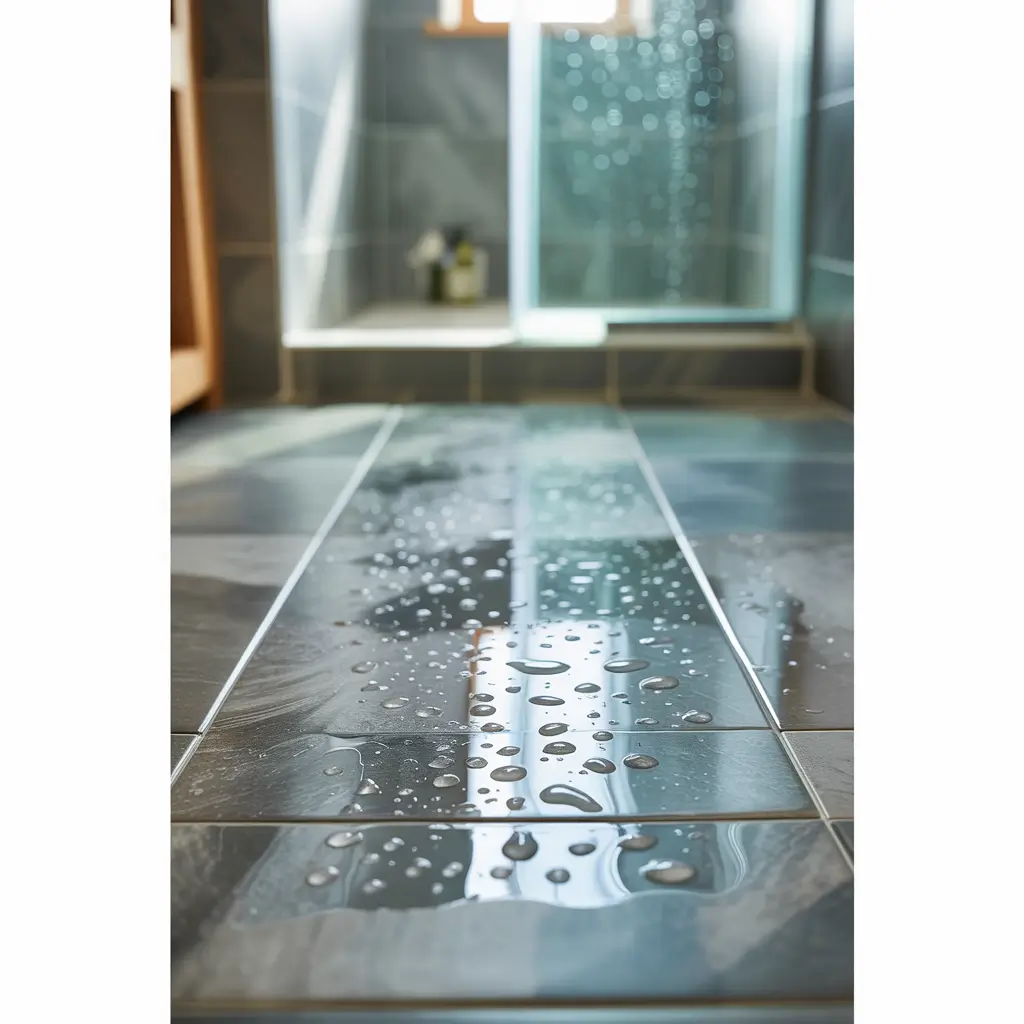
Okay, so here’s a question that probably keeps you up at night: Will these tiles actually hold up to water?
Fair concern! Bathrooms are basically moisture factories. But modern waterproof peel and stick tiles are specifically engineered for wet environments. Look for tiles with vinyl or PVC backing—these materials naturally resist water and won’t curl up at the edges when things get steamy.
Small bathrooms actually work perfectly for peel and stick tiles because you need fewer tiles (obviously), which means less money and less time to install. I’m talking about those powder rooms or half-baths that measure maybe 25-30 square feet. You can literally transform one of these spaces in an afternoon.
The trick with waterproof tiles in small bathrooms is proper sealing around fixtures. You’ll want to use waterproof caulk around your toilet base and any areas where water might seep underneath. This isn’t rocket science—just basic common sense that’ll make your installation last for years.
FYI, I’ve had waterproof peel and stick tiles in my guest bathroom for over three years now, and they still look brand new. Zero bubbling, zero peeling, zero regrets.
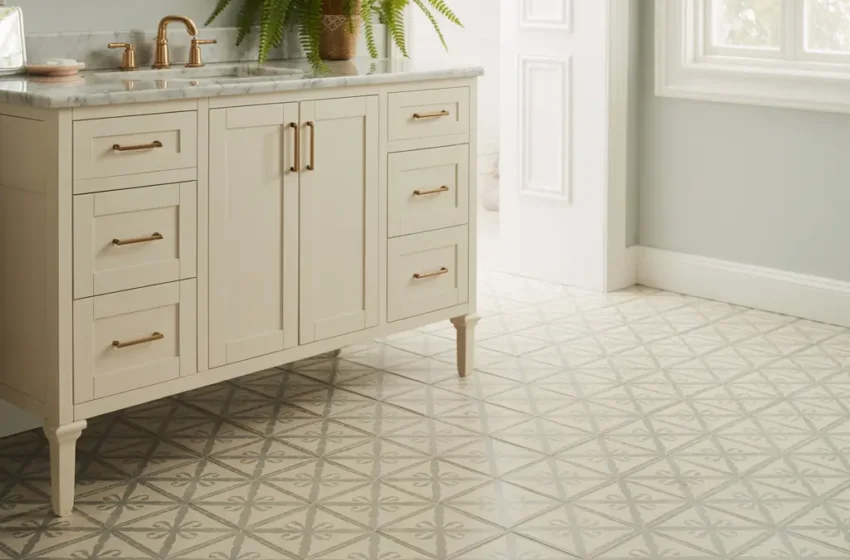
4. Modern Marble Look Peel and Stick Bathroom Floor
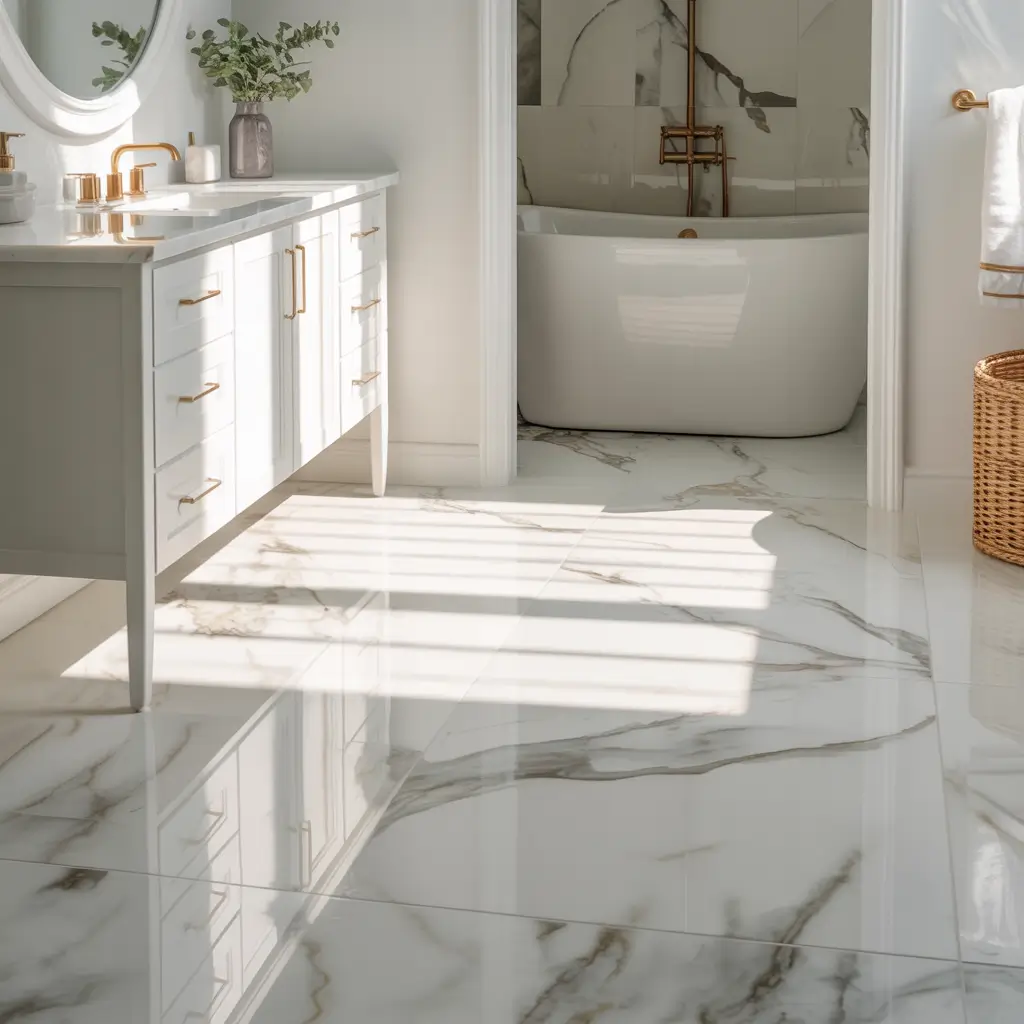
Want to know a secret? That Instagram-worthy marble bathroom you’re lusting over? There’s a decent chance it’s not real marble.
Marble-look peel and stick tiles have gotten so realistic that you’d need to get on your hands and knees with a magnifying glass to tell the difference. And unlike real marble, which requires sealing, constant maintenance, and costs more than my first car, these tiles are practically maintenance-free.
I went with a white marble pattern with gray veining for my master bathroom, and guests literally refuse to believe it’s peel and stick. The key is choosing tiles with subtle variation in the pattern—not every tile should look identical, just like real marble wouldn’t.
Why Marble-Look Tiles Rock:
- No sealing required (real marble needs this annually)
- Stain-resistant (real marble stains if you look at it wrong)
- Installation takes hours, not days
- Costs 90% less than actual marble
- Looks absolutely stunning with chrome or gold fixtures
Pair these with white subway tile on the walls and some brass fixtures, and you’ve got yourself a bathroom that screams “expensive taste” even if your bank account whispers “budget-conscious.”
Also Read: 15 Trendy Wood Tile Bathroom Looks with Modern Charm
5. Black and White Patterned Peel and Stick Tile Design
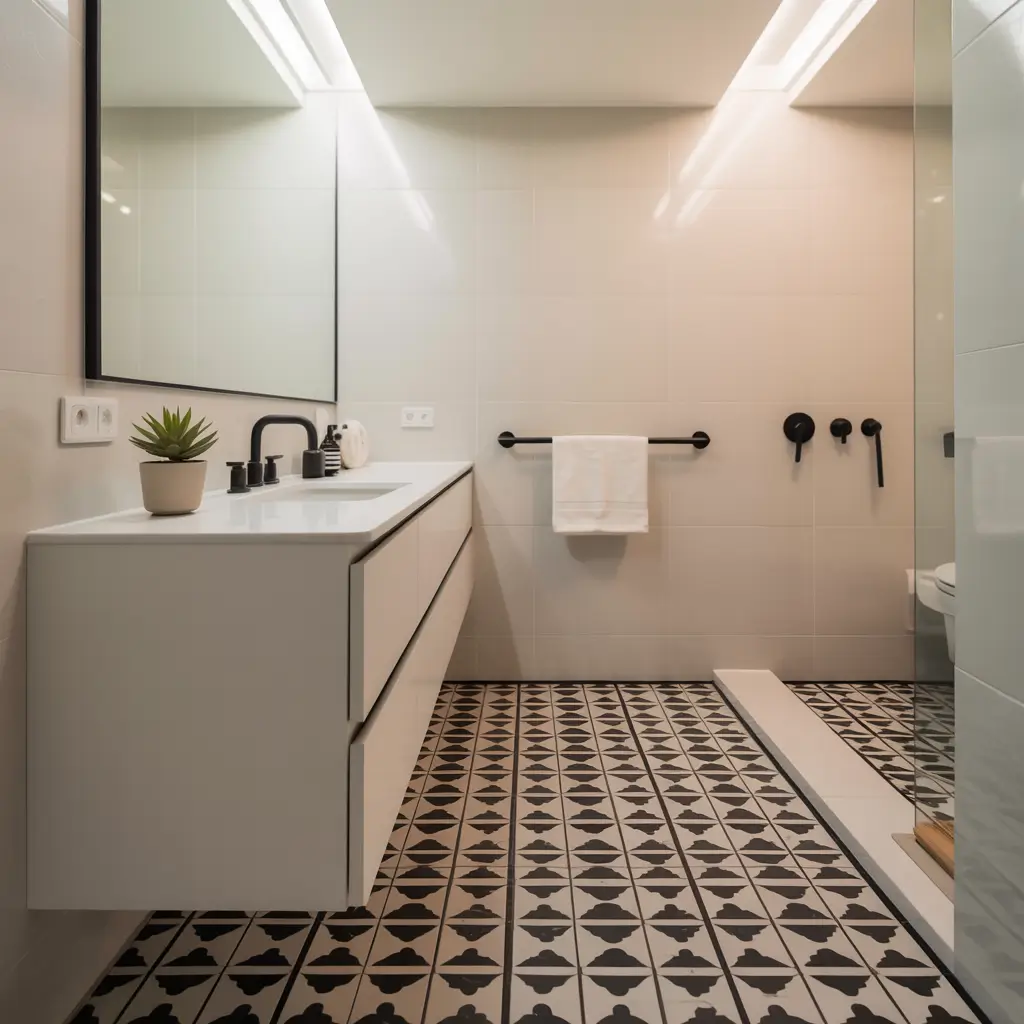
Nothing—and I mean nothing—says “classic elegance” quite like black and white tile patterns.
You’ve got options here: checkerboard, hexagon, geometric, Moroccan-inspired, basketweave… the list goes on. Black and white never goes out of style, which means you won’t look at your floor in five years and wonder what you were thinking (unlike that purple accent wall phase we all went through).
I’m particularly obsessed with hexagon patterns in black and white. They give you that vintage vibe without feeling dated. Plus, the geometric pattern is actually forgiving when it comes to less-than-perfect installation. Small gaps? Can’t really tell because of the busy pattern. Compare that to large-format tiles where every little mistake shows up like a neon sign.
The best part about black and white patterns is their versatility. You can go full vintage with clawfoot tub and pedestal sink, or keep it modern with sleek fixtures and minimalist decor. The floor works either way.
One word of caution: darker grout lines show water spots and soap scum more easily. Learn from my mistakes and keep a squeegee handy!
6. Farmhouse Style Peel and Stick Bathroom Flooring
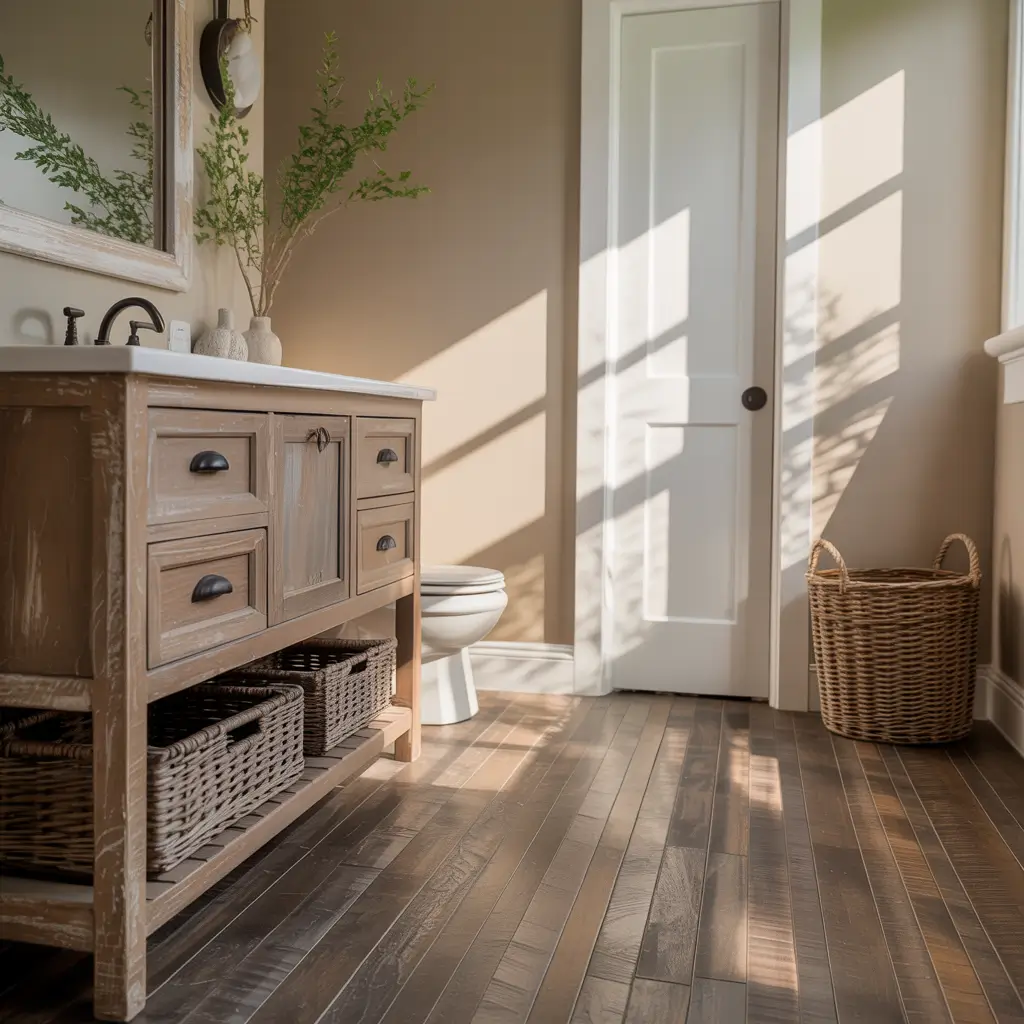
Farmhouse style isn’t going anywhere, folks. Sorry if you’re sick of seeing shiplap everywhere, but the trend is here to stay.
For farmhouse bathroom floors, you want to look for wood-look peel and stick tiles or whitewashed brick patterns. I’ve seen some incredible faux reclaimed wood tiles that genuinely look like weathered barnwood. They bring that rustic, cozy vibe without the nightmare of trying to waterproof actual wood in a bathroom (please don’t do that, by the way).
The beauty of farmhouse style is that it’s supposed to look a bit imperfect and lived-in. This actually works in your favor with peel and stick tiles because you’re not stressing about achieving perfectly aligned, sterile-looking installation. A little character is a good thing!
Farmhouse Floor Pairing Ideas:
- White shiplap walls (of course)
- Oil-rubbed bronze or matte black fixtures
- Open shelving with wicker baskets
- Vintage-style mirrors and lighting
- Neutral colors throughout
IMO, the farmhouse look creates the most inviting, comfortable bathrooms. It’s like giving your bathroom a warm hug. Plus, the wood-look tiles add texture and visual interest without making the space feel busy.
7. Luxury Vinyl Look Peel and Stick Tile Bathroom
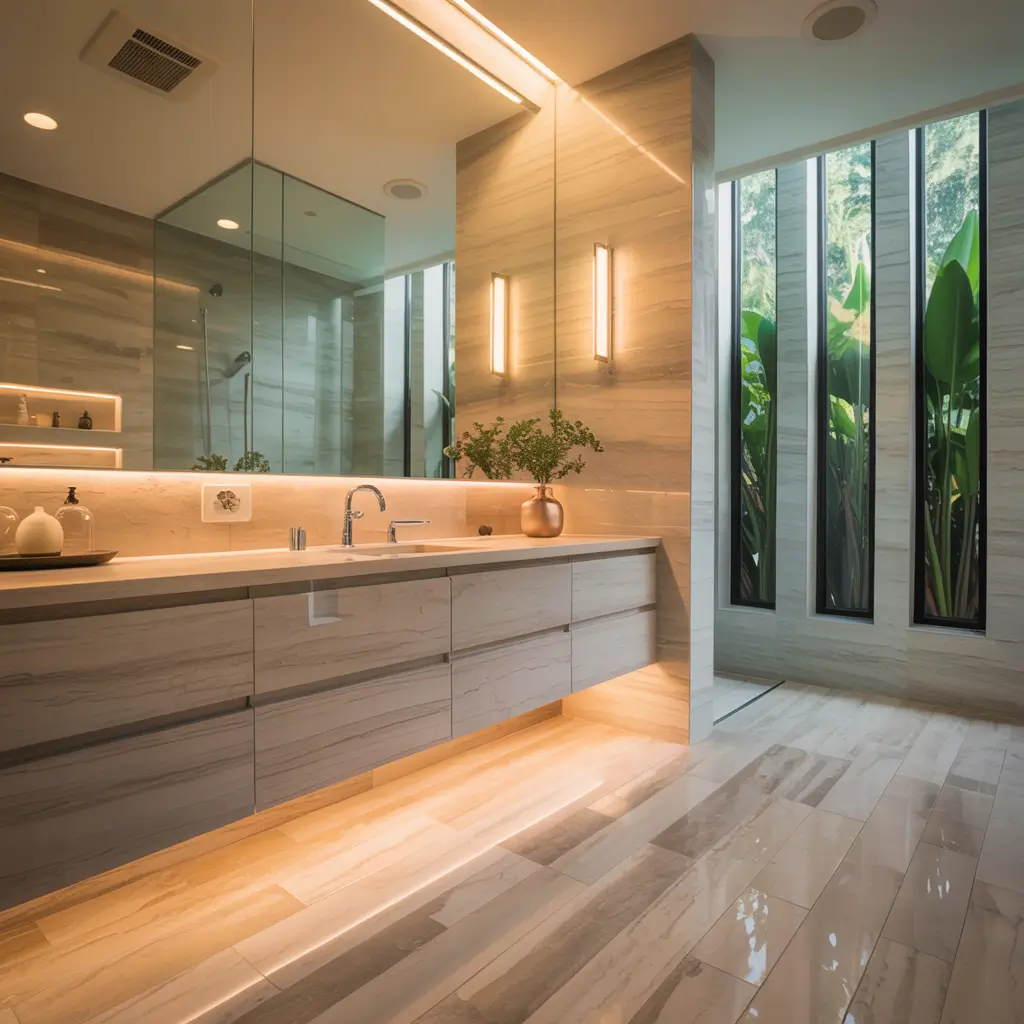
Here’s something that confused me at first: aren’t peel and stick tiles already vinyl? Well, yes and no.
Luxury vinyl peel and stick tiles (LVT) are thicker, more durable, and more realistic-looking than standard vinyl tiles. They often include multiple layers—a printed design layer, a wear layer, and a backing layer—that make them seriously heavy-duty. We’re talking commercial-grade stuff that can handle whatever your family throws at it.
I upgraded to luxury vinyl tiles in my kids’ bathroom specifically because those little tornadoes are rough on everything. After two years of wet towels, toothpaste globs, and who-knows-what-else hitting the floor, those tiles still look pristine. The wear layer is the MVP here—it protects against scratches, stains, and general chaos.
The luxury vinyl look typically mimics high-end materials like stone, slate, or premium hardwood. You get that expensive aesthetic with the durability and water-resistance of vinyl. It’s basically the mullet of flooring—business on the surface, party (proof) underneath.
These tiles cost a bit more than basic peel and stick options, but you’re still spending a fraction of what traditional luxury flooring would cost. Totally worth it for high-traffic bathrooms.
8. Peel and Stick Tile Over Old Linoleum Bathroom Floor
Got ugly linoleum that’s making you consider burning your house down? (Please don’t.) I have good news!
You can absolutely install peel and stick tiles directly over old linoleum, as long as that linoleum is in decent condition. By “decent condition,” I mean it’s not actively peeling up, there aren’t huge gouges in it, and the surface is relatively smooth. Think of the old linoleum as your subfloor—it just needs to provide a stable base.
I did exactly this in my bathroom makeover, and it saved me so much time and effort. Removing old flooring is genuinely the worst part of any renovation. It’s dusty, it’s loud, it’s exhausting, and you inevitably find some horrifying surprise underneath (hello, water damage and questionable stains).
Prep Steps for Installing Over Linoleum:
- Deep clean the existing floor with a degreaser
- Fill any gouges or dents with floor leveling compound
- Sand down any raised edges or bumps
- Let everything dry completely (moisture is your enemy)
- Wipe down with rubbing alcohol right before installing
The key word here is “preparation.” I know, I know—you want to jump straight to the fun part. But spending an extra hour or two on prep work will make the difference between tiles that last a decade and tiles that start peeling up in six months. Trust the process!
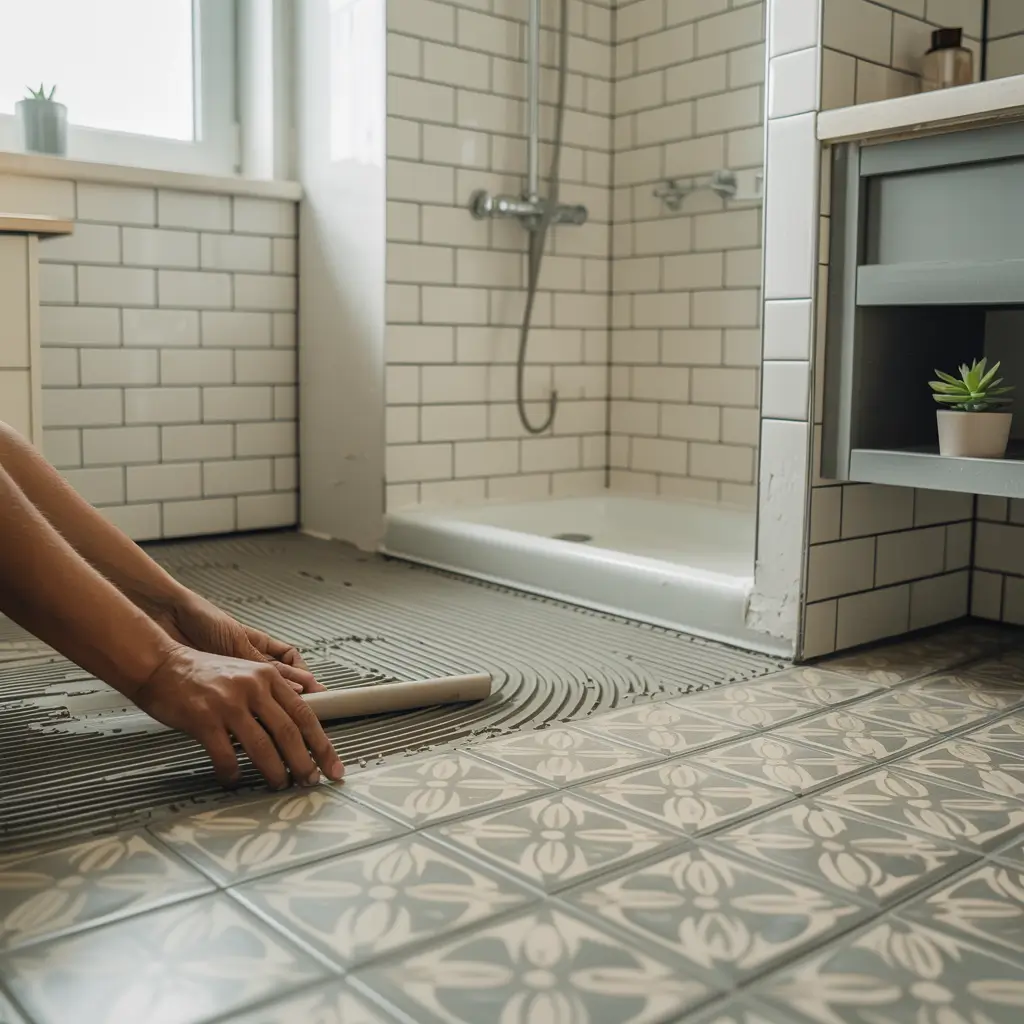
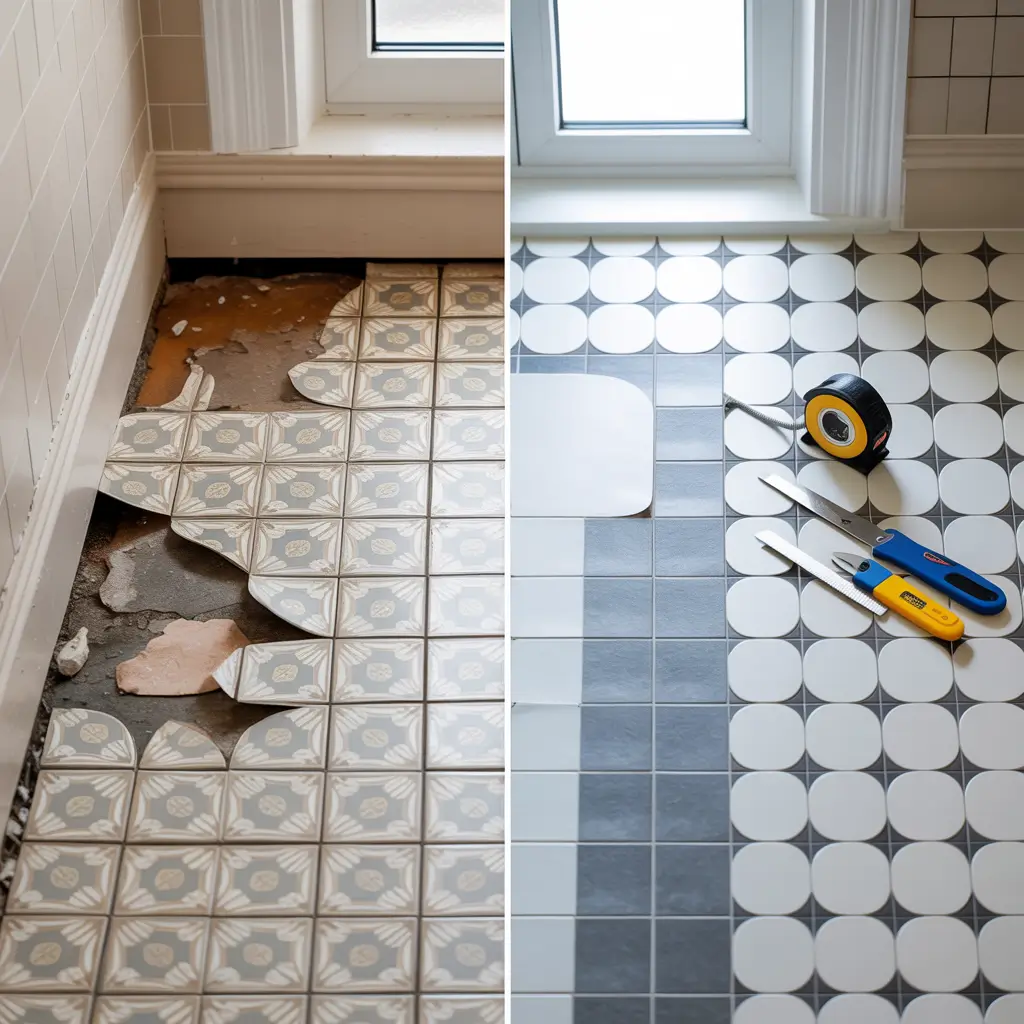
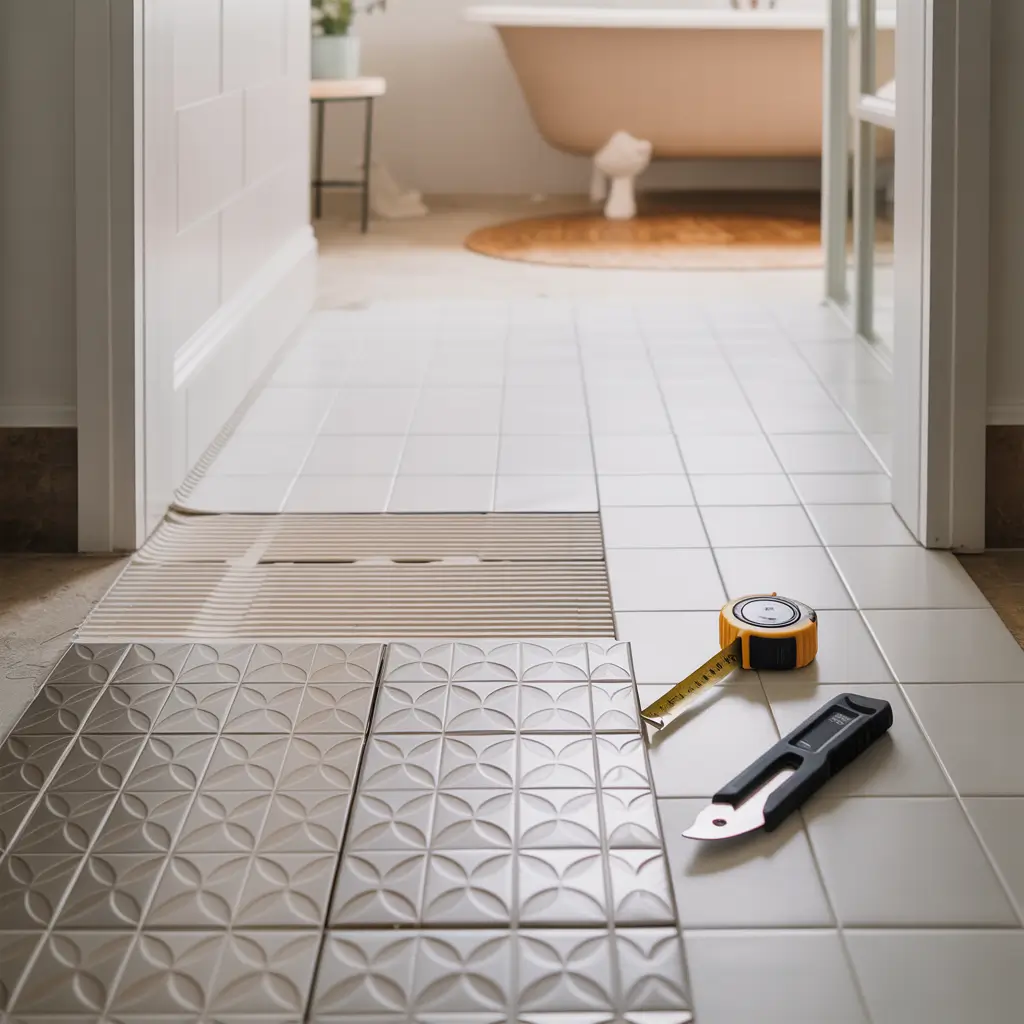
9. Easy Weekend DIY Peel and Stick Bathroom Floor
Let’s talk about time, because who actually has any these days?
Traditional tile installation means renting tools, mixing mortar, cutting tiles (scary), applying grout, sealing grout, and probably crying at least once. You’re looking at a full weekend minimum, maybe longer if you’ve never done it before. Peel and stick tiles? You can finish an average bathroom in 4-6 hours. Yes, really.
I remember my first peel and stick project—I kept waiting for it to get hard or complicated. It never did. You literally peel off the backing, stick it down, press firmly, and move on to the next tile. The most complicated part was cutting tiles to fit around the toilet, and even that was pretty straightforward with a utility knife and a straight edge.
The “easy weekend DIY” approach is perfect for people who want instant results. You can start Saturday morning and be enjoying your new bathroom by Saturday evening. Sunday you can spend doing literally anything else, like actually relaxing (what a concept).
Tools You Actually Need:
- Utility knife (for cutting tiles)
- Straight edge or T-square (for straight cuts)
- Tape measure (obviously)
- Roller or rolling pin (to press tiles down firmly)
- Pencil (for marking cuts)
That’s it! No special skills required. If you can follow directions on a recipe, you can install peel and stick tiles. I’ve successfully taught this to friends who claim they can’t even hang pictures straight. You’ve got this!
10. Peel and Stick Tile for Tiny Powder Room Floors
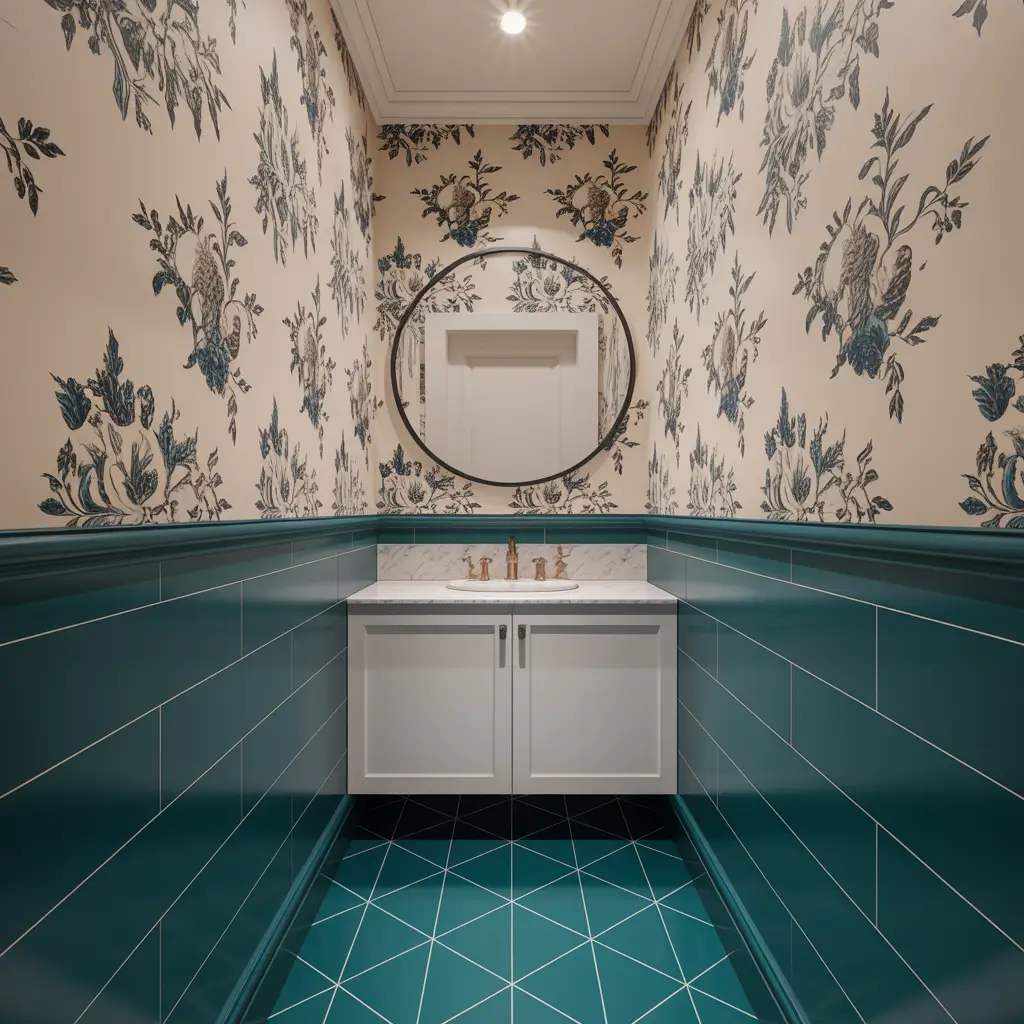
Powder rooms are the unsung heroes of home design. They’re small, sure, but they pack a punch because guests actually see them.
Tiny spaces are actually the perfect playground for bold design choices. Think about it—you’re not committing to a pattern or color for a huge area, so you can take risks you might not take in a larger bathroom. This is where you can go wild with that geometric pattern you love but weren’t sure about, or try out a trendy color combination.
I put a bold geometric pattern in navy and white in my powder room, and it’s become a conversation starter at every party. People love it because it’s unexpected and fun. Would I do the same pattern in my master bathroom? Probably not. But for a 20-square-foot powder room? Absolutely.
The practical advantage of tiny spaces is cost and time. You might spend $50-$75 total on tiles for a powder room. Even if you decide you hate it a year from now (you won’t), you’re not out much money, and you can redo it in an afternoon.
Plus, tiny spaces mean fewer tiles to mess up. It’s basically the perfect starter project if you’re new to peel and stick installation.
11. High End Look on a Budget Bathroom Floor Tiles

Want to know the best trick I’ve learned? Expensive-looking doesn’t mean expensive.
The secret to a high-end look is all about the details: clean lines, consistent grout spacing, and quality finishes. You can use budget-friendly peel and stick tiles and still achieve a luxury aesthetic if you focus on these elements.
I’ve seen bathrooms with cheap tiles that look amazing because the installation was perfect, the grout lines were consistent, and the fixtures complemented the floor. On the flip side, I’ve seen expensive tiles that look terrible because the installation was sloppy. Your installation quality matters more than the price tag on the tiles.
Choose patterns that mimic expensive materials like marble, travertine, or slate. These designs automatically elevate the space. Then pair them with upgraded fixtures—even just swapping out basic chrome for brushed nickel or matte black hardware makes a massive difference in perceived quality.
Budget-Friendly Luxury Tips:
- Stick to neutral, timeless colors (whites, grays, blacks, beiges)
- Choose simple, classic patterns over trendy designs
- Invest in quality fixtures to complement budget flooring
- Keep grout lines thin and consistent (looks more expensive)
- Add luxury touches like good lighting and nice mirrors
The beautiful irony is that you’re spending less money while creating a space that looks more expensive. That’s what I call winning at life!
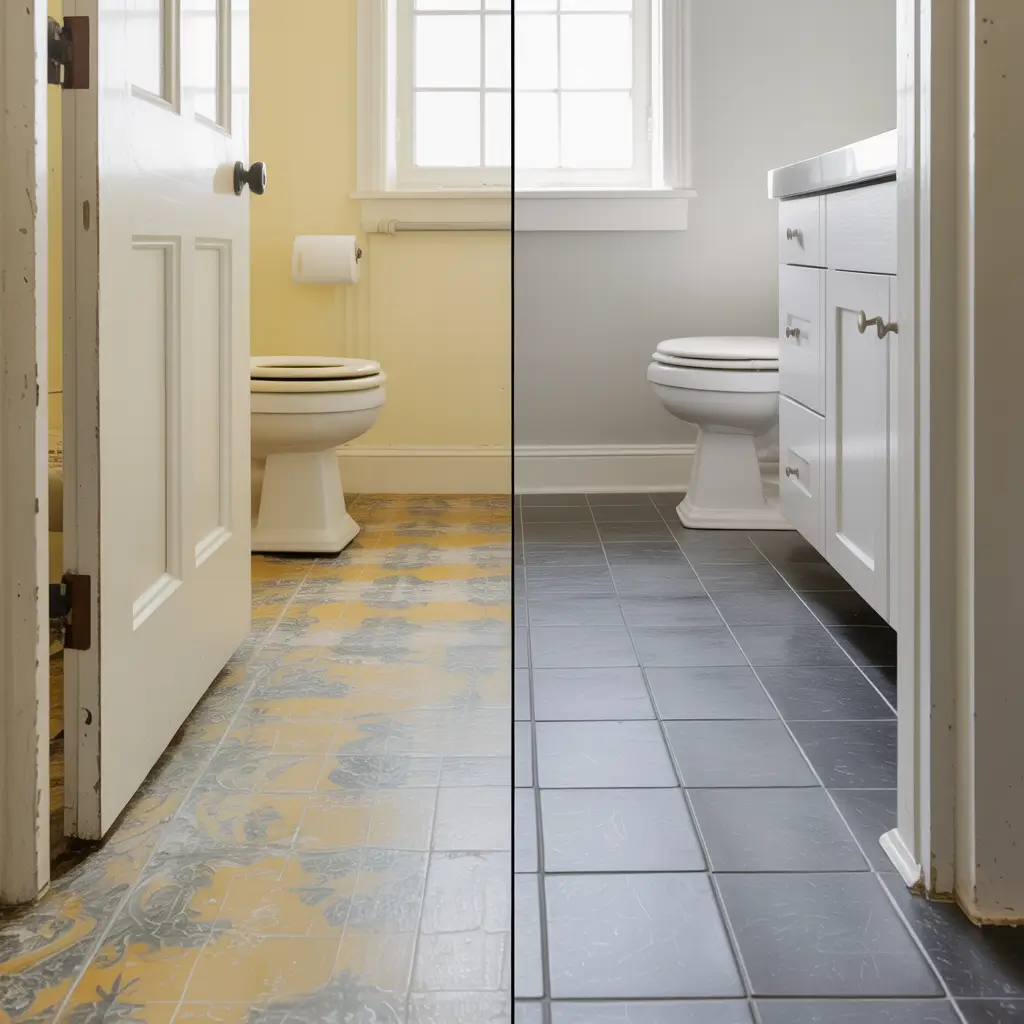
12. Peel and Stick Bathroom Floor Before and After
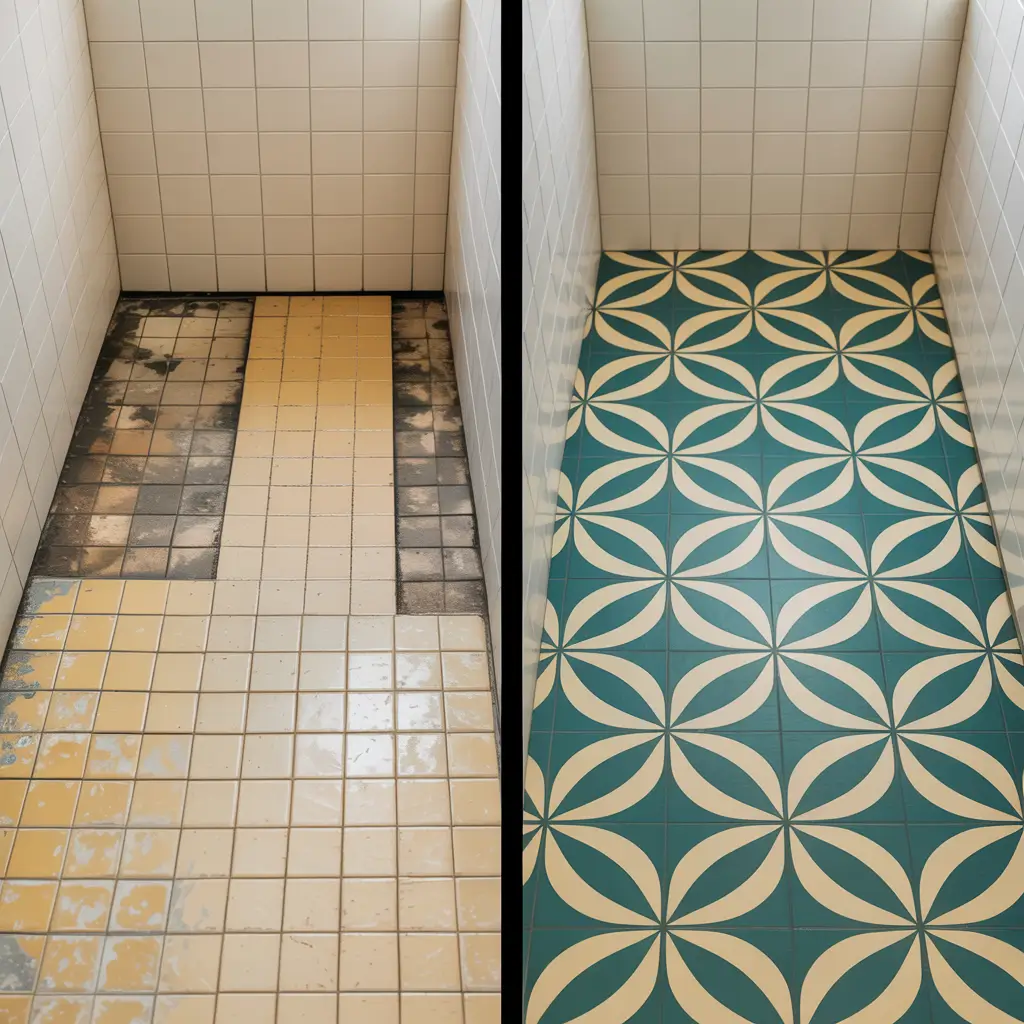
Before and after transformations are basically the most satisfying thing on the planet, right?
I’m obsessed with bathroom floor makeovers specifically because the impact is SO dramatic. You take a dated, dingy bathroom with gross flooring and transform it into something that looks current and fresh. The floor literally changes the entire vibe of the room.
My own before-and-after was wild. I had this terrible beige linoleum with a weird marbled pattern that screamed “1987 called and wants its floor back.” After installing white marble-look peel and stick tiles, the same bathroom looked modern, clean, and honestly like a completely different room. Same fixtures, same walls—just new flooring. The transformation blew my mind.
The psychological impact of a beautiful space shouldn’t be underestimated either. I actually enjoy cleaning my bathroom now (okay, “enjoy” might be strong, but I don’t dread it as much). When you create a space you love, you take better care of it. Plus, starting your day in a bathroom that doesn’t depress you is genuinely life-improving.
Document your own transformation with photos! You’ll want to remember what it looked like before, and showing off your handiwork to friends and family is way more fun when you have visual proof of the journey.
Also Read: 15 Elegant Brown Tile Bathroom Styles That Feel Luxurious
13. Minimalist Neutral Peel and Stick Tile Bathroom
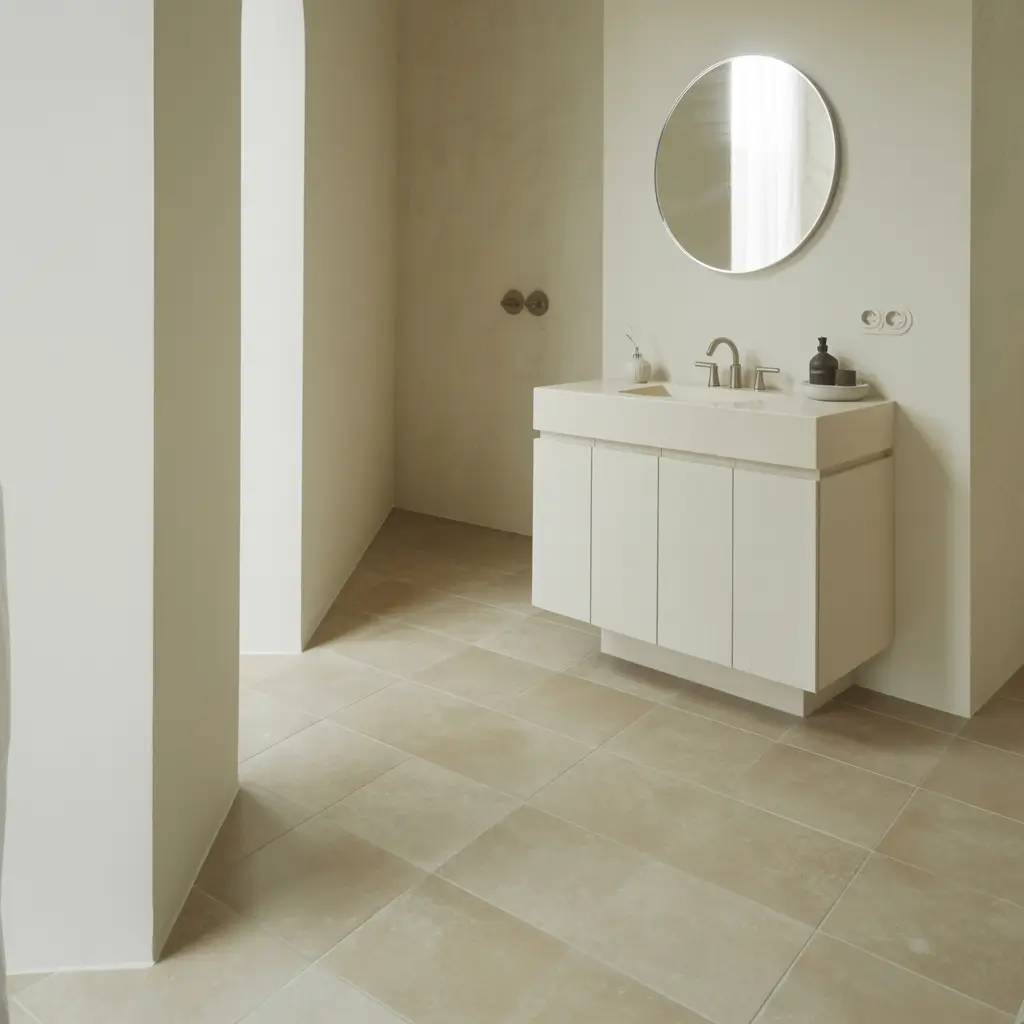
Minimalism isn’t about having nothing—it’s about everything having a purpose and looking intentional.
Neutral peel and stick tiles in shades of white, gray, beige, or taupe create the perfect minimalist foundation. The beauty of this approach is its timelessness and versatility. You can change your decor, your towels, your shower curtain—whatever—and the floor still works.
I went minimalist in my master bathroom with simple white tiles and gray grout lines. Sounds boring, right? Wrong. The simplicity actually makes the space feel larger, cleaner, and more serene. It’s like a visual palate cleanser for my brain after a chaotic day.
The minimalist approach also makes small bathrooms feel bigger because you’re not chopping up the space visually with busy patterns or multiple colors. A consistent, neutral floor creates an unbroken visual plane that tricks your eye into perceiving more space.
Minimalist Design Principles:
- Choose one or two neutral colors maximum
- Keep patterns simple or nonexistent
- Let the floor fade into the background (it’s a supporting player, not the star)
- Focus on quality over quantity in decor
- Embrace negative space and clean lines
Neutral doesn’t mean boring—it means sophisticated and intentional. Plus, you’ll never walk into your bathroom and think “ugh, I’m tired of this already.” Neutrals don’t get old.
14. Bold Pattern Peel and Stick Tile Bathroom Floor
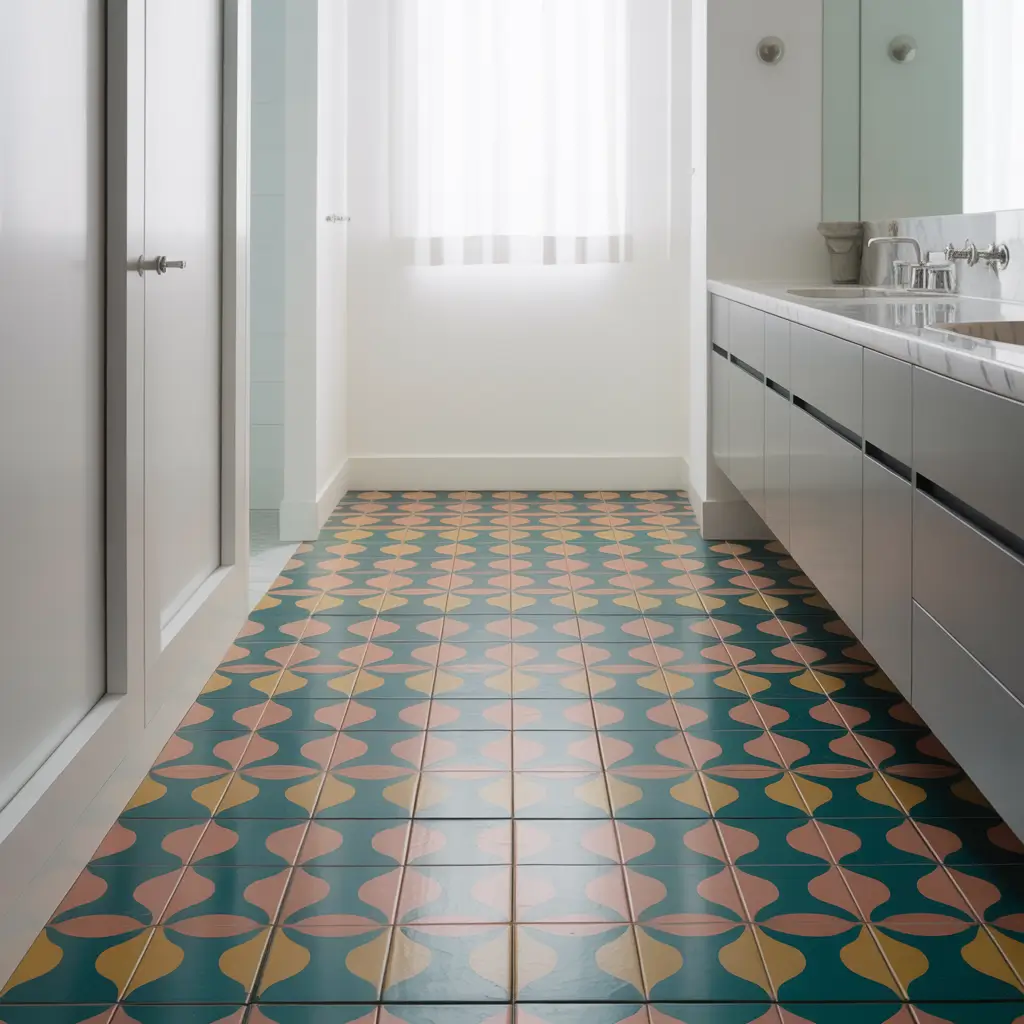
Alright, forget what I just said about minimalism for a second. Let’s talk about going BOLD.
Bold patterned tiles are having a major moment, and for good reason—they’re fun! Moroccan patterns, geometric designs, colorful florals, striking hexagons… these tiles make a serious statement. Your bathroom floor becomes the focal point of the entire room.
I personally love bold patterns in bathrooms because bathrooms are usually pretty small spaces. You can afford to be daring without overwhelming your entire home. It’s like wearing a statement necklace—attention-grabbing but contained to one area.
The practical advantage? Bold patterns are incredibly forgiving when it comes to hiding dirt, water spots, and general bathroom messiness. Try keeping a pure white floor looking pristine when you have kids or roommates. Good luck with that :/ A busy pattern camouflages everyday wear and tear beautifully.
When working with bold patterns, keep everything else relatively simple. White or neutral walls, simple fixtures, minimal decor. Let the floor be the star of the show. Too many competing elements will make the space feel chaotic instead of intentional.
Just commit to it, you know? Half-hearted bold doesn’t work. Go all in and own the look!
15. Peel and Stick Tile Bathroom Floor for Apartments
Apartment living comes with its own unique set of challenges (like thin walls and neighbors who apparently own a bowling alley upstairs).
Peel and stick tiles are literally perfect for apartment bathrooms because they’re temporary, affordable, and require zero permission from your landlord. You’re not drilling, hammering, or permanently altering anything. You’re just covering up the existing ugly floor with something that doesn’t make you sad every time you look at it.
The removability factor cannot be overstated. When your lease is up, you peel up the tiles, clean the original floor underneath, and walk away with your security deposit intact. Or, if your landlord falls in love with what you’ve done (which happens more than you’d think), you can leave the tiles as an upgrade for the next tenant.
I’ve helped three different friends tile their apartment bathrooms, and every single one wished they’d done it sooner. One friend lived with terrible flooring for two years before finally renovating because she thought it would be too complicated. After we finished in four hours, she was genuinely mad at herself for waiting so long.
Apartment-Specific Tips:
- Choose removable tiles specifically (read product descriptions carefully)
- Test in a hidden spot before committing to the whole floor
- Keep original flooring photos for move-out documentation
- Store removed tiles properly if you plan to reinstall elsewhere
- Consider taking them with you when you move (they’re reusable!)
Your apartment should feel like home, even if you don’t own it. A beautiful bathroom floor makes such a difference in your daily quality of life. You deserve to love where you live, even temporarily!
Wrapping It All Up
So there you have it—15 gorgeous ways to transform your bathroom floor without selling a kidney or spending every weekend for the next month covered in grout dust.
Peel and stick floor tiles have genuinely revolutionized bathroom design for regular people who want beautiful spaces without the traditional renovation nightmare. Whether you’re working with a tight budget, renting your place, dealing with a tiny powder room, or just want a weekend project that actually gets finished, there’s a peel and stick solution for you.
The best part? You really can’t mess this up too badly. Even if your installation isn’t perfect (whose is?), the improvement over whatever gross flooring you’re covering up will still be dramatic. And if you really hate it? You can change it. Try saying that about traditional tile without crying over the money and time wasted.
My honest advice? Stop overthinking it and just do it. Pick a design that makes you happy, order those tiles, clear a weekend, and get to work. Future you (the one who gets to enjoy a gorgeous bathroom every single day) will be so grateful.


