How to Organize Kitchen Cabinets So They Actually Stay That Way
- Home Organization Ideas Kitchen Design
 Alina
Alina- 0
- 17 minutes read


I have reorganised my kitchen cabinets more times than I can count, and for years it never stuck. I’d spend a Saturday making everything perfect, and within a fortnight it was chaos again, lids avalanching out, three half-empty bags of flour, a mug I had to move four other mugs to reach. The reason it never lasted, I eventually worked out, wasn’t laziness. It was that I’d organised by what looked tidy instead of by how I actually use the kitchen.
So here’s how to organise kitchen cabinets in a way that holds up to real cooking, step by step, plus the mistakes that send you straight back to chaos.
Start by taking everything out
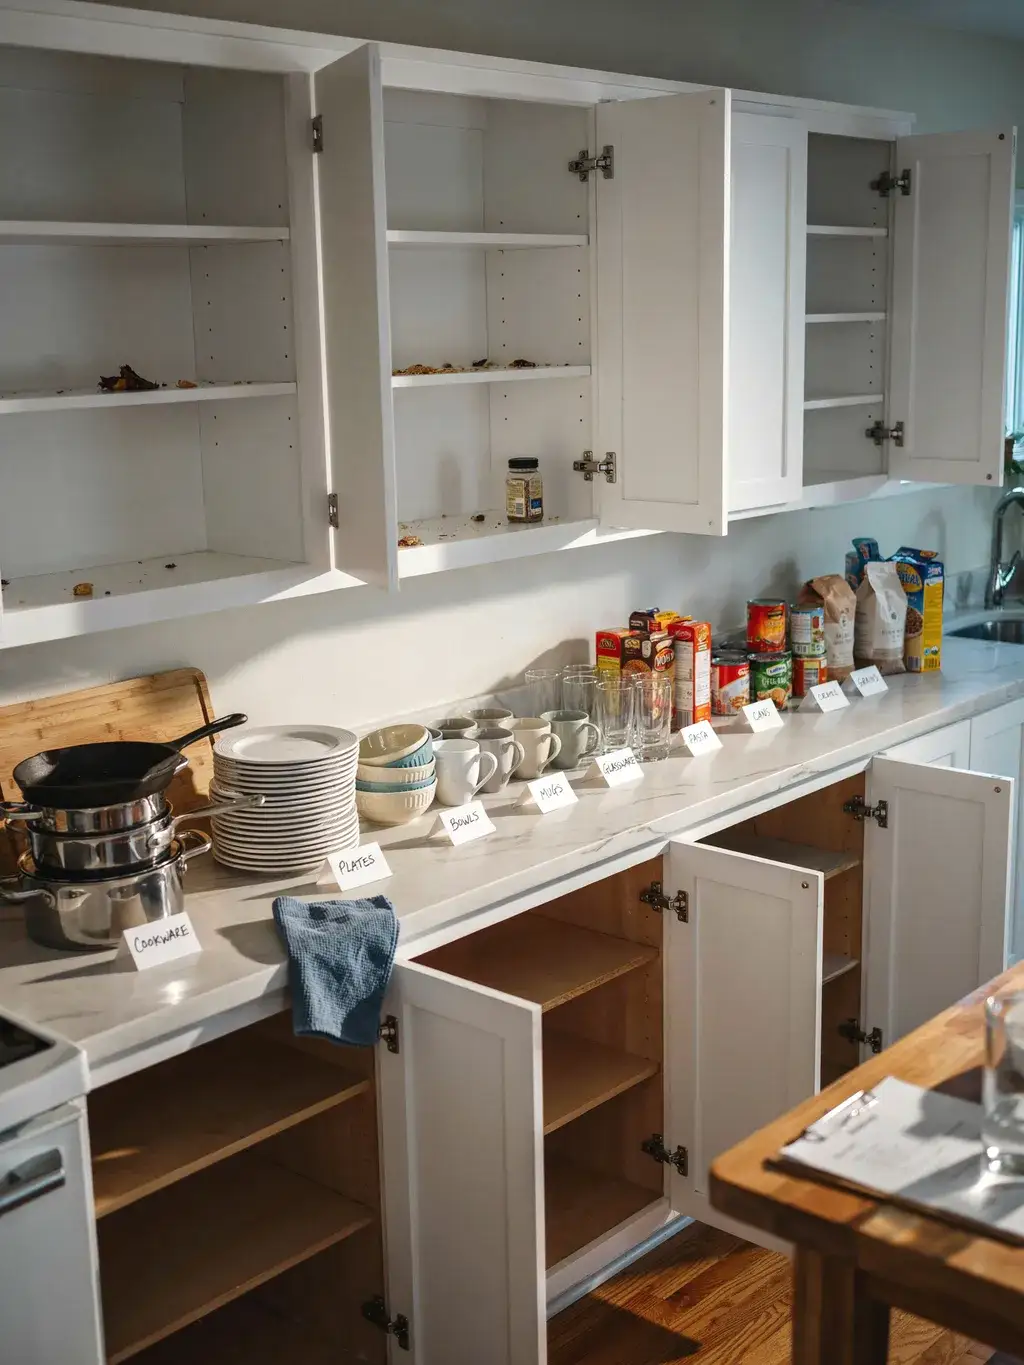
It feels backwards, but the first step is to empty the cabinets completely. You can’t organise around what you can’t see, and pulling everything out forces you to confront exactly how many travel mugs and mismatched lids you actually own.
Lay it all out on the counter or table so the full inventory is visible. This is also your one chance to wipe down the empty shelves properly. Yes, it makes a bigger mess before it gets better, but skipping this step is why most cabinet reorganising fails, you just shuffle the same clutter around.
Declutter ruthlessly before anything goes back
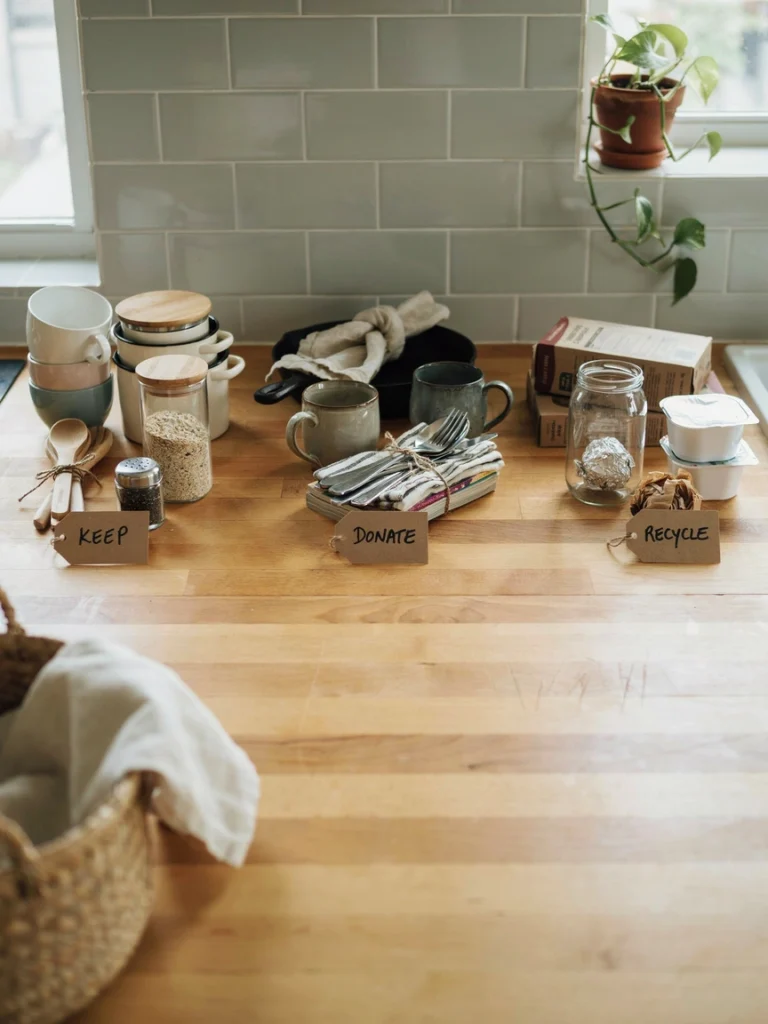
With everything out, be honest about what earns its way back in. The chipped mugs, the duplicate gadgets, the appliances you bought once and never used, the expired tins, none of it deserves prime cabinet real estate. Donate, recycle, or bin it.
The single biggest reason cabinets feel cramped isn’t lack of space, it’s too much stuff. Most kitchens hold far more than anyone uses, and clearing the excess does more than any clever organiser. Aim to put back noticeably less than you took out.
Group like things together
Before anything goes back, sort what’s left into categories: baking, cooking, food storage, mugs and glasses, plates and bowls, food. Keeping like with like means you always know where to look and where to put something away.
This grouping is the backbone of an organised kitchen. When all the baking gear lives together and all the food storage lives together, you stop hunting and you stop the slow drift of things ending up wherever there’s a gap.
Store things by where you use them
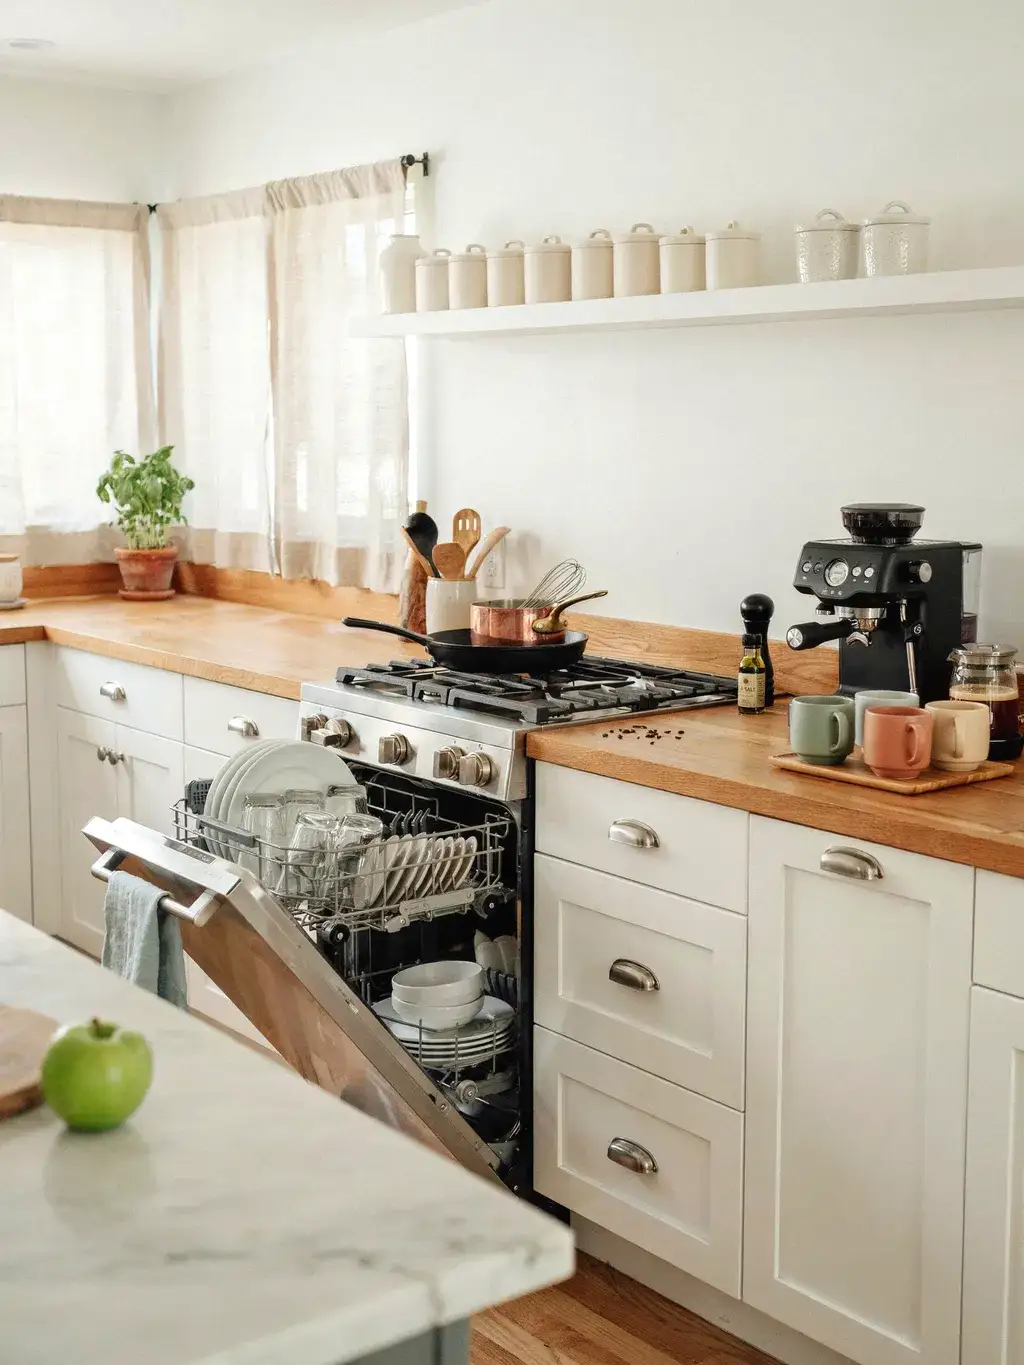
This is the principle that changed everything for me. Put things near the spot in the kitchen where you actually use them. Plates and glasses near the dishwasher or sink for easy unloading, pots and pans near the stove, prep tools and knives near your chopping area, mugs near the kettle.
Organising by zone rather than by what fits where means your kitchen works with your movements. The fewer steps between where a thing lives and where it’s used, the more naturally everything gets put back, which is what keeps the system going.
Put daily items at eye level, rare ones up high
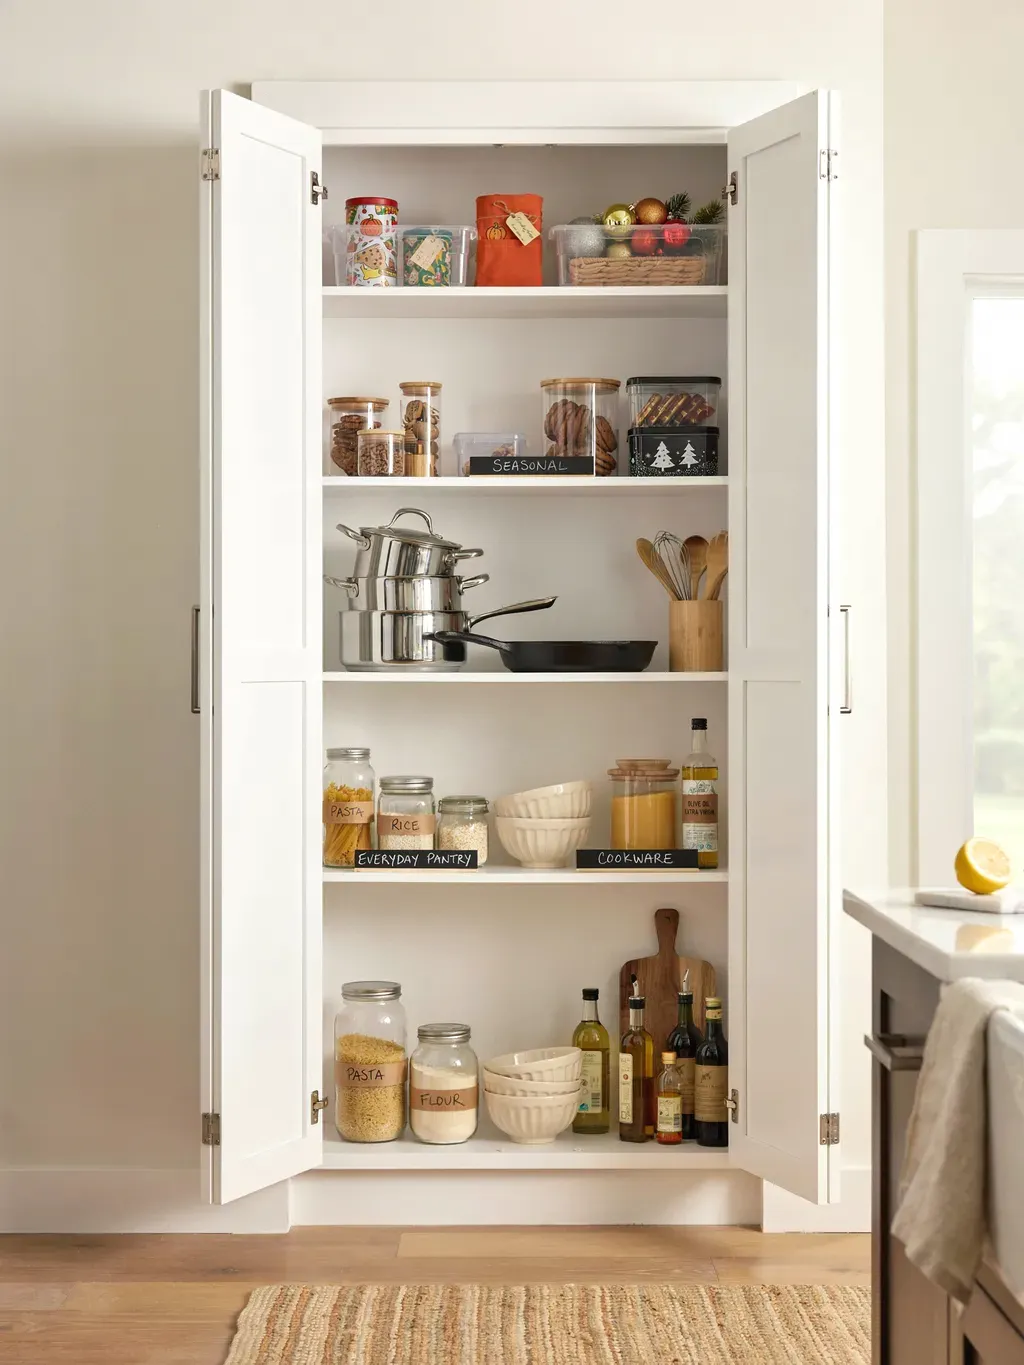
Not all cabinet space is equal. The prime real estate, the shelves between roughly hip and eye height, should hold the things you reach for every single day. The high shelves and deep back corners are for the once-a-year items.
So your everyday plates, mugs, and glasses go in the easy-reach zone, while the turkey roaster, the punch bowl, and the spare appliances go up high or right at the back. Matching the accessibility of the spot to how often you use the item is what makes a kitchen feel effortless.
Make the deep and corner cabinets usable
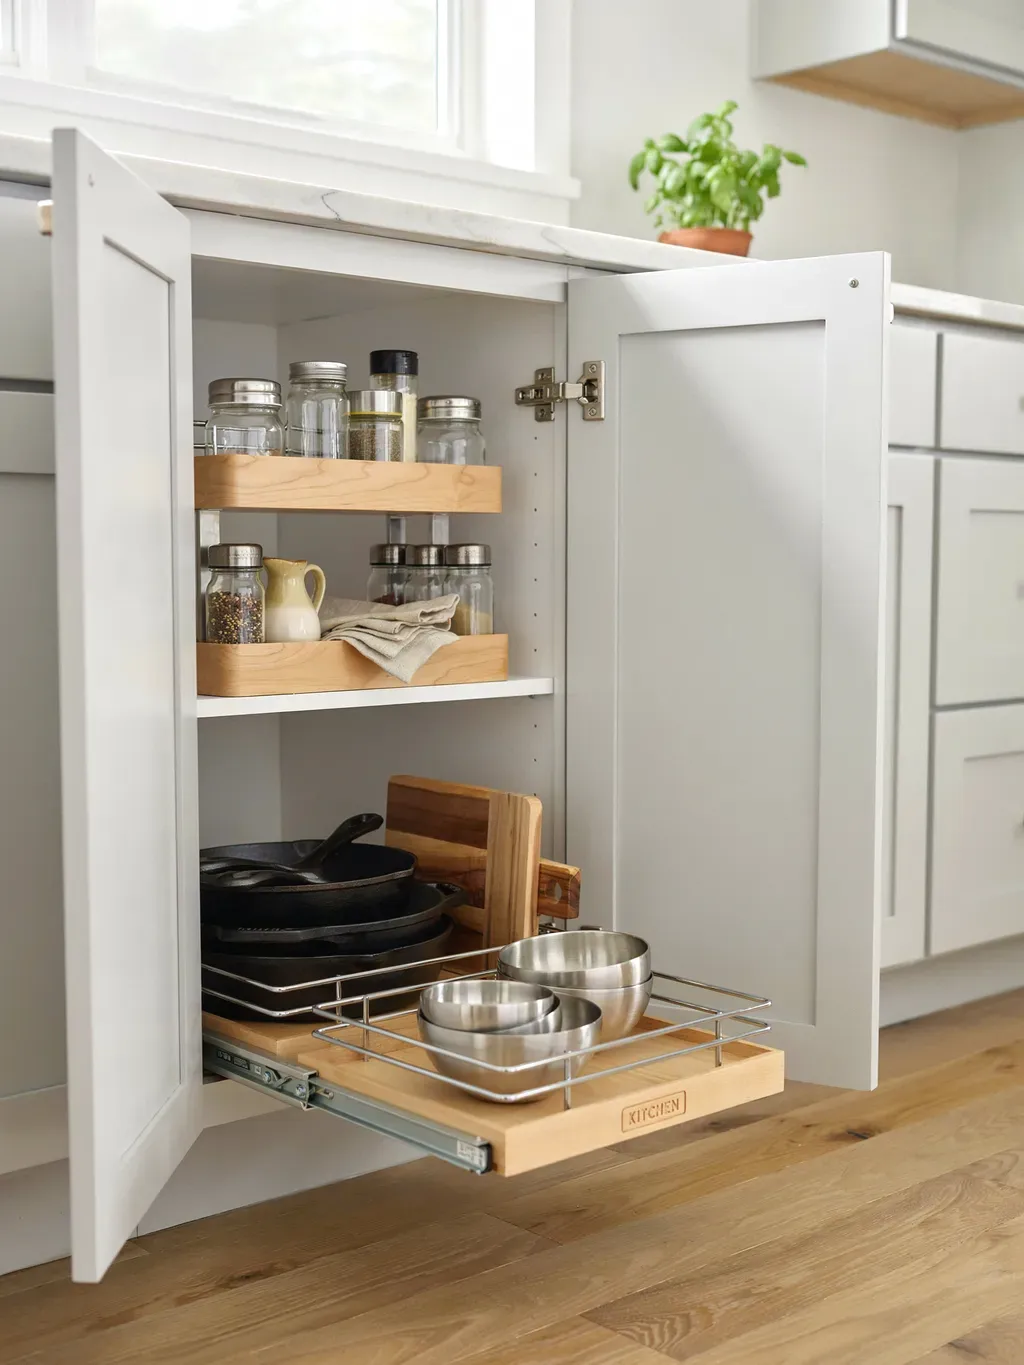
Deep cabinets and corner units are where things go to disappear. The fix is to make the back reachable: pull-out drawers, lazy Susans, or simple turntables bring the hidden depths to you instead of making you crawl in after them.
For a corner cabinet, a turntable is transformingly useful, spin it and everything comes to the front. For deep lower cabinets, pull-out shelves or baskets mean you’re never again losing a pan in the black hole at the back.
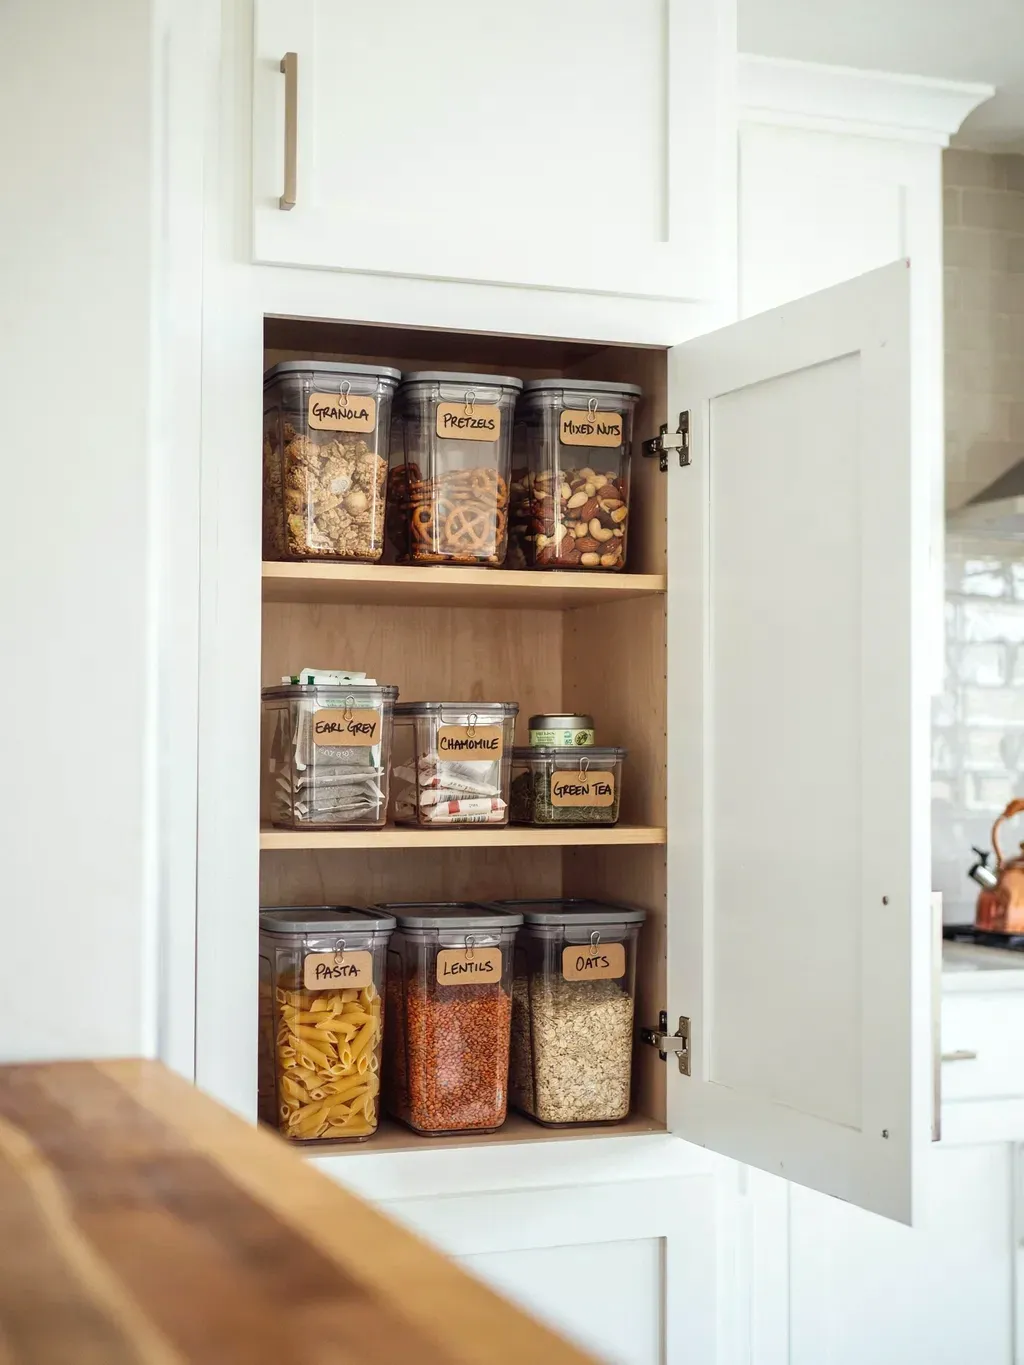
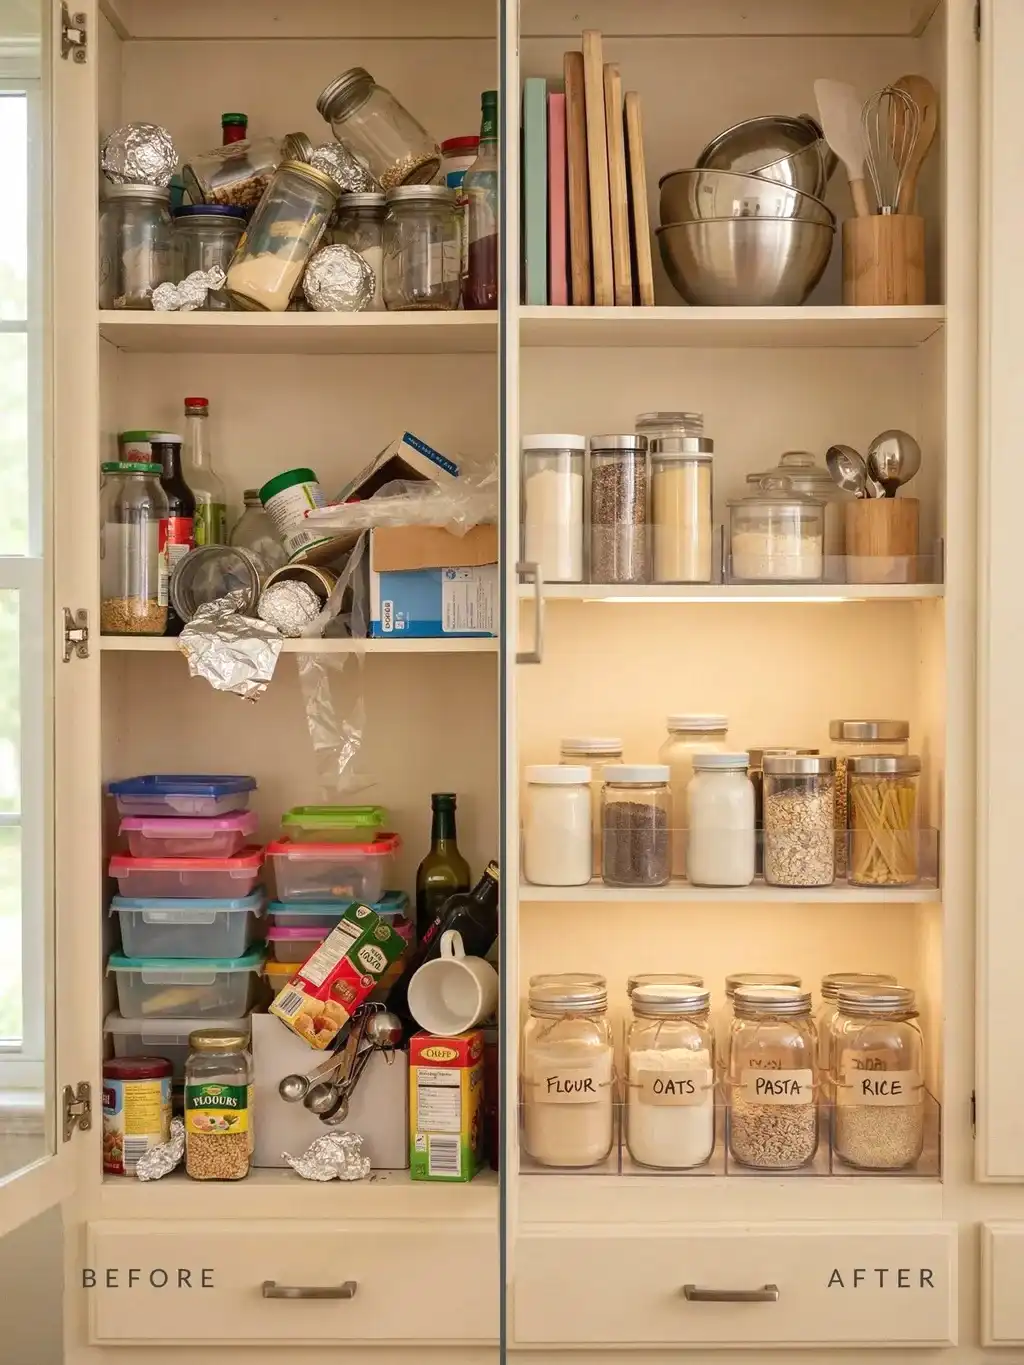
Tame the lids and the food containers
Food storage containers and their lids are the single most chaotic cabinet in most kitchens. The trick is to store containers and lids separately, stack the containers nested inside each other, and corral all the lids upright in a bin or rack so they’re not sliding everywhere.
Keeping lids on their ends in a divided bin or a cheap rack, sorted by size, means you can flick through and grab the right one instantly. It’s a small fix for what is, for most people, the most rage-inducing cabinet in the house.
Use risers, shelf inserts, and drawer dividers
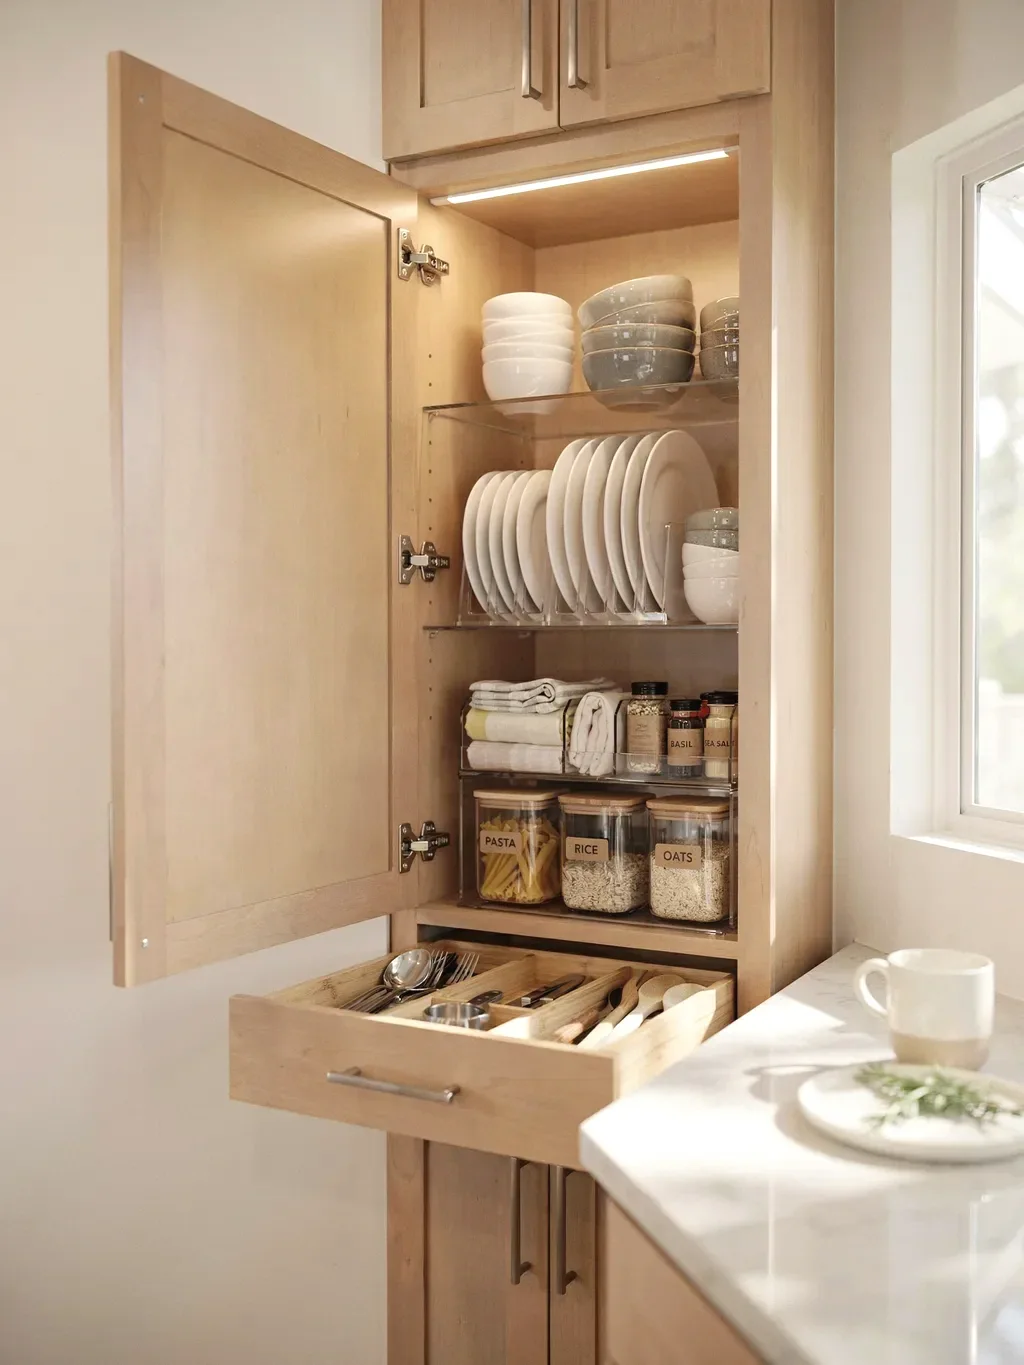
A cabinet is just one tall empty box, and you’re wasting most of its height. Shelf risers and stackable inserts add a second level so short items don’t waste the space above them, doubling what a shelf holds.
In drawers, dividers keep utensils and tools from becoming a tangled jumble. These inexpensive add-ins are what turn a cabinet from a pile into a system, and they’re the difference between stacking things precariously and actually using the full height.
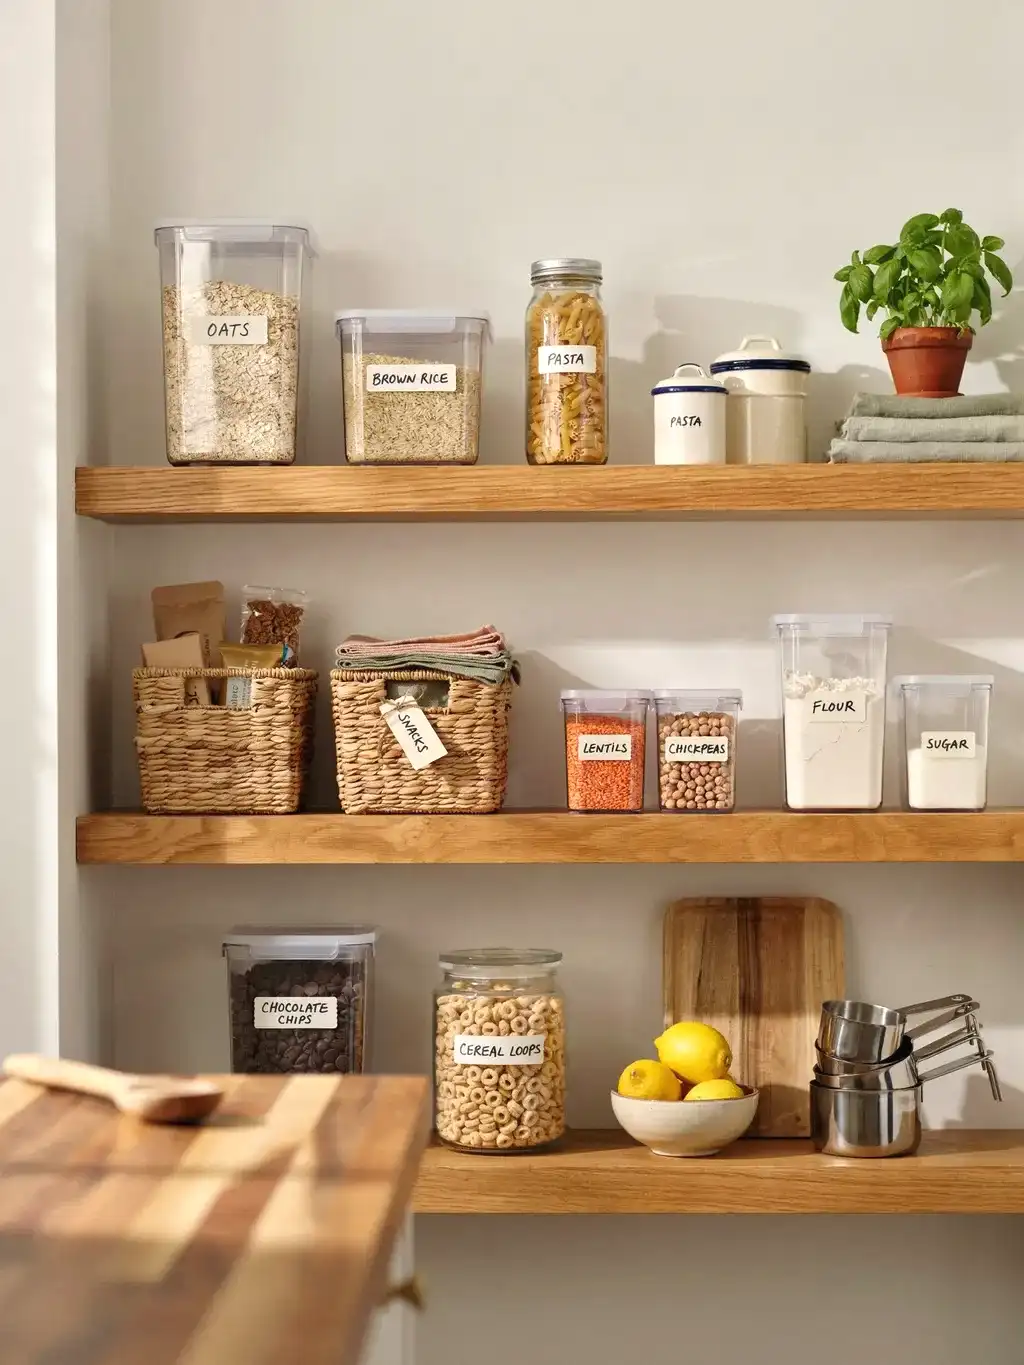
Corral small things in bins and baskets
Loose small items, packet sauces, snack bars, tea bags, spice sachets, are what create cabinet clutter, because they slump and scatter. Grouping them into clear bins or baskets by category contains the chaos and lets you pull out the whole “snacks” bin at once.
Bins also make the back of a shelf usable, since you slide the bin forward rather than reaching past everything in front. Clear ones let you see what’s inside; labelled ones tell everyone else in the house where things go too.
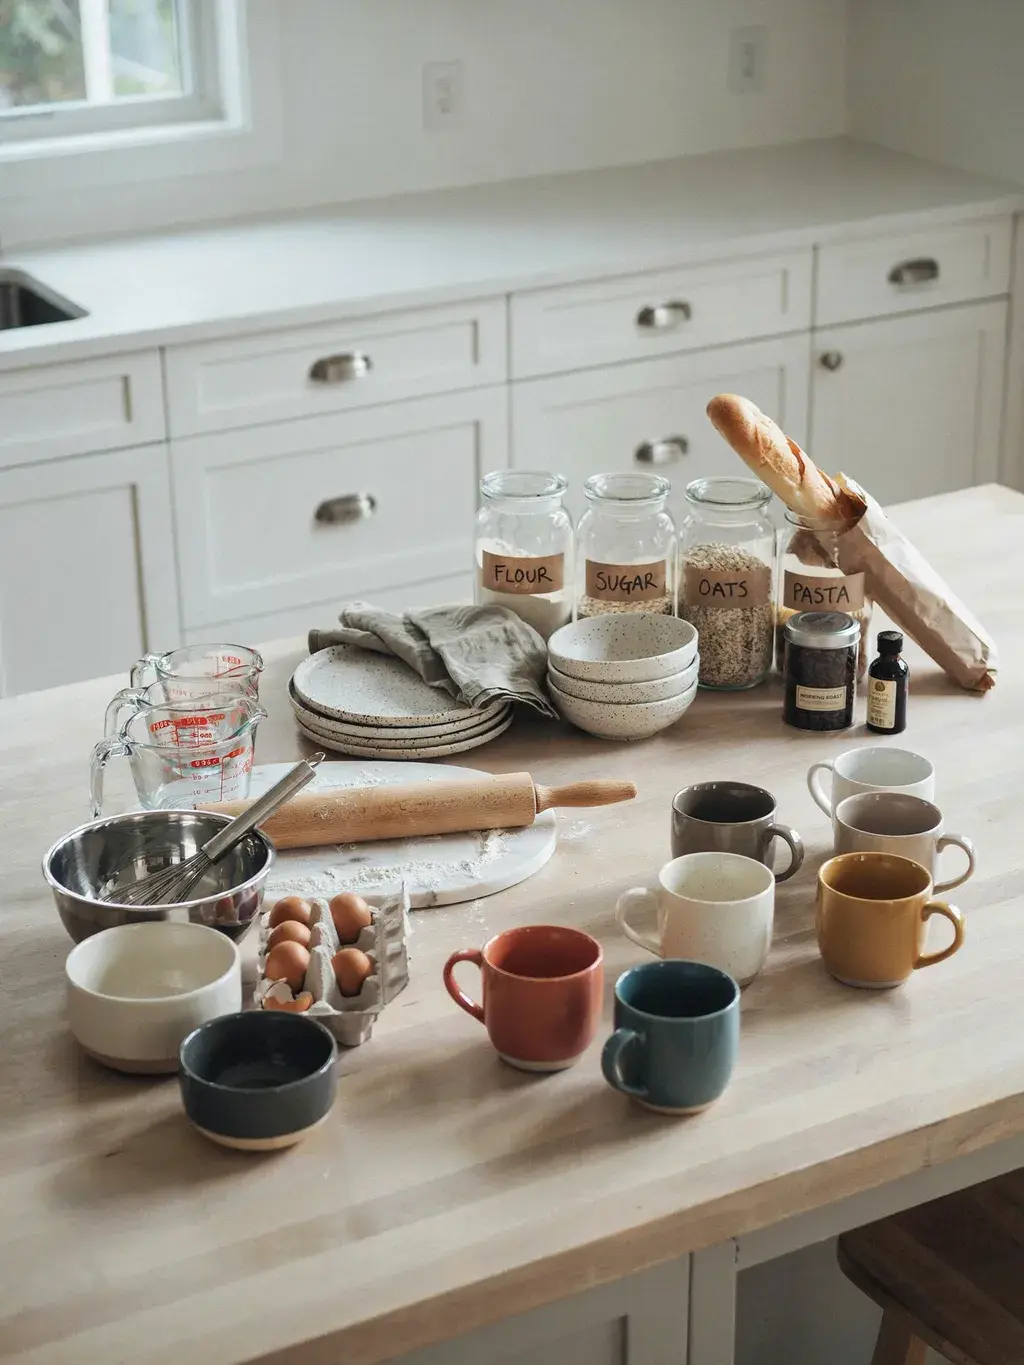
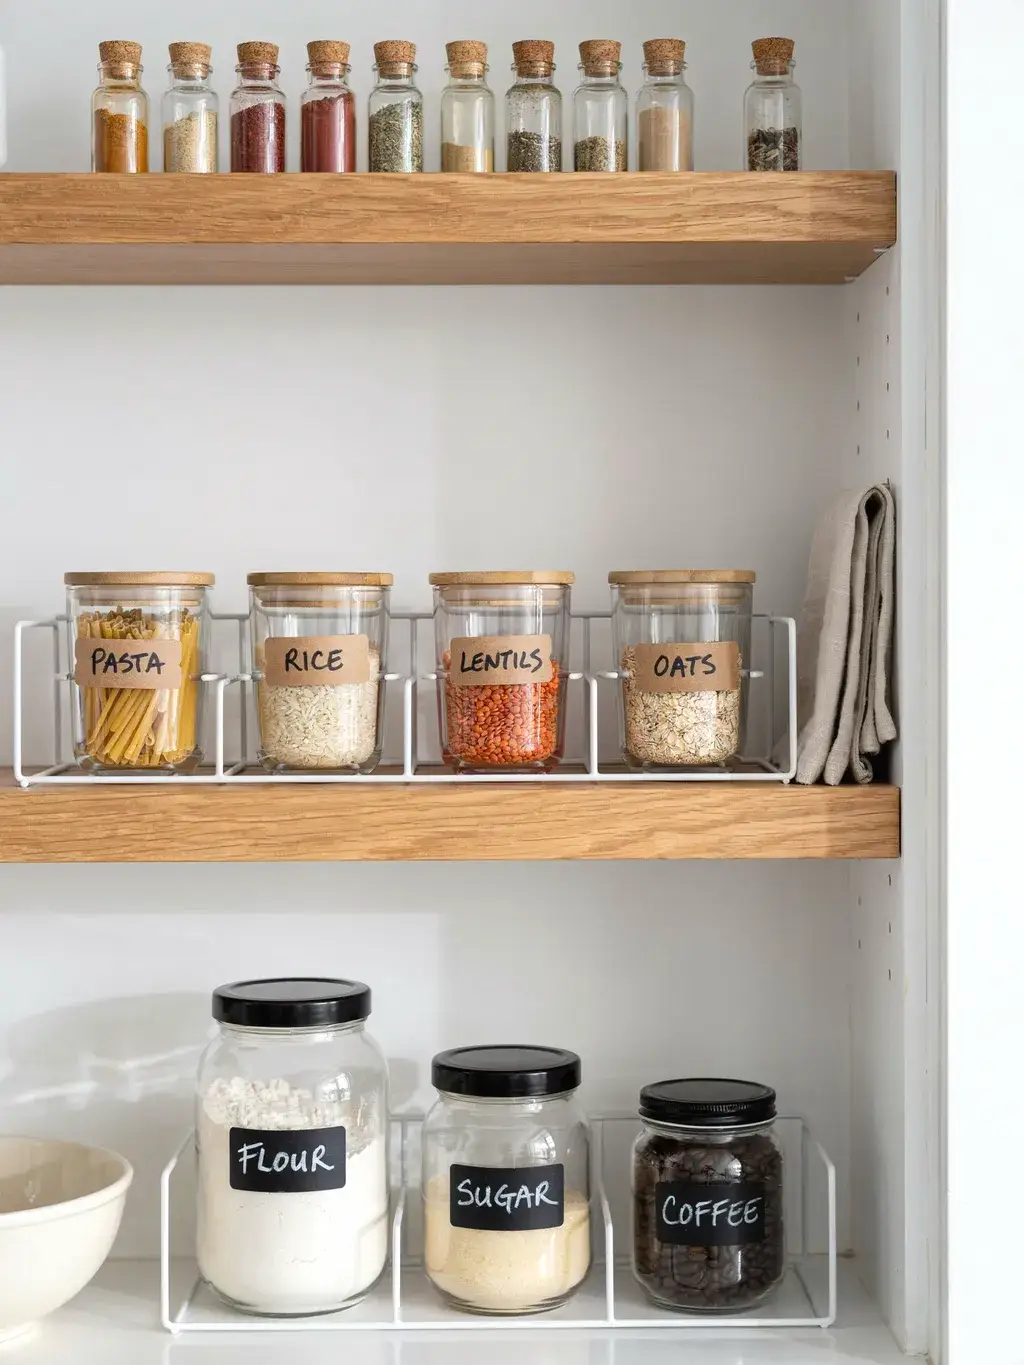
Decant dry goods into clear containers
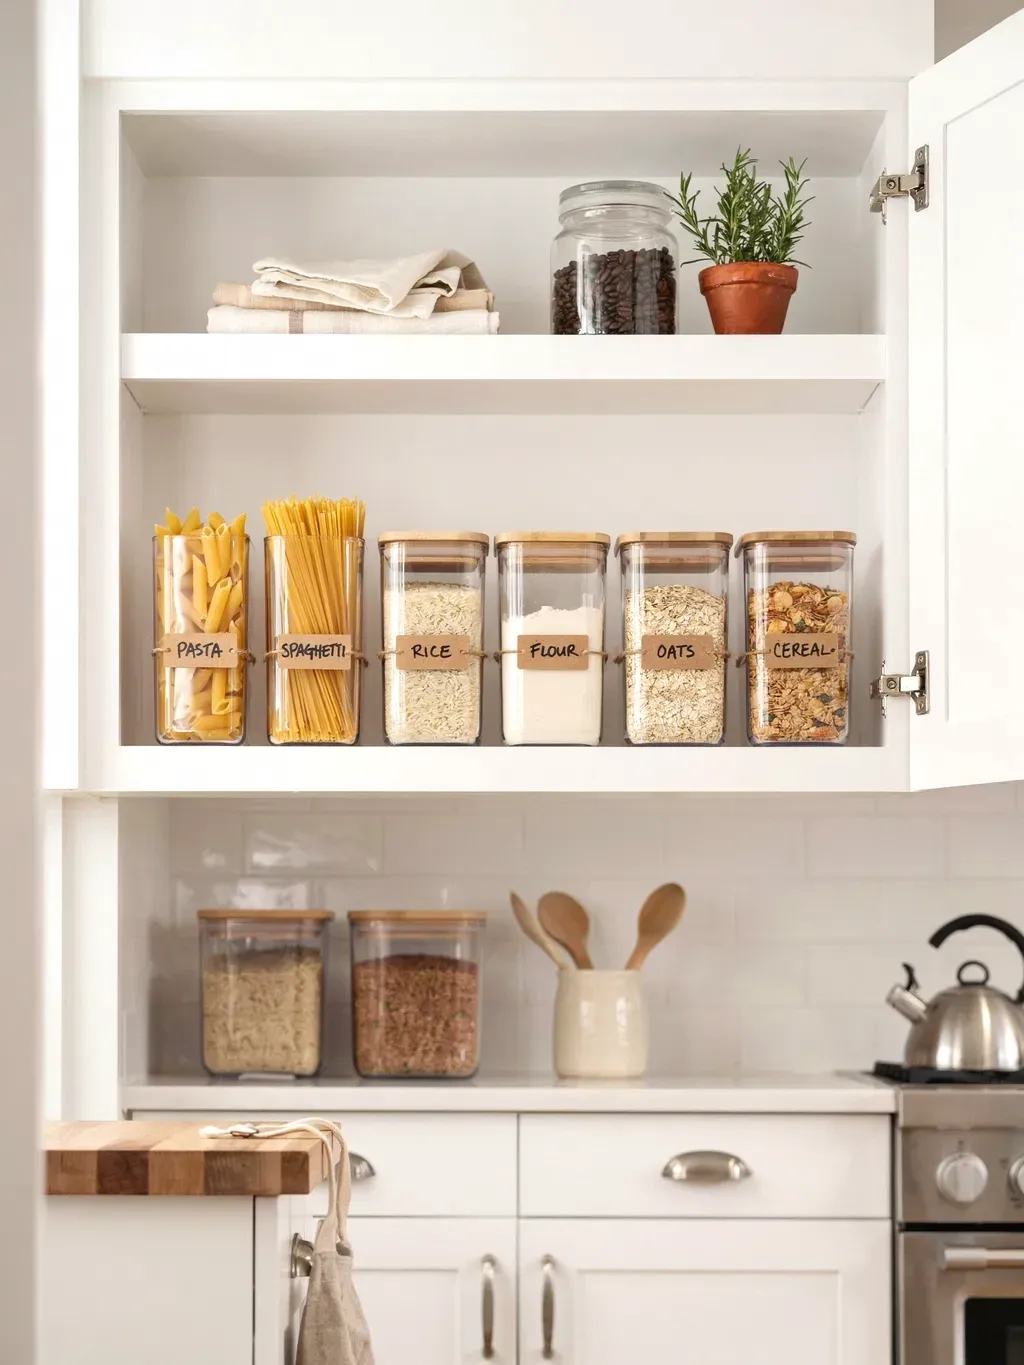
For pantry cabinets, decanting flour, pasta, rice, and cereal into matching clear, airtight containers does two jobs: it keeps food fresher and it instantly shows you how much you have left. No more three open bags of the same thing.
It also uses space far better than a jumble of half-crushed boxes and bags. Square containers stack and line up neatly where original packaging never does, so you fit more and see everything. It looks great, but the real win is functional.
Label so the system survives other people
A system only holds if everyone in the house can follow it. Simple labels, on bins, shelves, or containers, tell family members exactly where things belong, so they put things back correctly instead of guessing.
Labels also help you stick to the plan months later when the original logic has faded. It feels fussy, but labelling is often the difference between an organised kitchen that lasts and one that quietly unravels within a month.
Leave a little breathing room
The instinct is to use every inch, but a cabinet packed to the brim is the one that descends back into chaos fastest, because there’s no room to put anything back without a fight. Leave some empty space on each shelf.
Breathing room means you can take things out and return them easily, which is what keeps a system alive. A slightly emptier cabinet you can actually use beats a crammed one you dread opening. If everything’s a tight squeeze, that’s the sign to declutter further, not to push harder.
A couple of things to skip
Skip organising purely for looks. Those photos of perfectly decanted rainbow pantries are lovely, but if the system doesn’t match how you cook, it falls apart fast. Function first, pretty second, always.
Skip buying organisers before you declutter, too. It’s tempting to start with a trolley full of bins and risers, but until you’ve cleared out and grouped what you actually own, you don’t know what you need. Declutter first, measure your cabinets, then buy only the inserts that solve a real problem. Buying first usually just adds more stuff to an already-full kitchen.
The bottom line
Get the order right and it sticks: empty everything, declutter hard, group like with like, and then put things back according to where you use them and how often. The bins, risers, and labels come last, and only where they solve an actual problem.
My cabinets finally stay organised now, not because I found the perfect bins, but because everything lives where I actually reach for it. Turns out the trick was never tidier shelves. It was organising around the cook instead of the cabinet.


